Hard to believe we’re already in the middle of this year’s holiday season. Every year I have grand plans of making all my gifts and most of them never come to fruition. But here’s a quick idea that works for teachers, friends, and any time you need just a little something to give. Add a mug and a few related items such as specialty teas, hot chocolate mix or gourmet coffees, and you have a nice useful gift.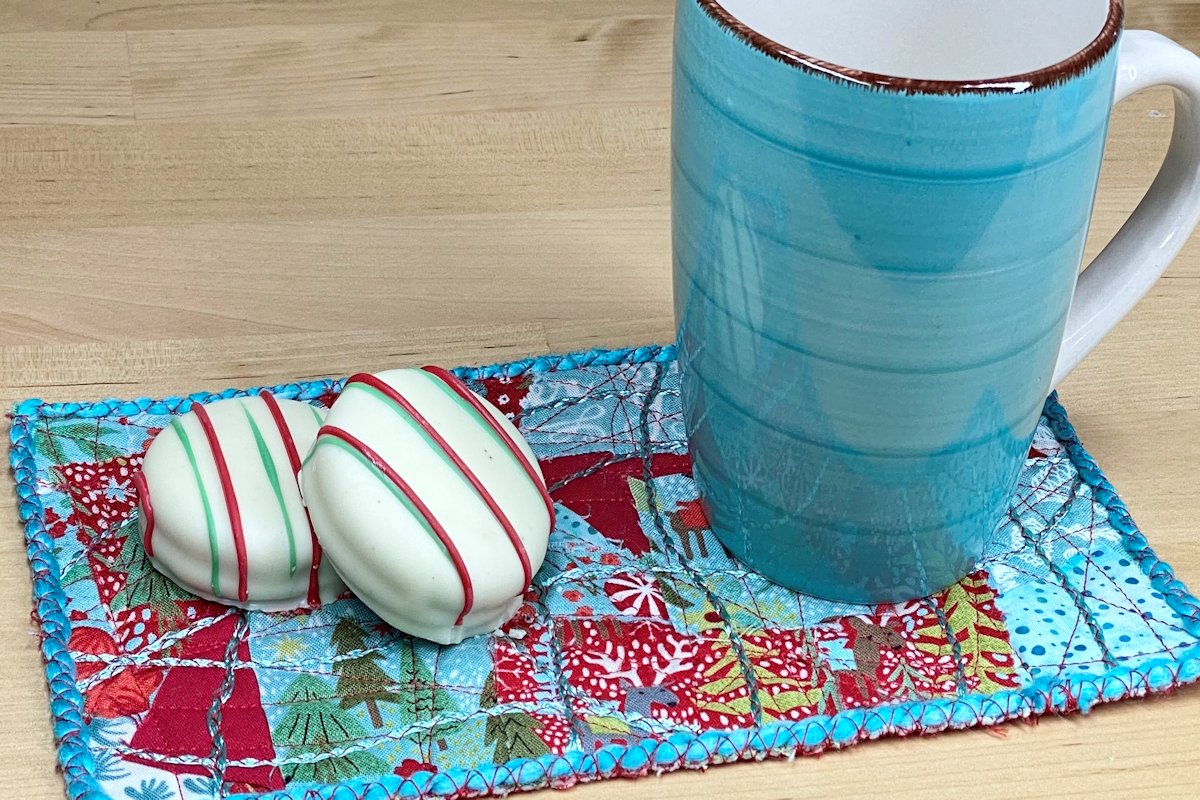
Presser Feet
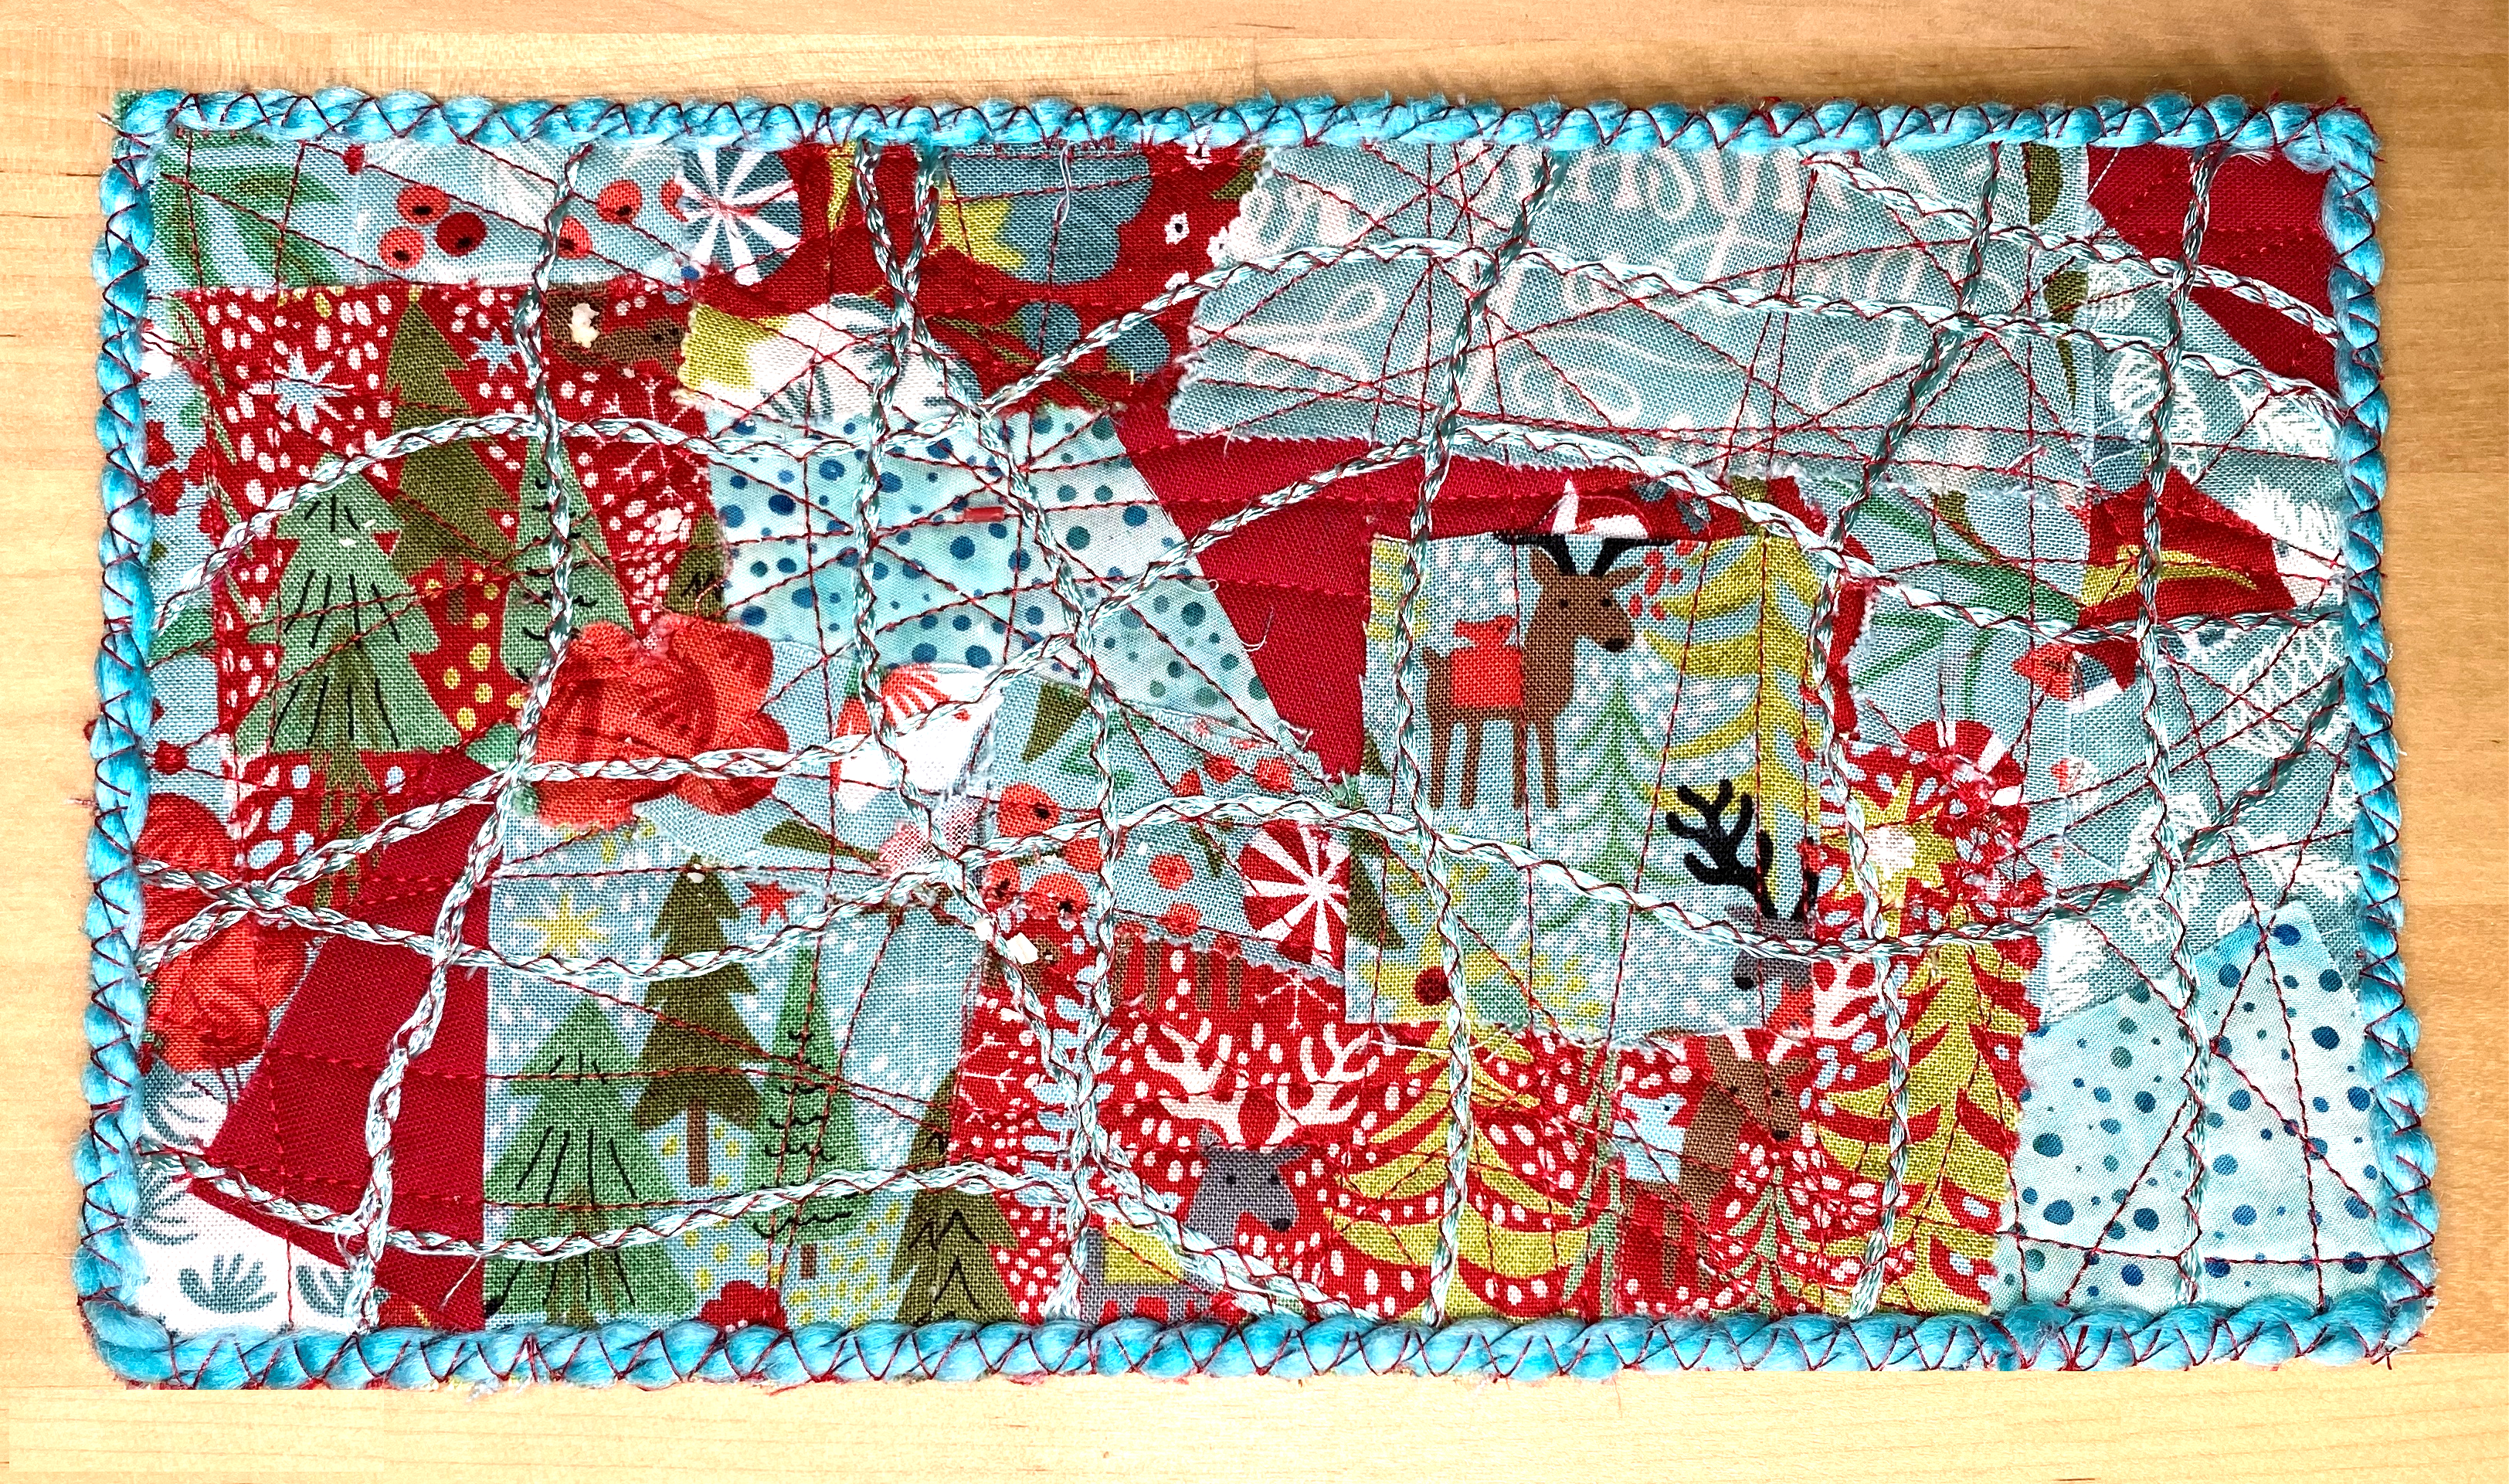
Even through this is a small, easy project that is fast to create, I used four distinctly different presser feet because that’s part of what makes it quick to sew. It’s always easier and quicker to use the specific presser foot needed for the technique you are sewing.
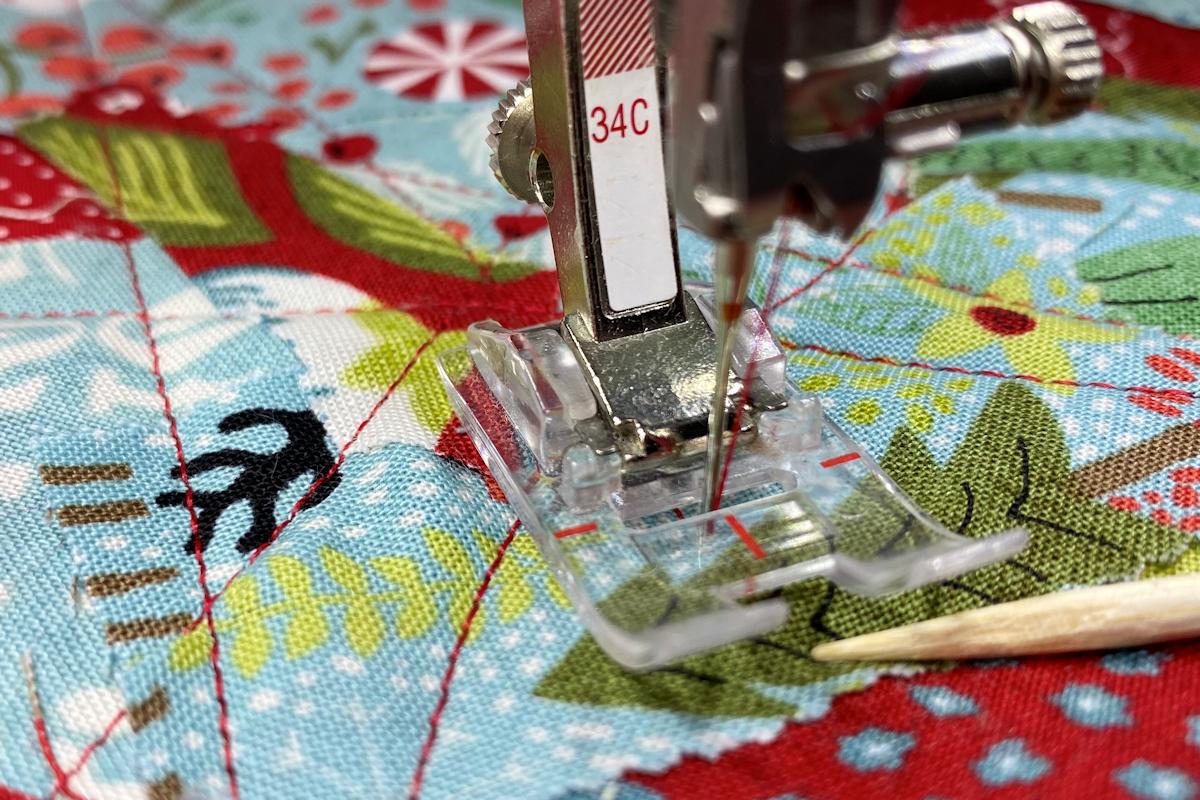
Clear Foot #34/34C/34D – Use this all purpose foot to quilt scraps on a piece of batting. The clear sole lets you see exactly where you are stitching.
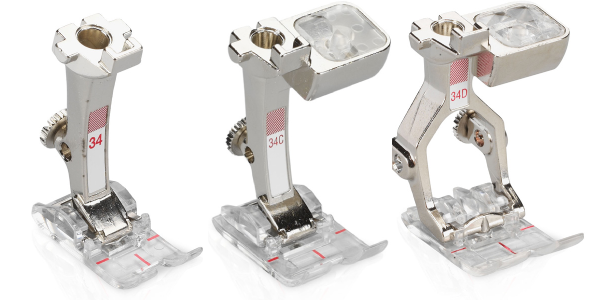
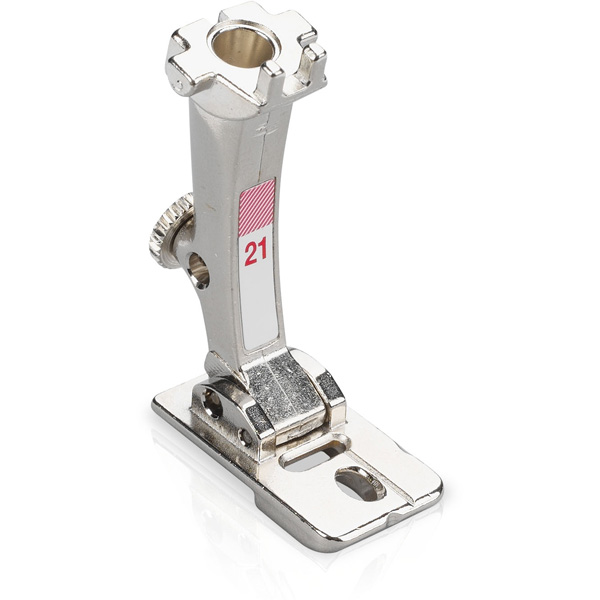
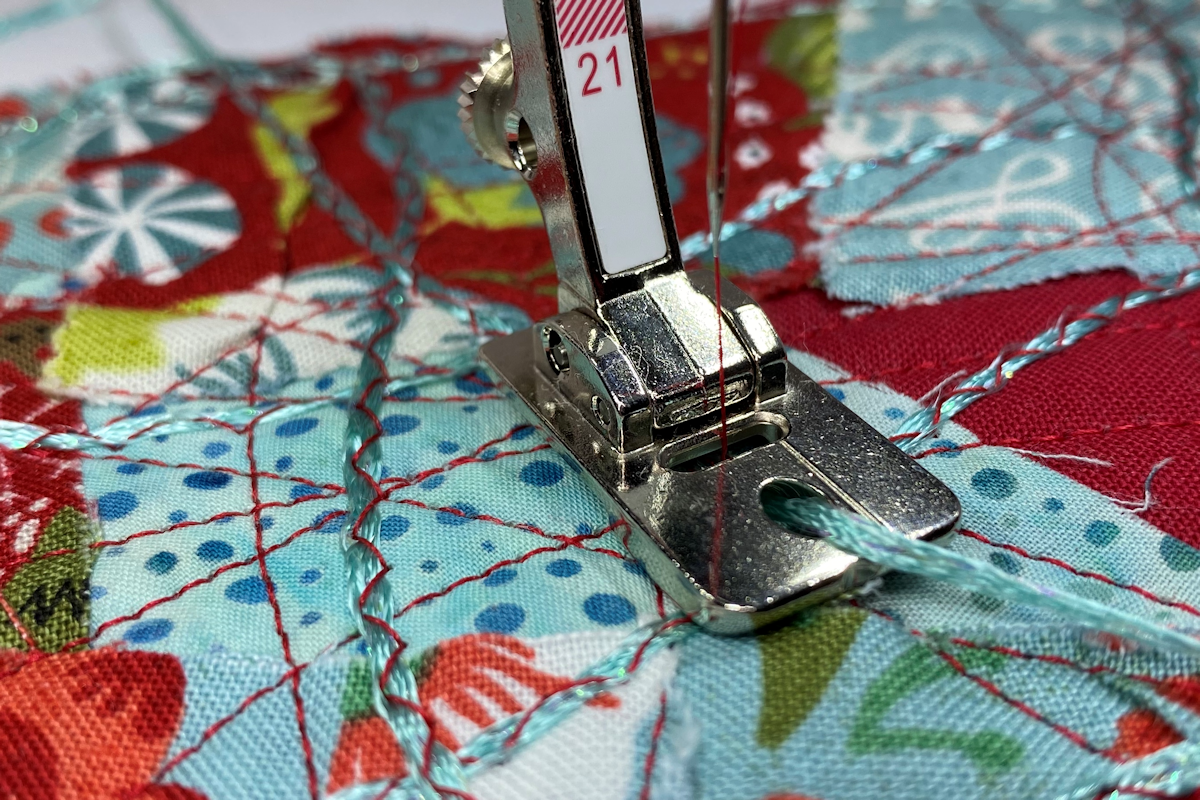
Braiding Foot #21 – Add color and texture by couching pretty cords to the surface of the quilted mug rug. This foot holds the cord in place for stitching so you don’t have to manage it.
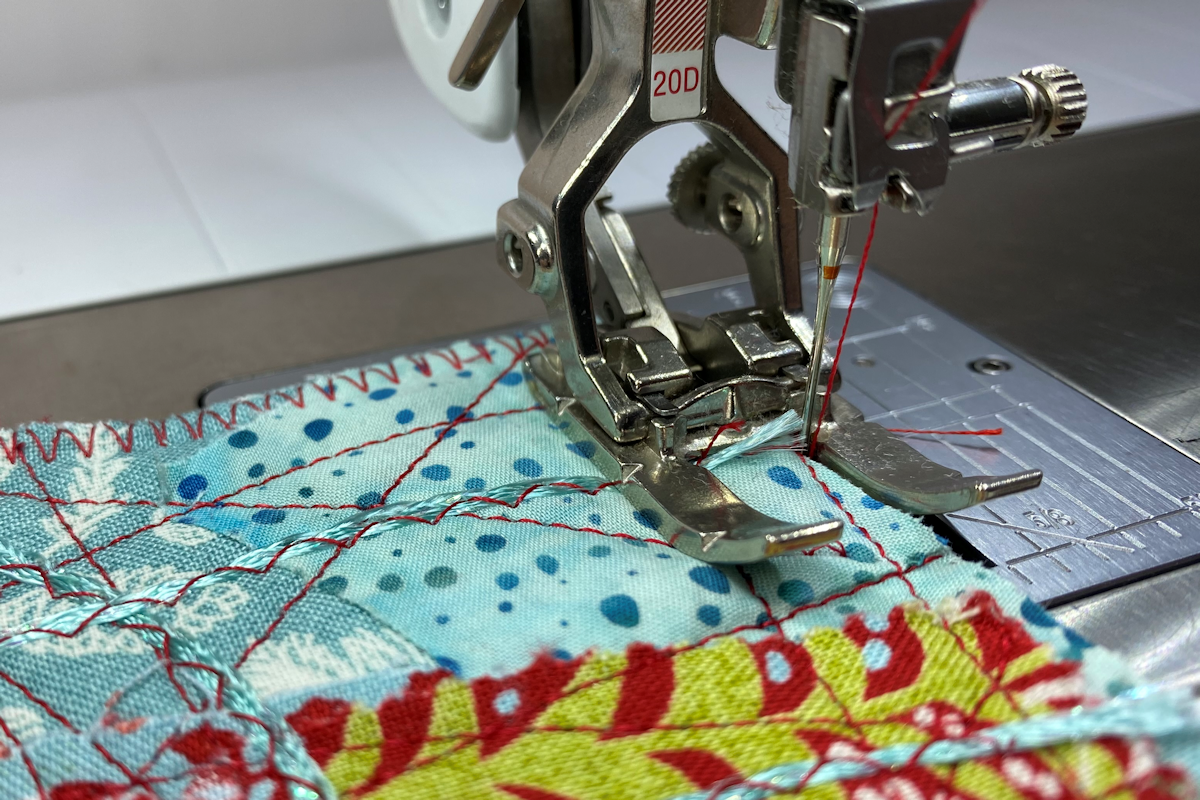
 Open Embroidery Foot #20/20C/20D – Prepare the edges of the mug rug for finishing using this open toe presser foot. Using the inside toe of the foot as a guide makes it easy to stitch exactly on the fabric edge.
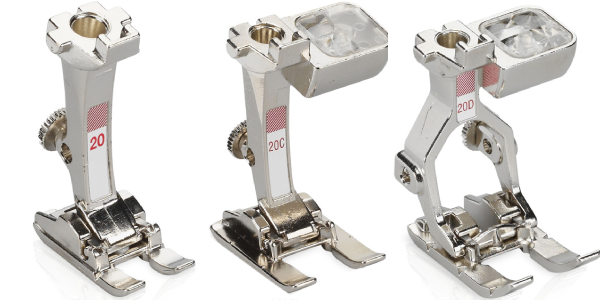
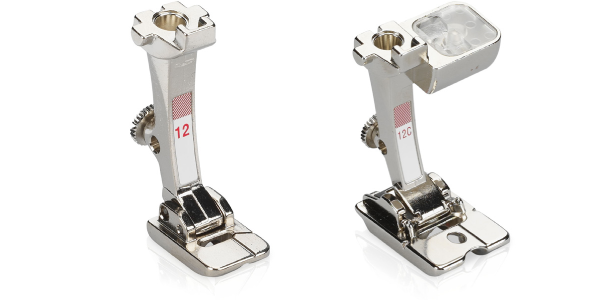
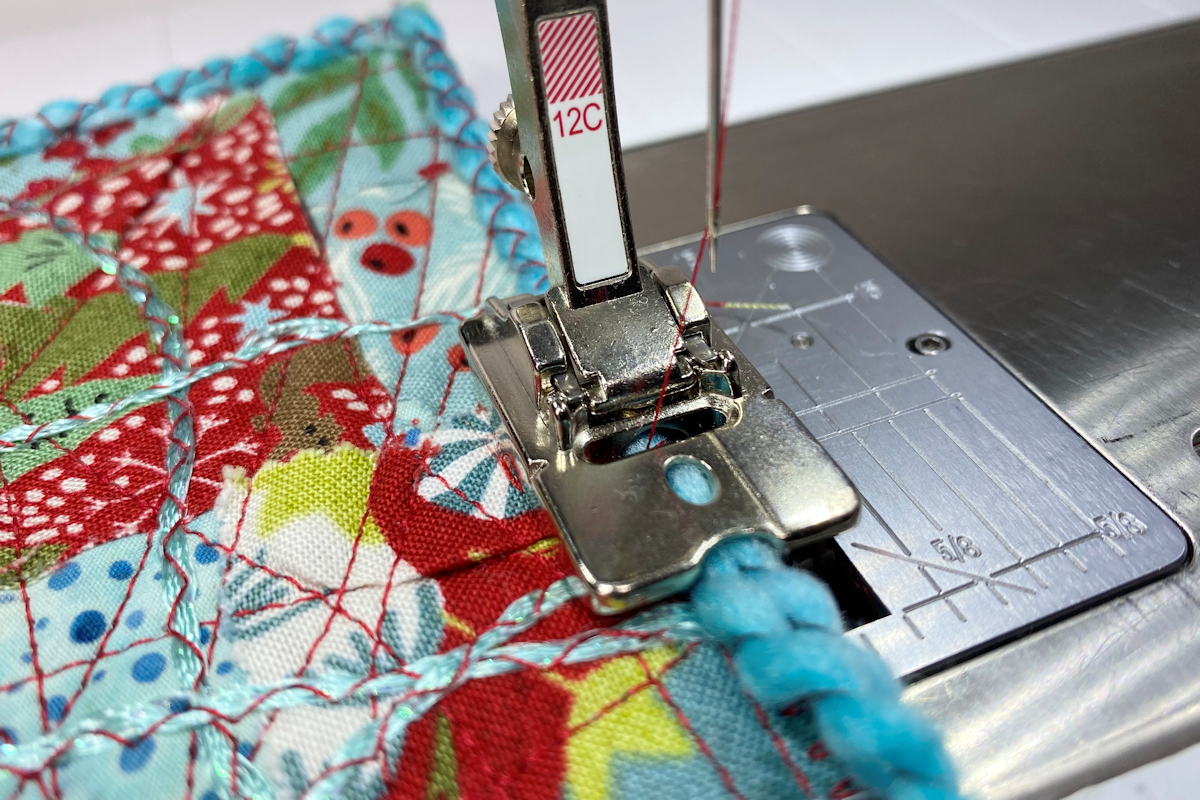
Bulky Overlock Foot #12/12C – Use this presser foot to finish the mug rug by couching yarn on the edges.The tunnel on the sole of this foot lets it feed easily over the yarn as you stitch.
Supplies
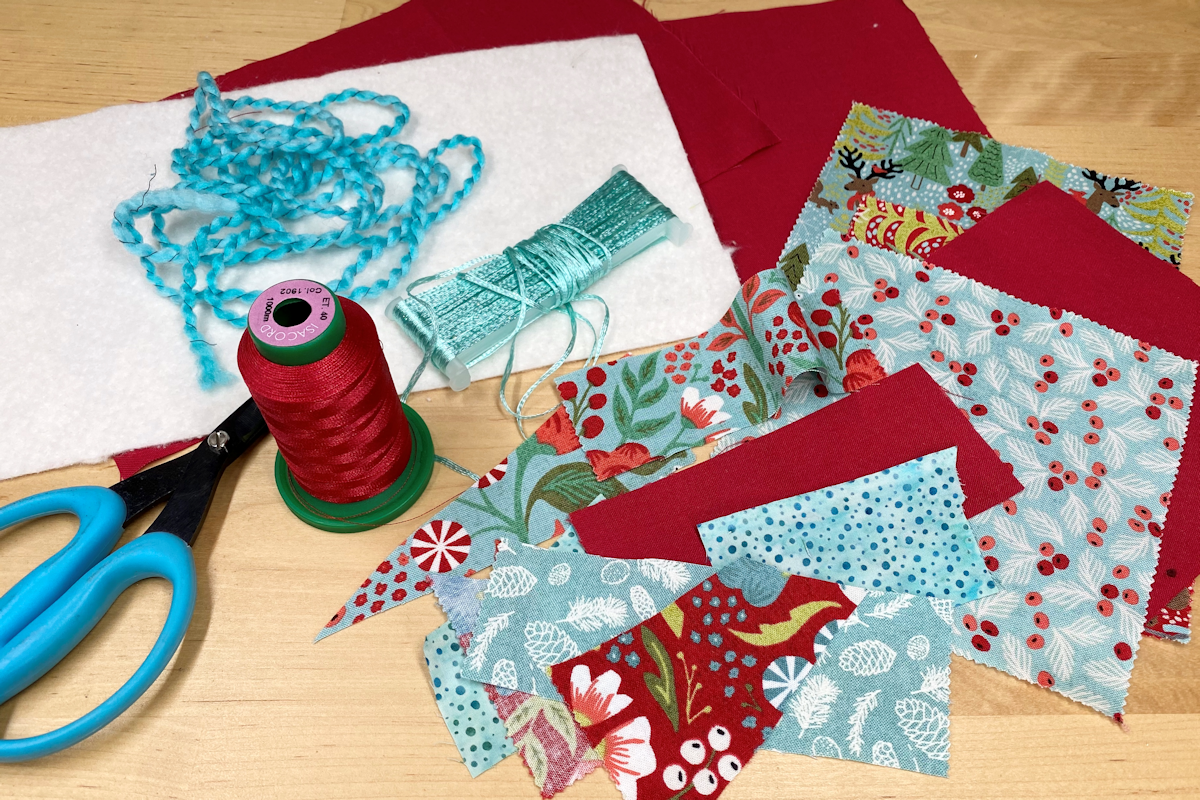
- Front fabric: Assorted scraps (I used holiday colors and prints but any fabrics that speak to you will work.)
- Batting: 10” x 6” (I used Warm ‘n Natural because it’s my favorite – easy to manage with a nice hand.)
- Backing fabric: 10” x 6” (Choose a color from the print scraps and make the back fabric solid.)
- Narrow decorative cord (I used a heavy decorative thread with a little bit of sparkle.)
- Polyester embroidery thread (Use a color that matches the backing.)
- 2 ½ yards of coordinating yarn (Select a thick, chunky or a textured yarn or use 2-3 strands of a finer one.)
- Temporary spray adhesive
Place the backing wrong side up. Spray one side of the batting with adhesive and smooth it onto the wrong side of the backing. Spray the remaining side of the batting. Place the scraps of fabric on the sprayed batting, overlapping the edges and completely covering the batting.
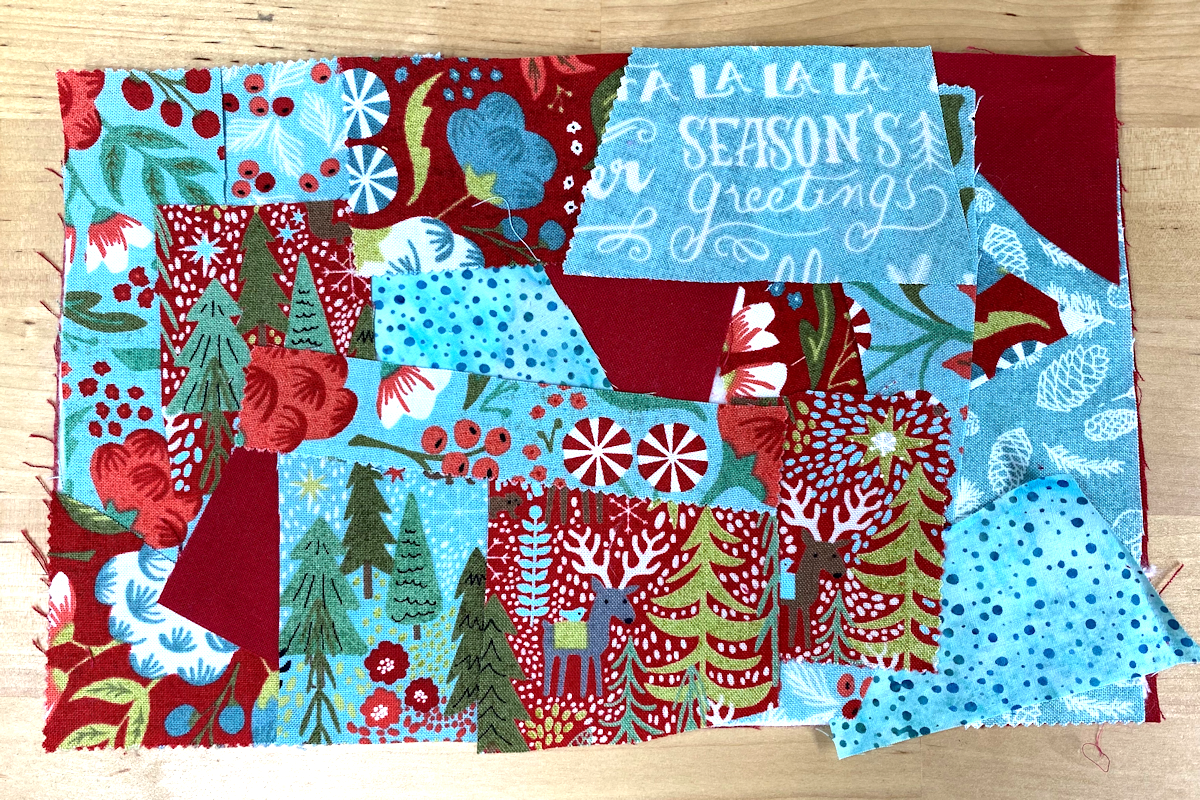
Attach Foot #34 to the machine. Take the project to the machine and stitch the surface with randomly placed lines of straight stitching. Cover the surface of the mug rug until the fabrics are flat and well-stitched. Tip: Use a stiletto to hold the raw edges down as they go under the presser foot.
Attach Braiding Foot #21 to the machine. Thread the narrow cord through the hole on top of the sole. Select the zigzag stitch and adjust the width so that it is just slightly wider than the cord. Adjust the stitch length to 3-4 mm. Stitch the narrow cord to the surface of the mug rug, again in a random pattern to add color and texture to the rug. When you decide you are finished stitching, trim the rug to 9” x 5”.
Attach Open Embroidery Foot #20/20C/20D to the machine. Select the zigzag stitch and adjust the width to 4 mm and the length to 2 mm. Adjust the needle position to the far right. Place the edge of the rug under the foot, aligning it with the inside right toe of the foot. The zigzag stitch will wrap over the raw edges, “sealing” them to make it easier to finish the edges of the mug rug.
Attach Bulky Overlock Foot #12/12C to the machine. Place the yarn in the tunnel on the bottom of the foot. Position the edge of the rug under the foot so the yarn is along the edge. Select the zigzag stitch and adjust the width so that it is just slightly wider than the yarn. Adjust the stitch length to 3-4 mm. As you stitch, the needle should stitch into the edge of the rug and then over the edge, holding the yarn in place. Stitch along all four sides of the rug, overlapping the beginning and ending of the yarn.
Your mug rug is now finished, ready to gift or be used by you with your next cup of holiday cheer – hope you and yours have a Happy Holiday!