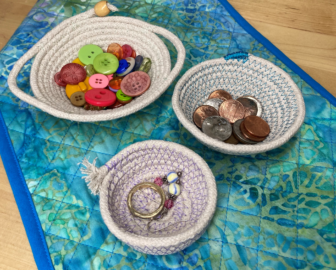
Years ago I learned to make coiled projects – placemats, coasters, baskets and bowls. I was amazed at how easy it was and how good the finished projects looked. I recently tried it again but this time, I made mini versions of some of the projects. Tiny little containers to hold small items such as jewelry that you wear every day, orphan buttons or loose pocket change. Even if you don’t stitch them perfectly, the miniature size of these bowls makes them so darn cute!
Supplies
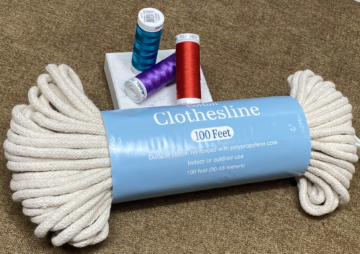
The basic supplies you need for this project are simple: cord and thread. I use clothesline cord and polyester embroidery thread. The cord can be wrapped with fabric strips for a more colorful look but for this tutorial I’m using the bare cord with contrasting thread.
Presser Foot
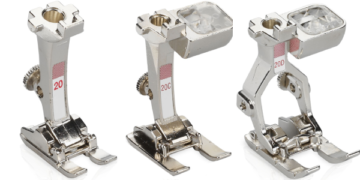
The presser foot I use for this technique is Open Embroidery Foot #20/20C/20D. There are other feet that may work but I find that the open area between the toes of the foot make it easy to see exactly where you are stitching and lets you keep the cords where they need to be as you sew.
 Getting Started
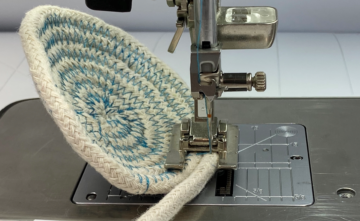
To start the base of the container, tightly coil the end of the cord, rolling it 2-3 revolutions. The coil determines the shape of the vessel. Make it round or oval as desired. I use a large Wonder Clip to hold the coil in place as I get started.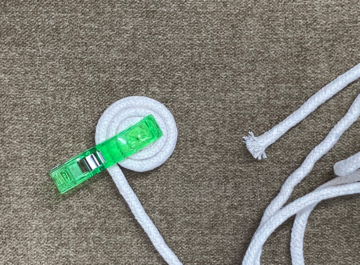
Securing the Coil
Place the coil under the presser foot and straight stitch across the coiled cords, then backstitch to the beginning point, sewing along the same line. Stitch forward again until you reach the center of the coil. Pivot and stitch the opposite direction to form a cross, again ending in the center. Repeat to sew two diagonal lines for a total of four lines that intersect in the center of the base.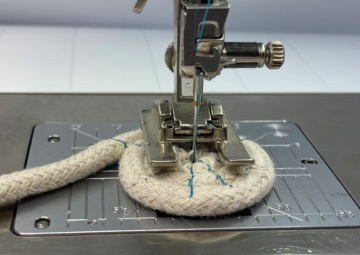
Stitching the Base
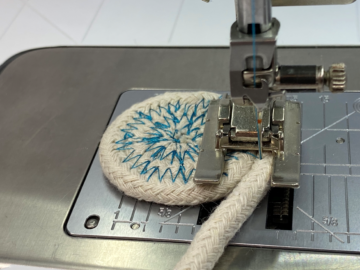
Select the zigzag stitch with a width of 4-5 mm and a length of 1-1.5 mm. Position the base under the presser foot at the center of the coil. The straight stitching simply holds the coils together to start the zigzag stitching but does not secure the base tightly. Starting at the center, position the two cords, one on each side, so the zigzag stitch will sew into one cord and then into the other. As you begin, sew slowly and pivot around the coil frequently. Using the Freehand System to raise the presser foot lets you keep your hands on the cord and makes the process easier. Continue coiling and stitching the cords until the base is the desired size.
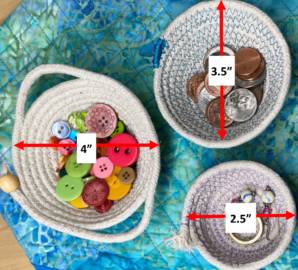
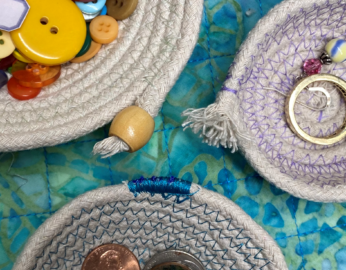
I did not have a specific size in mind as I made each one of these containers. I just stitched a small base and then started to build the sides. The photo below show the finished sizes of the openings.
Creating the Sides
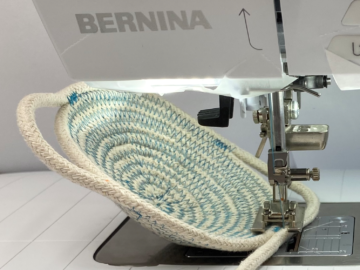
Tilt the base up as shown and continue stitching. The coils will now stack on top of each other, forming the sides of the container. Tilting the base at an angle makes the container more shallow as the sides will angle out and the opening will be wider than the base. If you hold the base straight up as you stitch, the sides will be straight and the opening will be the same as the base. Continue stitching until the vessel is as deep as you want.
Finishing
There are many ways to finish the upper edge of the vessel. Here are three simple methods I used:
- Frayed End – Stitch until the container is as deep as you want, then backstitch to secure the cord. Trim the cord
about ½” beyond the backstitching and fray the end of the cord. - Satin Stitch – Stitch until the container is as deep as you want, then trim the end of the cord at an angle.
Reduce the zigzag stitch length to 1 mm and stitch back and forth over the end of the cord until the cord is
covered. - Beaded End – Stitch until the container is as deep as you want, then backstitch to secure the cord. Trim the end of the cord at an angle. Put white glue on the end, forming a point. Push the point into the hole of a bead and trim the cord even with the bead if desired. Add more glue if needed to hold the bead in place.
Handles
Handles can be created on any vessel, no matter how you finish the edge. When the container is as deep as you want, decide where you want the handle to start and backstitch to secure the cord. Pull some slack into the cord to make the desired size handle. Backstitch the other end of the handle to the cord and continue stitching. Repeat on the other side of the vessel, making a matching handle across from the first.