
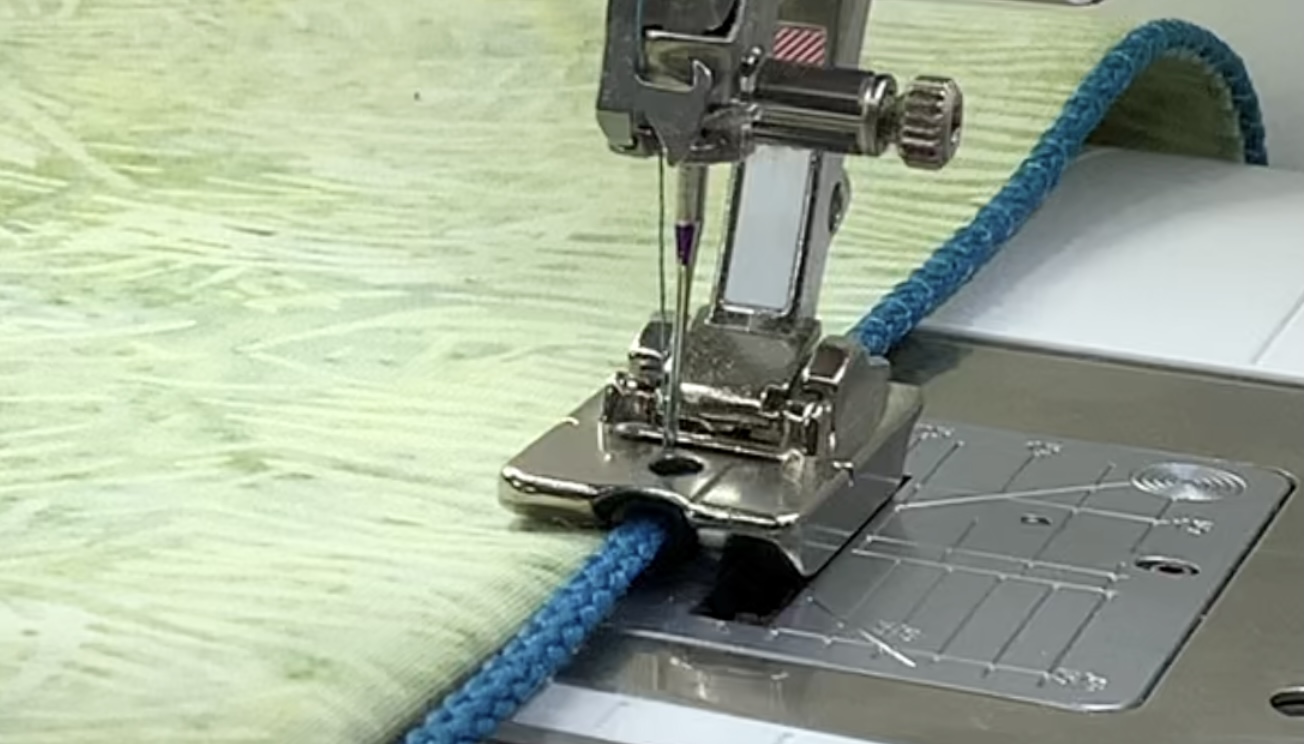
Here’s a simple technique that adds a decorative touch to finished edges such as the edges on the front opening of a jacket, cuff and collar edges, and outer edges of pillows, purses, journal covers, and art quilts. This technique works best on edges that have been hemmed, faced, or folded. Place the cord in the tunnel under the presser foot. Position the finished edge of the fabric next to the cord and start stitching. The zigzag stitch should go over the cord to hold it next to the fabric. This easy corded edge is a technique anyone can do, even a beginning sewist!
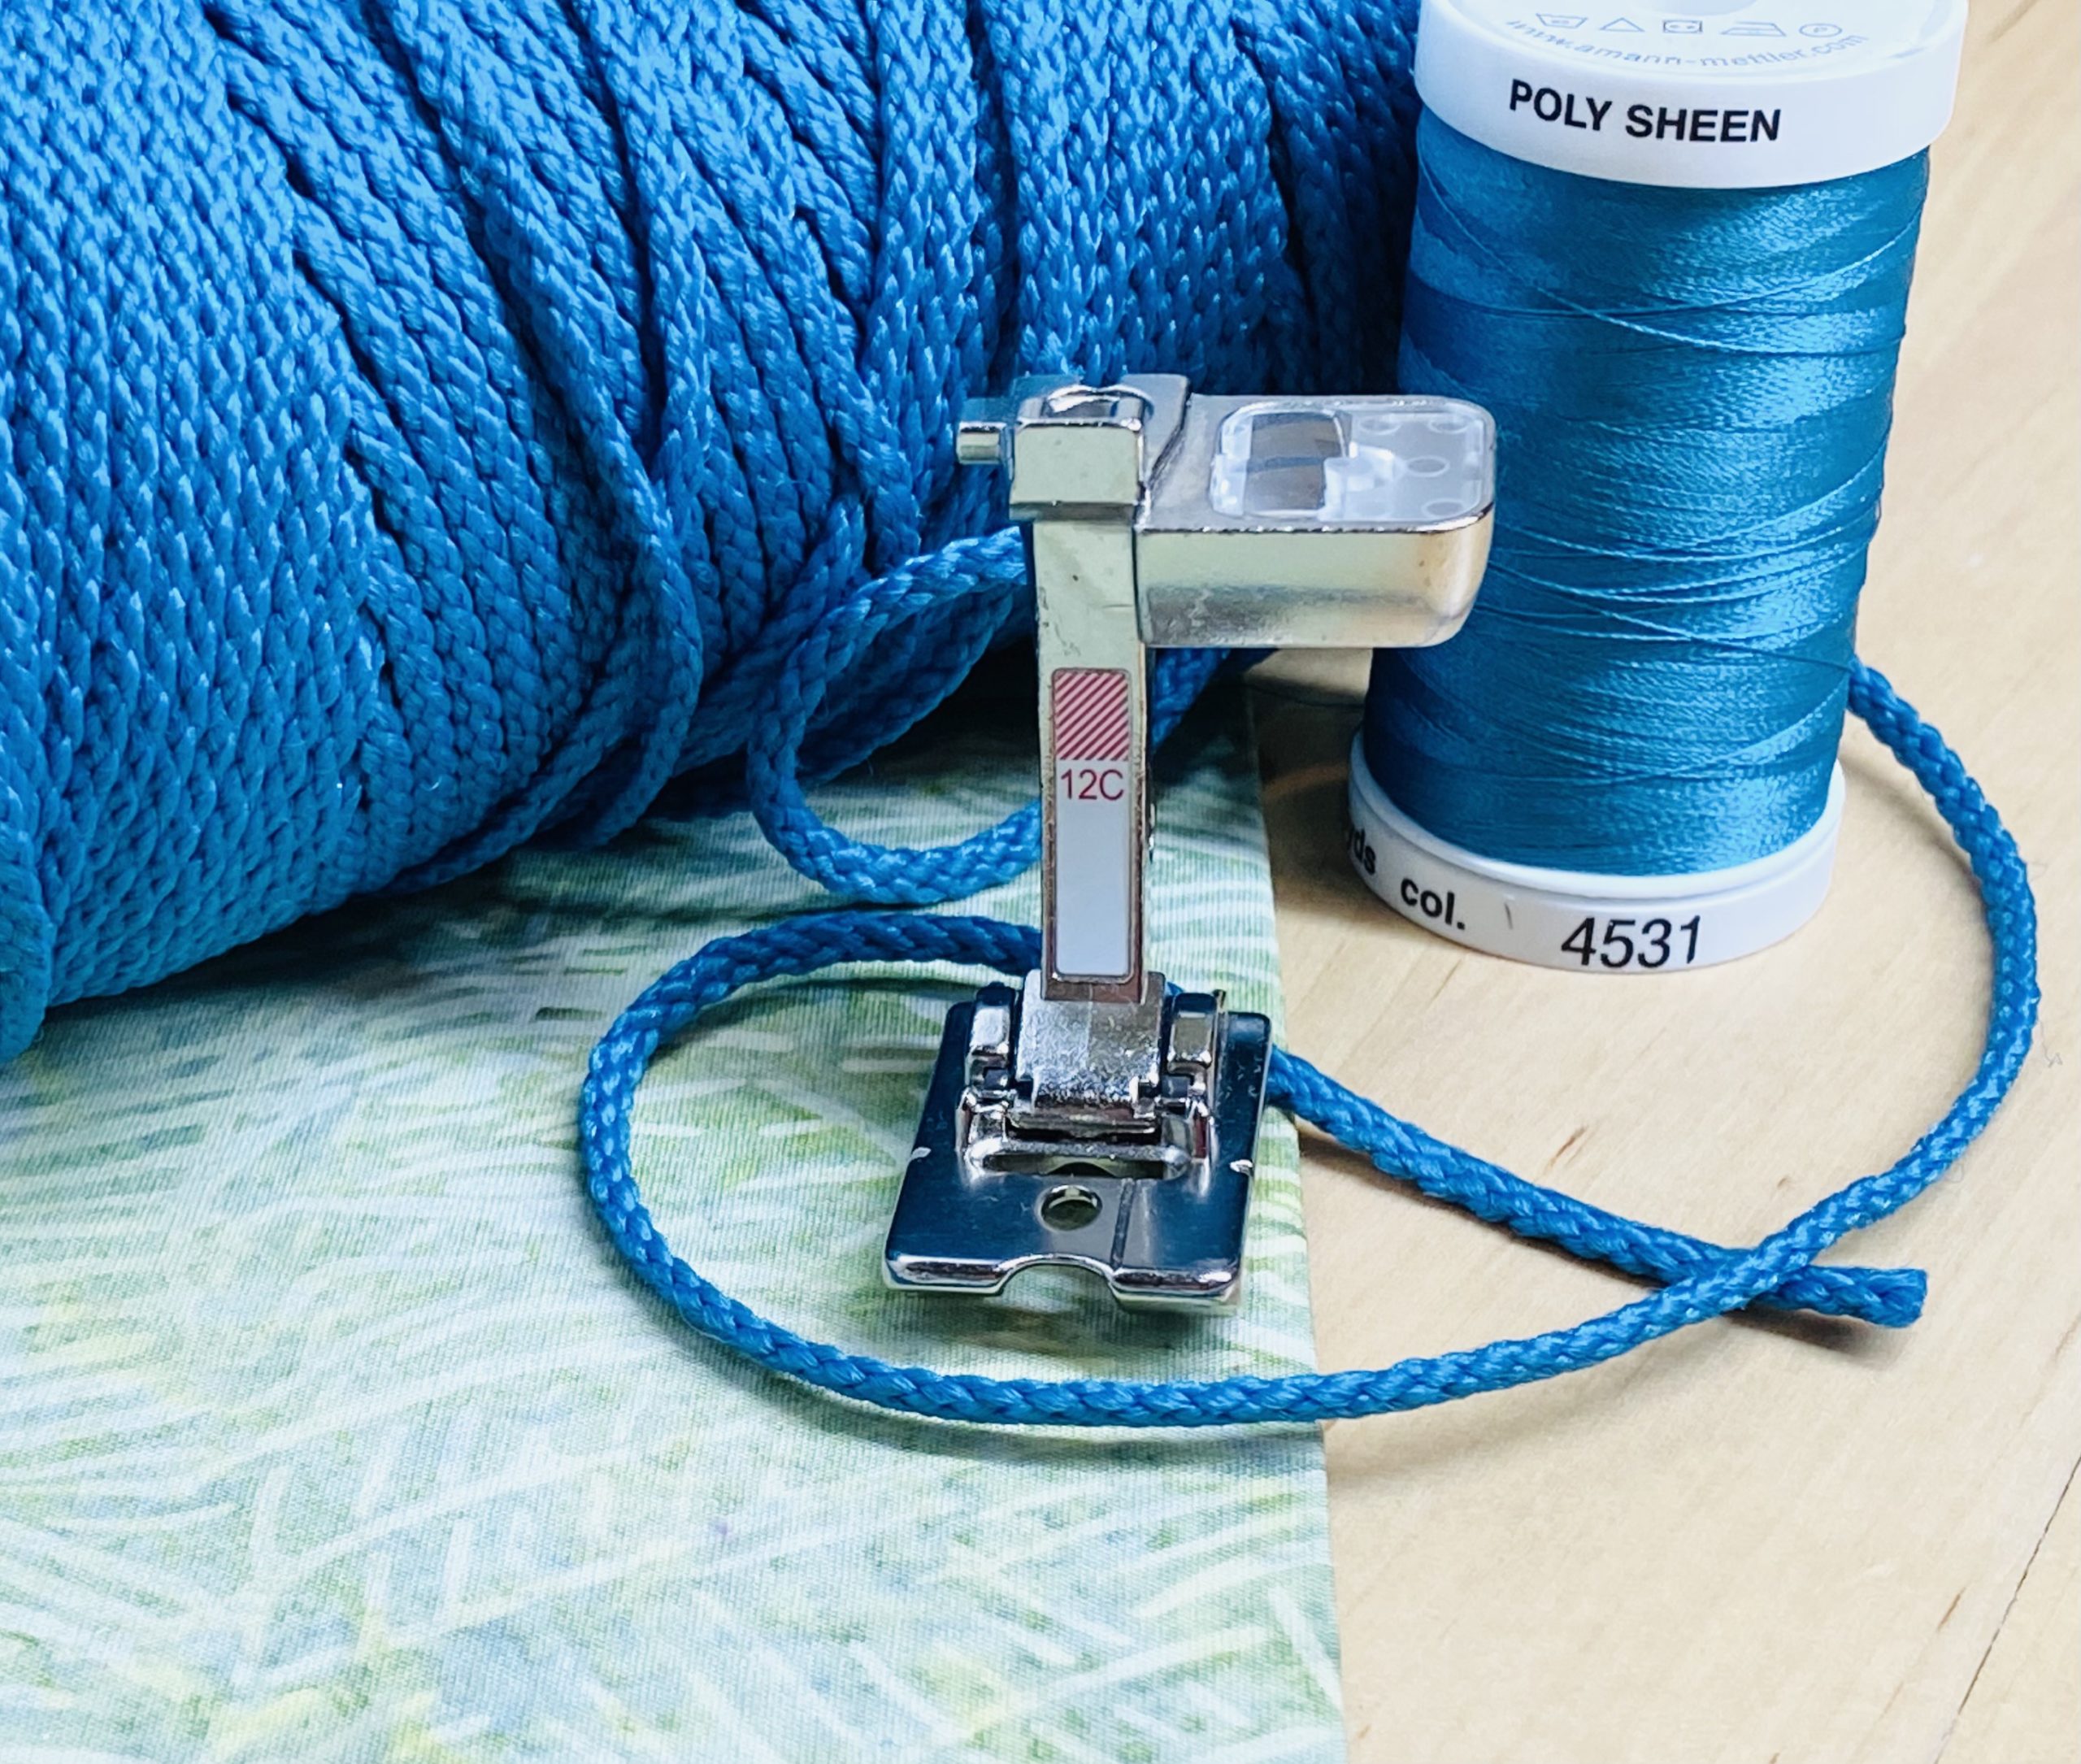
To add cording to your project edges, you’ll need a decorative cord, a simple zigzag stitch, and a particular type of presser foot.
Presser Foot and Cord
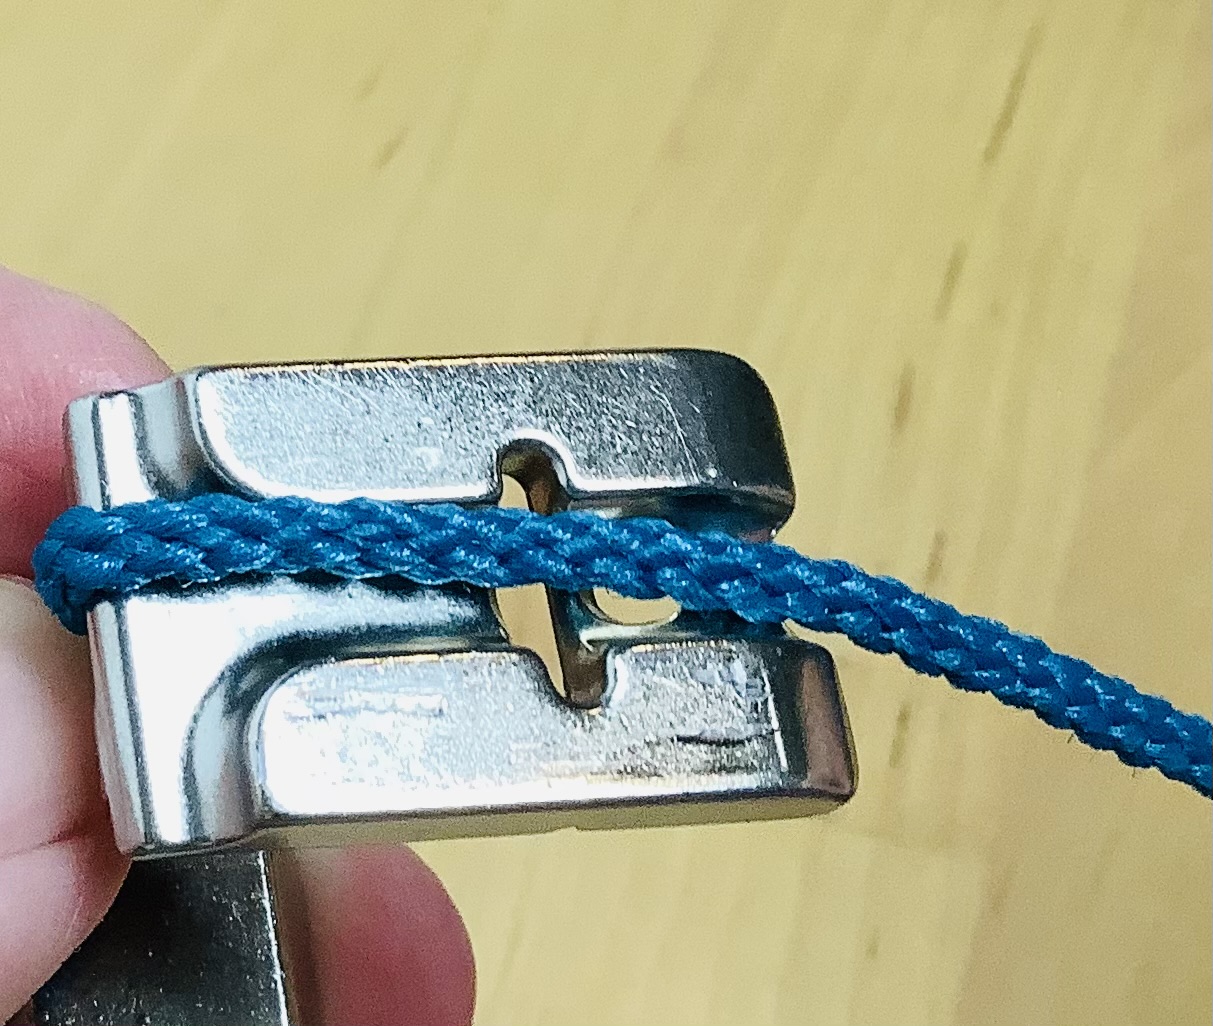
The presser foot should have a tunnel or groove on the sole that can accommodate the cord. The cord can be almost any size as long as it fits into the groove of the presser foot. Otherwise, the fabric and cord will not move easily under the foot. I used my BERNINA foot #12C that has a tunnel that works with cords up to about ¼” in diameter. If you have another brand of sewing machine, look for a piping foot and check to make sure that your cord fits into the groove.
Zigzag Stitch
Select the zigzag stitch on your machine and set the width to sew into the fabric edge and then over the cord, into the air. It should not stitch into the cord. The length setting is up to you. A shorter stitch length shows more thread and less cord while a longer length shows more cord and less thread. The color of the thread is also up to you. It can be same color as the cord, so it is inconspicuous, or a contrasting color so that the stitch becomes part of the design. Try this easy corded edge technique – you’ll love it!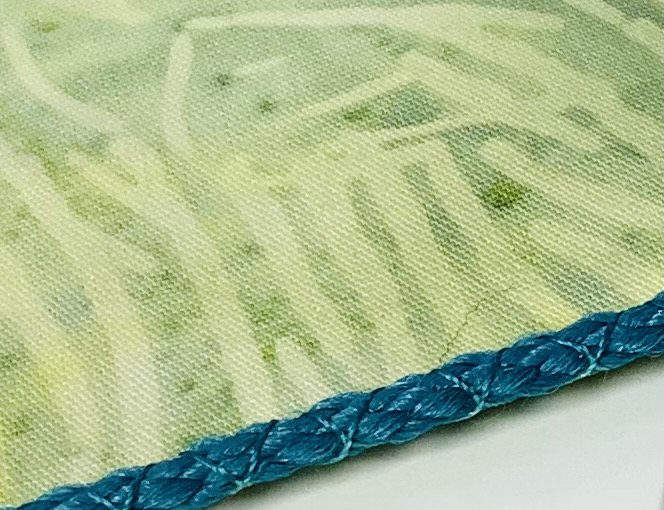
If you haven’t already, check out my new course about presser feet. Click on the tab, Courses & Classes, at the top of this page for more information.
