
I own all of the BERNINA presser feet and I have to say, I use ALL of them. Some more than others and there are a few that I only need on an occasional basis, but I love having access to the tools I need to sew any technique, any fabric, and any type of project. But there is one presser foot that I use more than others. I find it so versatile and useful that I reach for it over and over again. Open Embroidery Foot #20/20C/20D is my go-to foot for a wide variety of sewing techniques.
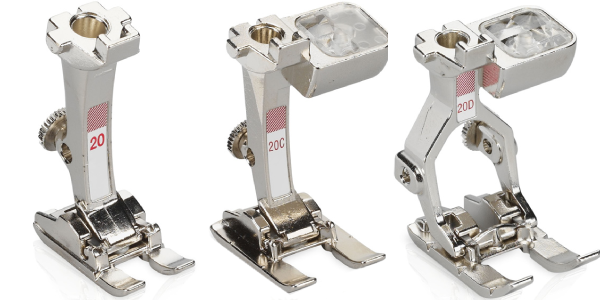
Foot #20 comes in three variations so there are options for any BERNINA model you own. Foot #20 is for models that have a maximum width of 5.5 mm, #20C is for 9 mm models and Foot #20D works with the Dual Feed function some models have.
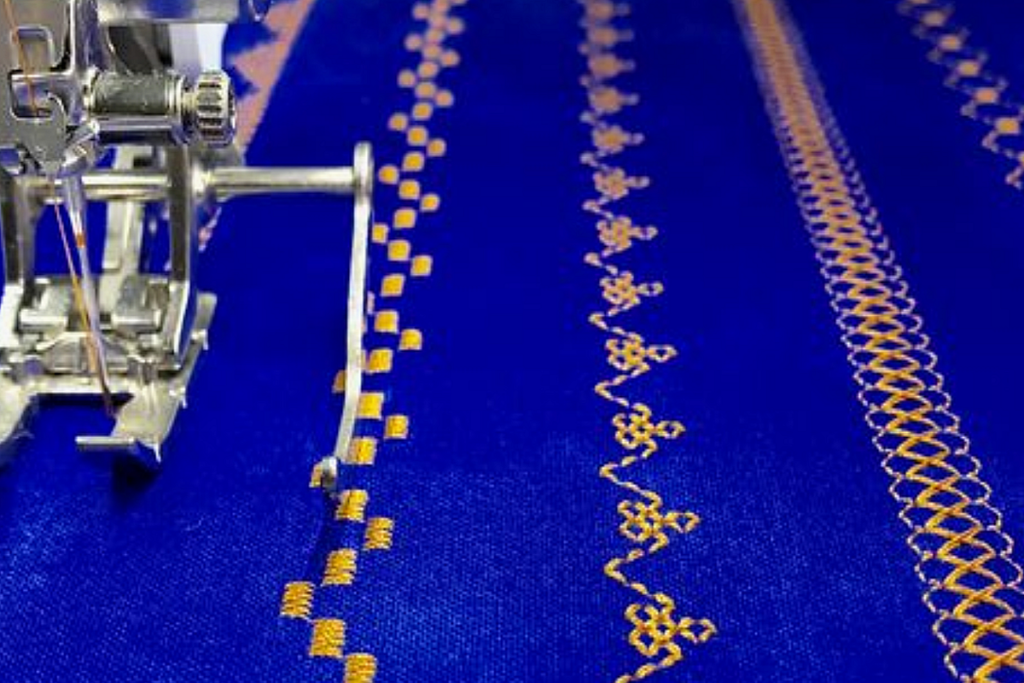
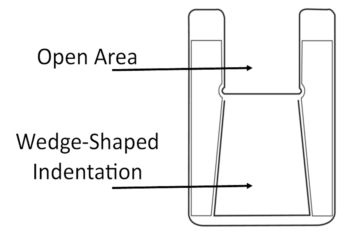
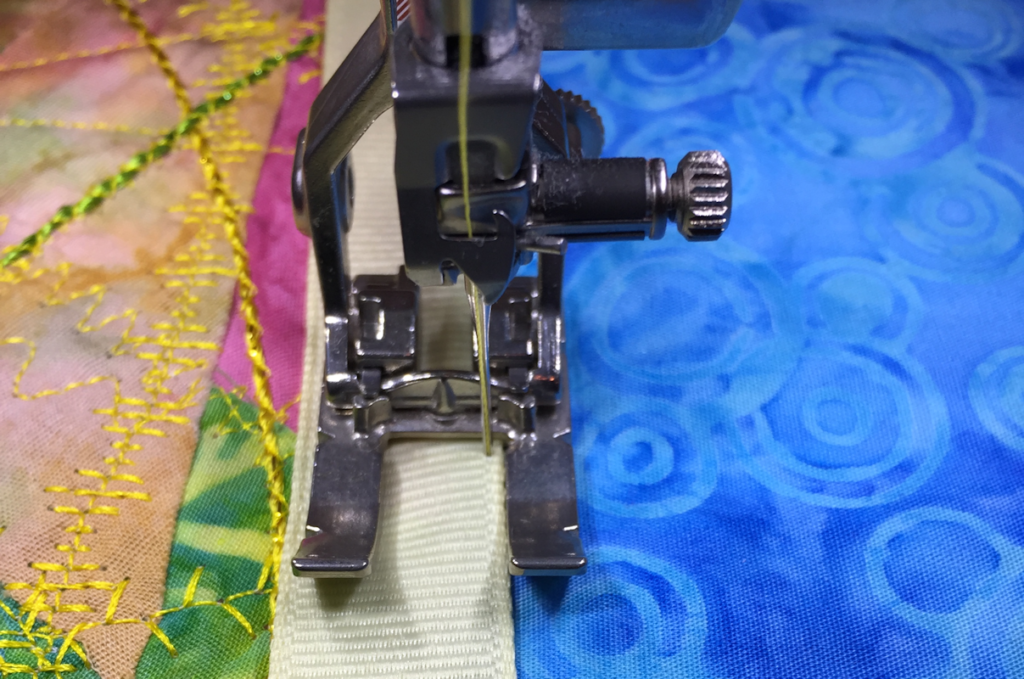
It is designed for decorative stitching, especially for satin stitching and the heavy, compact decorative stitching. If you look at the sole of the foot, you’ll see a wedge-shaped indentation. This extra room that allows fabric stitched with heavy stitches to easily move under the foot. But there is so much more it can do. The front of the foot has been cut-away so the area between the toes is open and you can clearly see where the needle goes into the fabric. I find this really useful when I am trying to position my stitching in a specific place on my project. The opening also lets me follow a marked line or pattern drawn on the fabric.
One of the really great things about this foot is that the toes can be used as guides for techniques such as appliqué and edgestitching. For appliqué, adjust the needle position all the way to the right or left (depending on how your fabric is oriented) and use the inside edge of the toe as a guide. Simply keep the edge of the appliqué aligned with the toe and your stitching will be perfectly placed on the edge of the shape. It works for a variety of appliqué techniques: Satin Stitch, Blanket Stitch, Invisible and more. It makes you look like a precision stitcher and all you have to do is use the right presser foot!
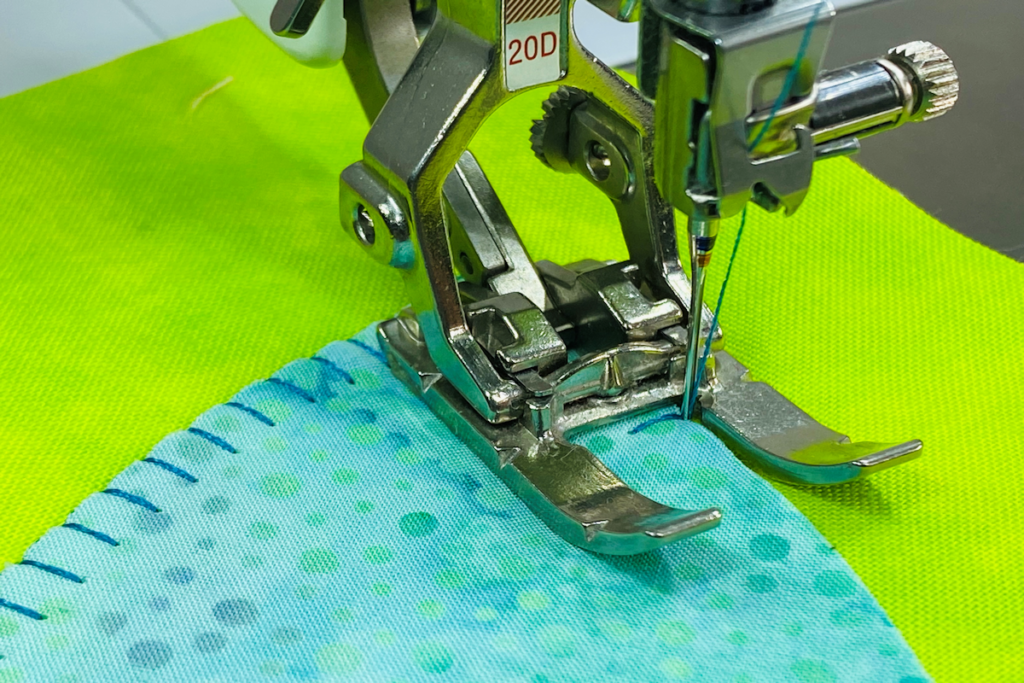
You can also use the inside toe as a guide for edgestitching and topstitching. Place the edge of your project against the inside toe and then adjust the needle to stitch where you want it – close to the edge for edgestitching and farther away for topstitching. As long as you keep the project edge next to the inside toe, your stitching will be perfectly parallel to it, giving your project a professional, polished look. This edgestitching technique is also an easy, perfect way to stitch the edges of ribbon.
So, Foot #20 is my favorite and most-used presser foot. What’s yours? I’d love to know and also what you use it for. As much as I use these feet, I’m sure there are techniques I haven’t discovered yet so please share!

Thank you very interesting. Will have a look at foot #20 😀
37 is my favorite. Piece all the time with this foot.
Thanks so much for this article Susan. My B570 QE came with a 20C foot which I forgot about and I accidentally bought a 20D foot when I was at my Bernina store today. Sounds like I should keep it and make use of the dual feed? Jenny xx
Hi Jenny –
I would definitely keep the 20D foot. You’ll get a lot of use from it!
Susan
Hi Susan
Great article! I’m looking at doing a lot of 1/2″ parallel quilting lines and I’d like to use the edge of the foot to do this. My Bernina foot 97D which I use for almost everything quilty only has a 3/8″ gap from edge to needle. Would you be able to tell me if the 20D is wider, at 1/2″?
Best wishes
Dulcie
Hi Dulcie
The opening of Foot 20D is much wider than 97D, which lets you move your needle position. Try it with a needle position of -3 or -4 (3 or 4 if you are using the left side as a guide) and measure it to see if it is what you want. Hope this helps!
Susan