
I first came across this method of piecing about 7-8 years ago and it has become one of my favorite speed piecing methods. It was called Tube Quilting and although I’ve occasionally seen it called Tube Piecing, (which it technically is), most of the time I see it as Tube Quilting so that’s what I call it. As with many speed piecing methods, you start with strips of fabric cut across the width of the fabric. After four seams and a bit of cutting, you end up with several blocks in two designs that coordinate. I’m going to use them to create a colorful chevron pattern that’s easy to put together.

Fabrics and Feet
I used 2½” wide strips (great for pre-cuts!) that make 5 ½” blocks (5” finished). If you start with strips that are more narrow or wider, your blocks will be smaller or larger than the ones I made. I used a patchwork foot to get an easy ¼” seam. The best one for piecing long strips is Patchwork Foot #57/57D because of the guide attached to the side of the foot. It’s an extra visual cue for keeping the edge of the fabric aligned with the edge of foot. It helps you piece long strips quickly without sacrificing accuracy. I used Foot #57D so the dual feed function helped feed the two layers at the same speed.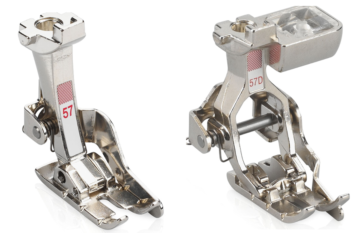
Sewing the Strips
Cut four strips 2½” wide across the width of the fabric. Sew two strips together to form a set; press the seam to one side. Stitch the remaining two strips to form a second set and press.
Stitching the Tube
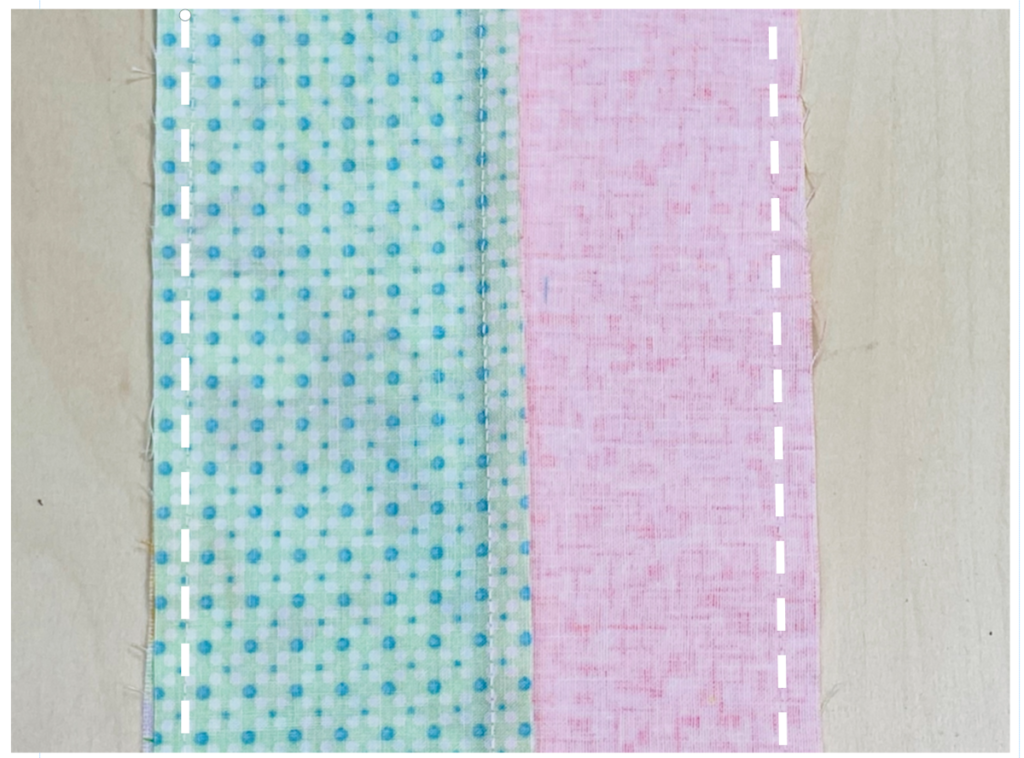
Place the sets right sides together and stitch along each long edge to form a tube.
Cutting the Blocks
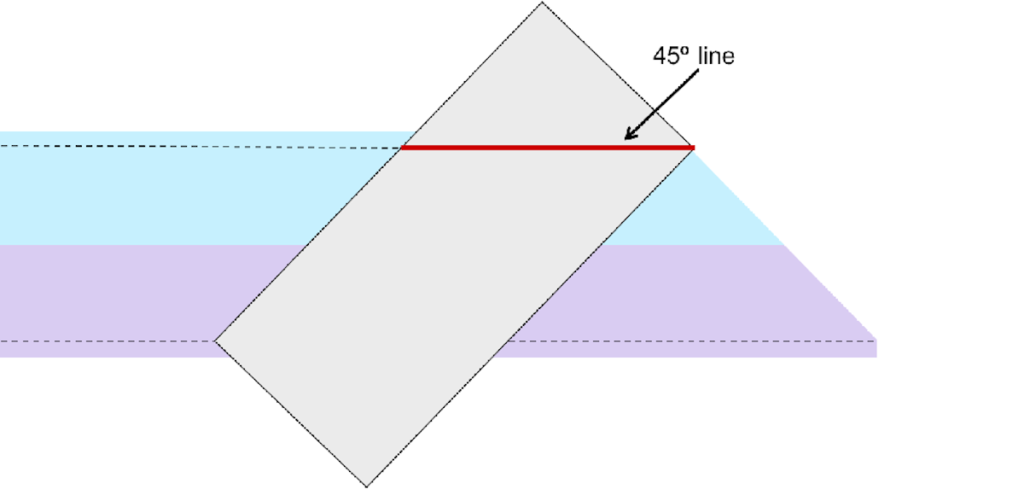
The cutting is a clever way to cut triangles from the tube. After cutting, open the triangles and you’ll see the blocks you’ve created. The diagrams below show how the ruler is placed on the tube for cutting. Align the 45º line on the ruler with the seam, starting at the edge of the fabric. Trim the corner and discard (or if you’re like me, you’ll keep it in your scrap basket and find a use for it later!).
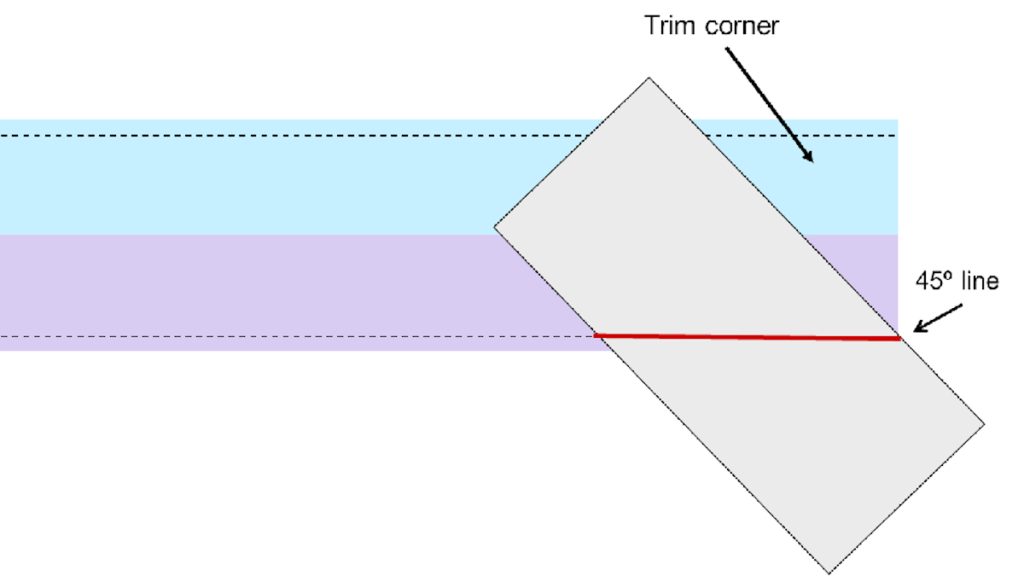
Flip the ruler and align the 45º line on with the upper seam the seam, starting at the edge of the fabric.
Creating the Chevron
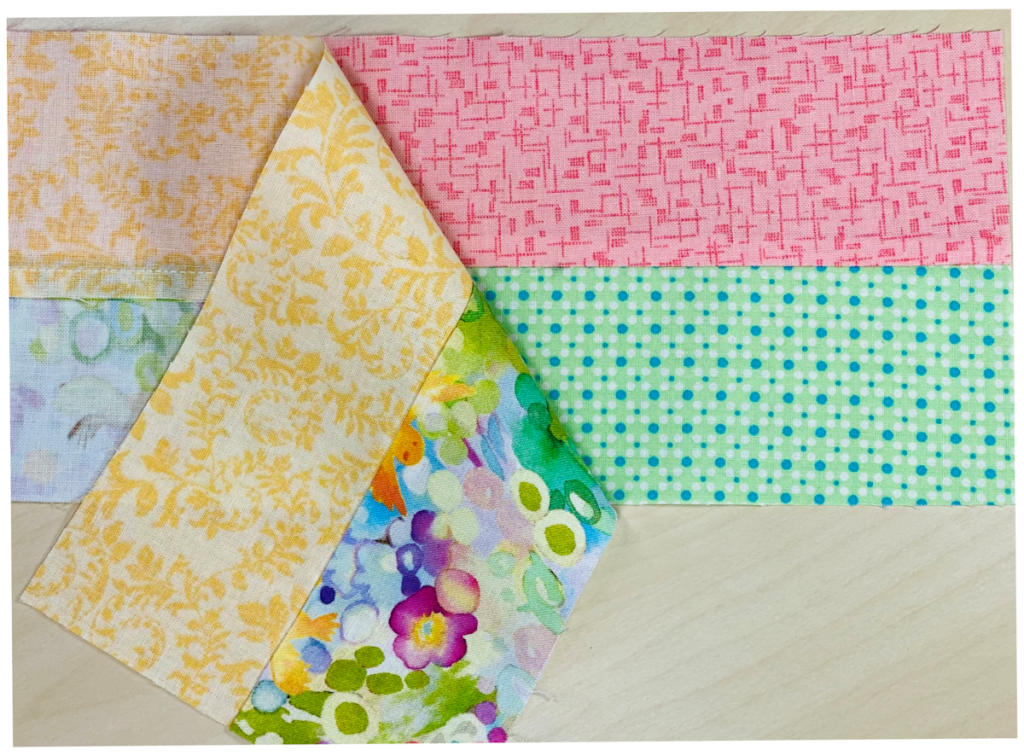
Open each triangle to see a block and then press. Each tube makes two different blocks that can be arranged in a variety of ways. I’m showing a few of the blocks here before they are stitched together – do you see the chevron pattern? I’ll be using this chevron pattern in a project soon so look for it in near future. In the meantime, try tube quilting and make your own chevron blocks!
![]()

That looks easy enough if I have enough of the same colors and would be cool in my quilt
Hi Kim –
It’s a really easy piecing technique. Would love to see your finished quilt – good luck!
Susan
Love the “modern” quilt idea! Might connect them on the diagonal, layer, do some decorative serging and create your tablet/ereader zipper bag!
You always inspire me Susan Beck! Keep it up😘
Thanks Marilyn – I appreciate your support!
Susan