Sometimes I just want to sew something simple and fun for no reason. Not something useful, not because I need clothes to wear, not even because I’m making a gift. I just want to enjoy the process of sewing and playing with fabric, color and textures. Usually when I feel this way, I make a little art quilt. The one I’m showing you here is very simple and a perfect piece of art to display in my studio. It’s small, with a finished size of 9½” x 11” so it won’t take a lot of materials and it’s fairly quick to make.

Supplies
When I make these a small art quilt like this, I usually challenge myself to use only materials I already have. Fabrics from my stash, leftover buttons, orphan charms, beads, and trims – whatever works! It forces me to be creative with what I have, and it depletes (in a very small way) the mountain of supplies I’ve accumulated over the years.
- Two 12” x 12” pieces of fabric for front and back–can be the same or different as desired
- Binding – cut enough 2” wide bias strips (45° cuts across the fabric) to stitch together to make one long strip about 60” long; press the long strip in half lengthwise and press.
- One piece of 12” x 12” batting
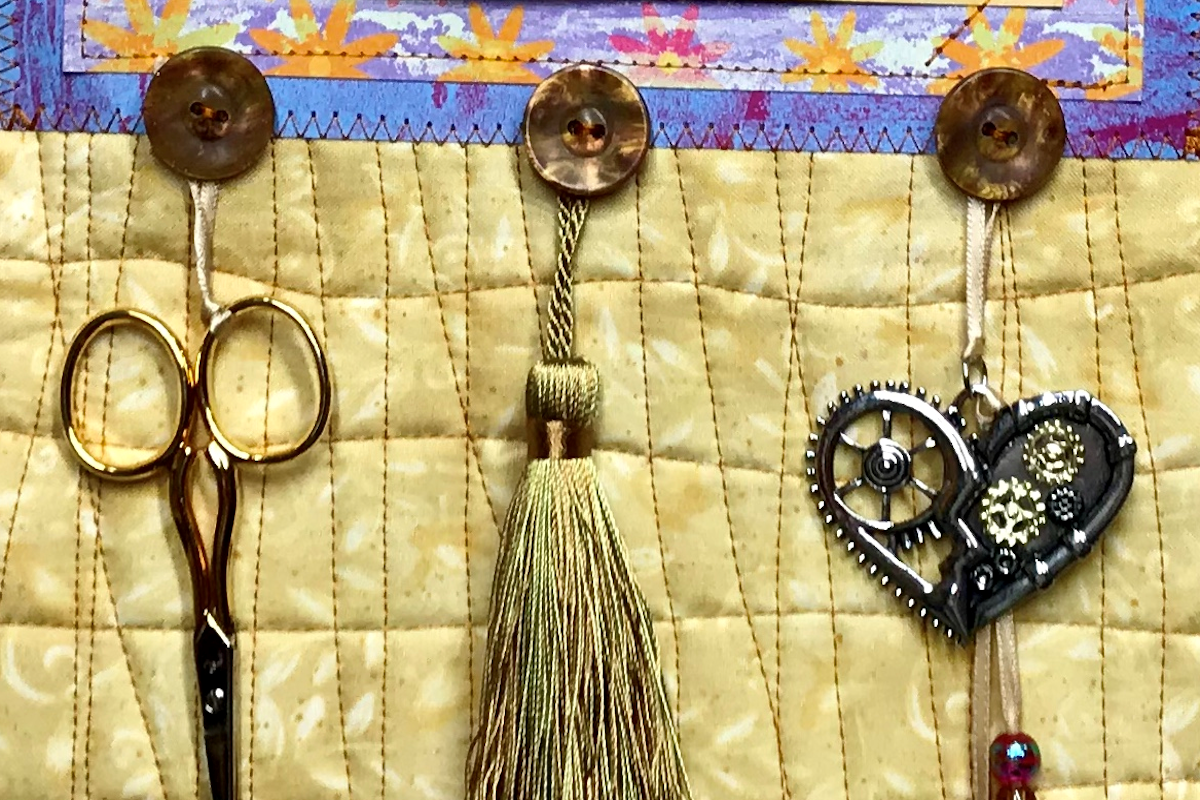
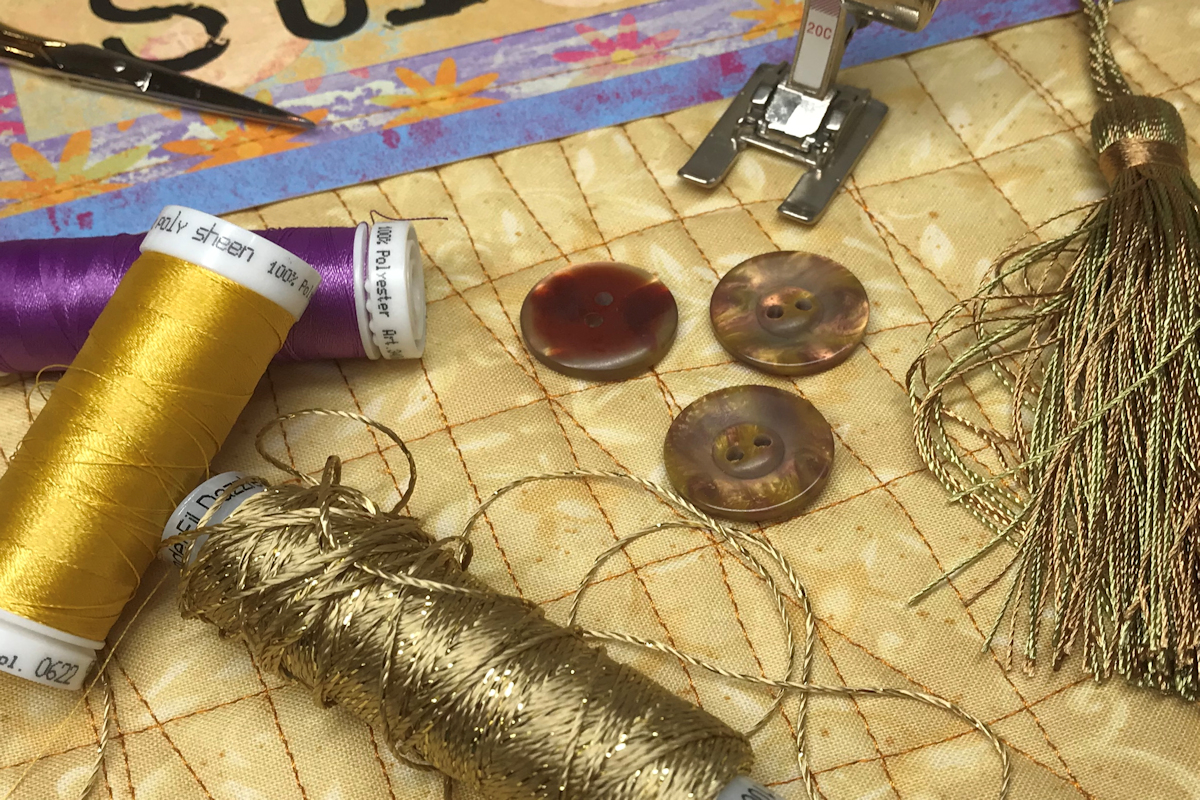
- Three decorative buttons – ¾”-1”
- Two pieces of scrapbook cardstock scraps – approximate sizes: 7½” x 3½”; 6½” x 3”
- One sheet of 8½” x 11” scrapbook cardstock for printing; it will then be trimmed to 5¾” x 2”
- About 1 yard of ⅛” ribbon
- Assorted items such as charms, beads, sewing tools, tassels, etc. to hang on the front of the quilt. These items will make your quilt totally different from any other!
Presser Feet
I used three presser feet on this project:
- Open Toe Foot – I used this for quilting and construction. Usually I quilt with a walking foot or even feed foot to keep the layers from slipping and shifting but because this is a small quilt and I knew I would be trimming it to size, I didn’t have to be as careful. This is my go-to foot because I can see exactly where the needle stitches.
- Button Sew-On Foot – The fastest, easiest, and most secure way to attach buttons.
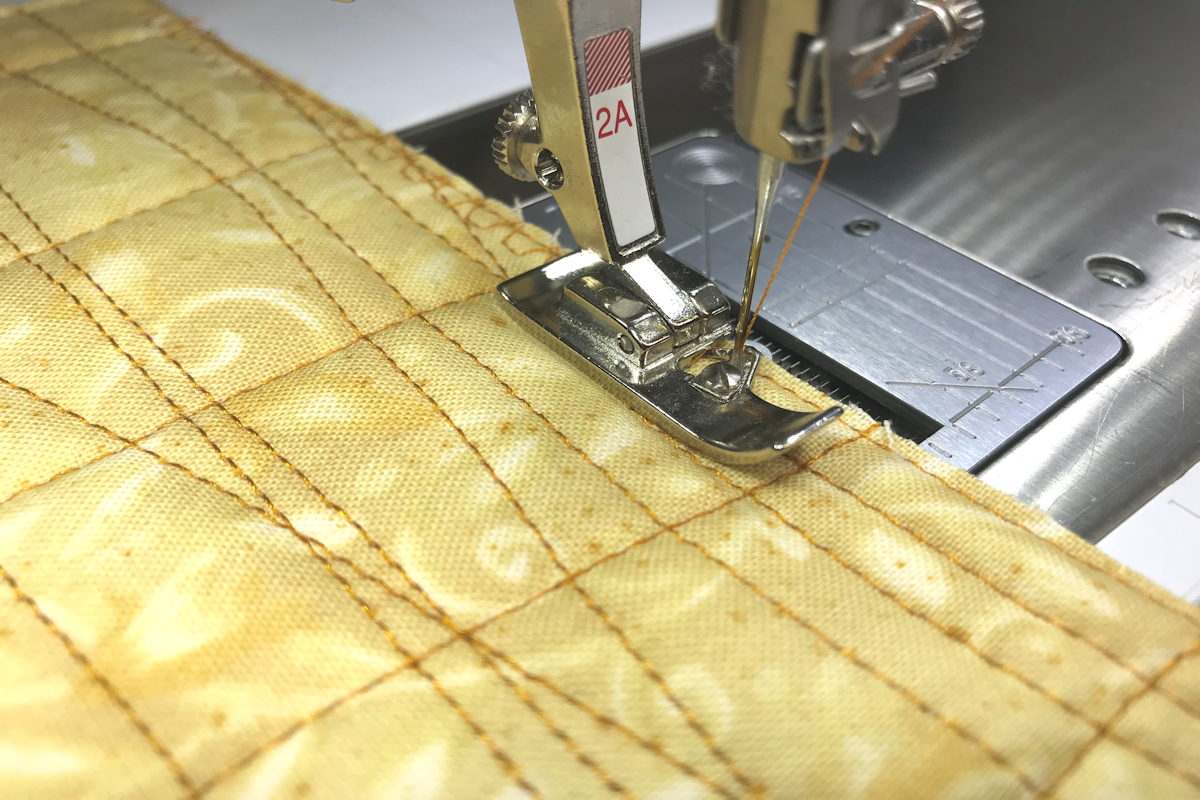
- Quarter Inch Foot – Even though the quilting does not need to be precise, the binding does. The width of the seam allowance will determine the width of the finished binding. If the seam allowance is not consistent and straight, your binding won’t be, either.
Quilting
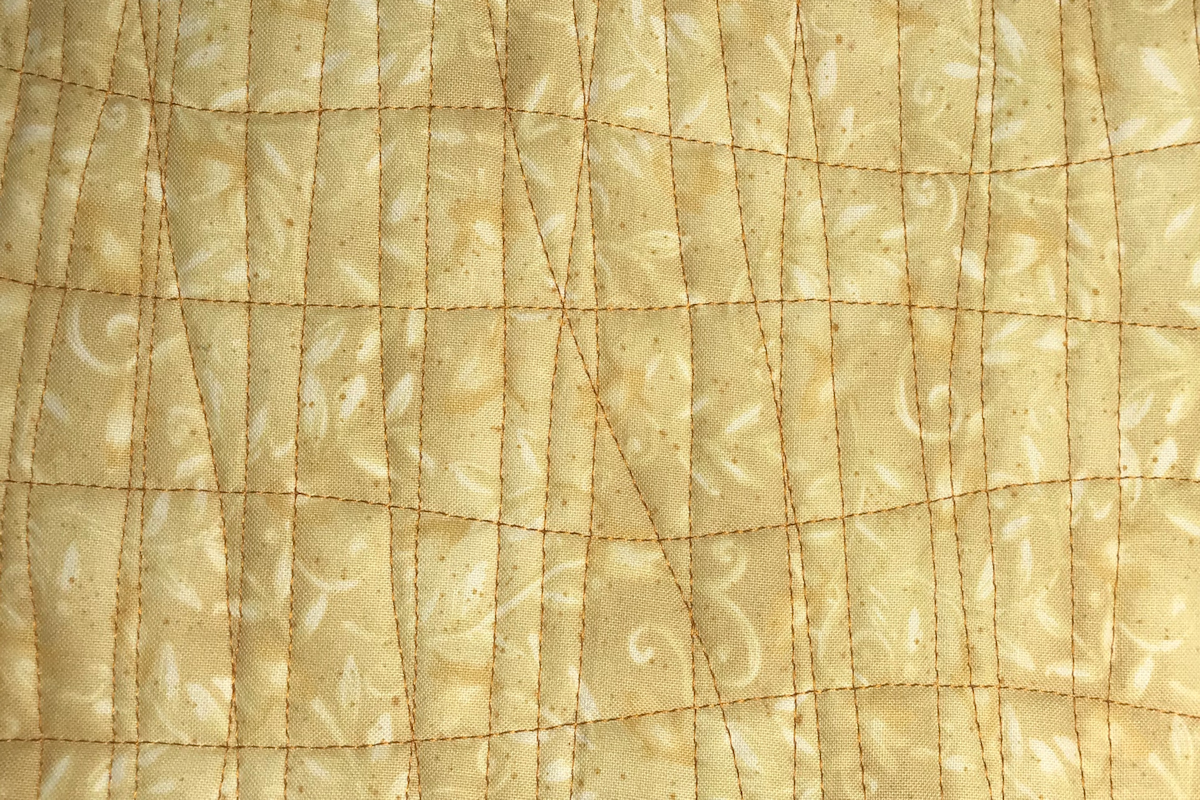
Make a quilt sandwich by placing the two pieces of fabric wrong sides together with batting between them. Quilt the layered fabrics by straight stitching in any pattern you want – randomly stitched lines, grid pattern, matchstick quilting, etc. I did a “wonky” grid with unevenly spaced vertical and horizontal lines. Trim the quilted fabric to 9½” x 11”.
Stitch Header
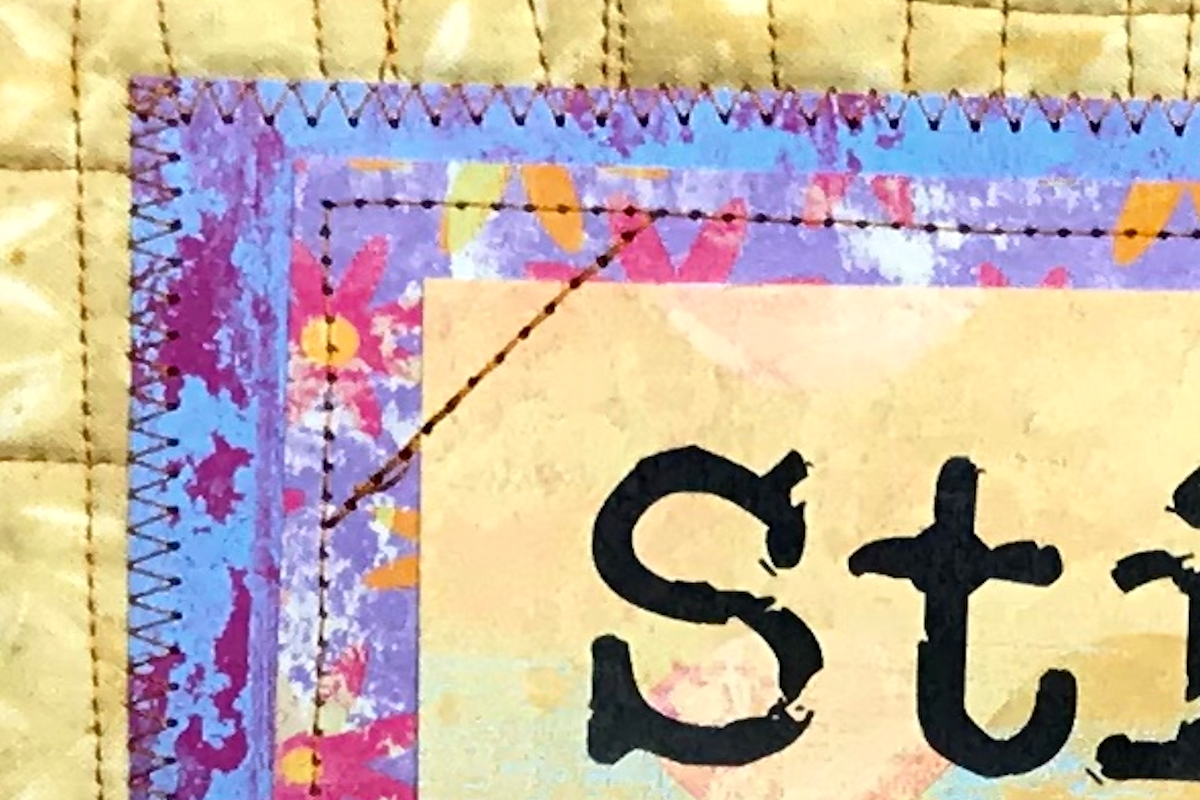
The first thing to do is to print your header. The font I used is Veteran Typewriter, which is a free font with an antique look to it. You can use any font to give the look and feel you want to your quilt. Resize the lettering so that the capital “S” is about 1¼” high. You can adjust the sizing of the lettering and the cardstock piece to suit yourself. Once you print, trim around the type.

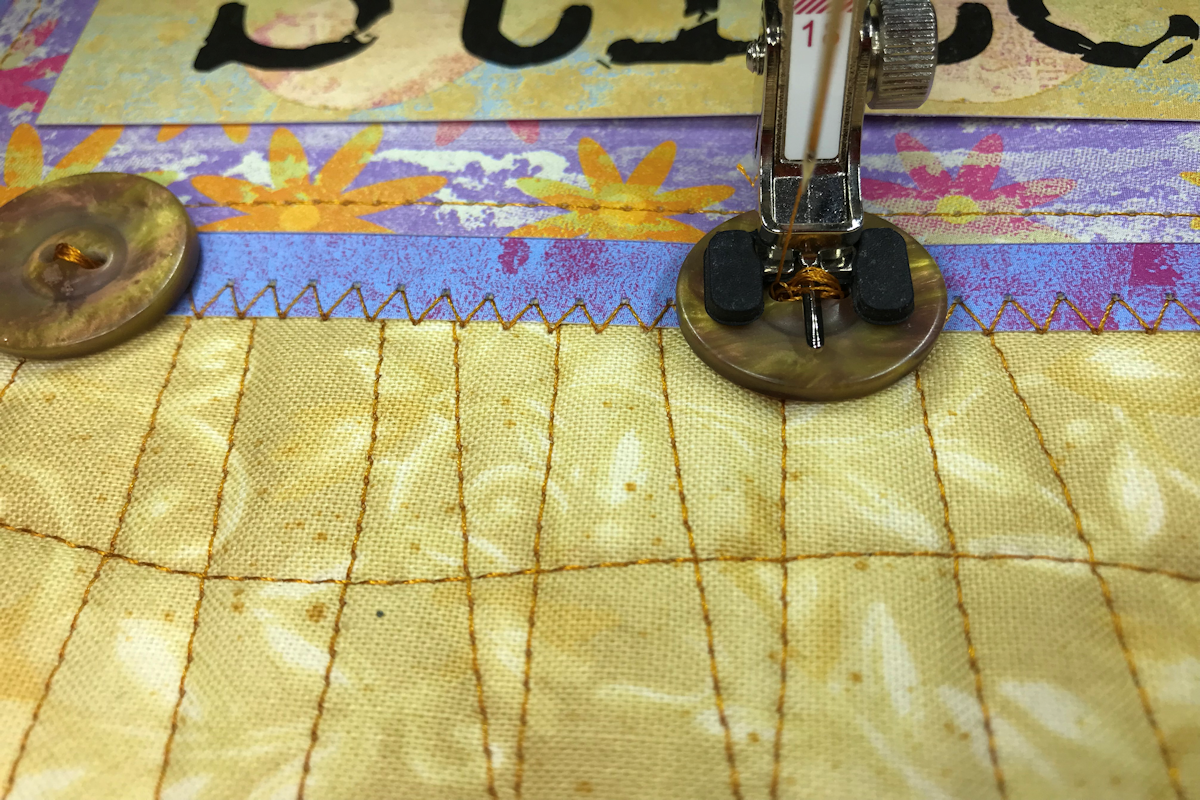
Stack the three pieces of cardstock and sew them together before stitching them to the quilt. I stitched the second layer to the largest one using a straight stitch around the edges. Then I put the printed piece on top and stitched diagonally across the corners. Lastly, I placed the entire stack on the quilt, about 1” down from the top, centering it from side to side. Using a medium zigzag stitch, I stitched along all four edges to secure it to the quilt. Note: Sewing through paper will dull your needle so it’s a good idea to change to a new one to continue sewing.
Attaching Buttons
Using a button sew-on foot, attach a button near the lower edge of the cardstock, centering it from side to side. I stitched through the cardstock, which would be difficult, if not impossible to do by hand. Stitch a button on each side, about 2” away from the center.
Preparing the Edges
Overcasting the edges of your quilt compresses them and makes the binding process easier. I used an overlock foot with an overlock stitch to finish all four edges before sewing the binding in place. The foot has a pin on the right side that you place on the edge of the quilt. It holds the edges flat while you overcast them.
Binding the Edges
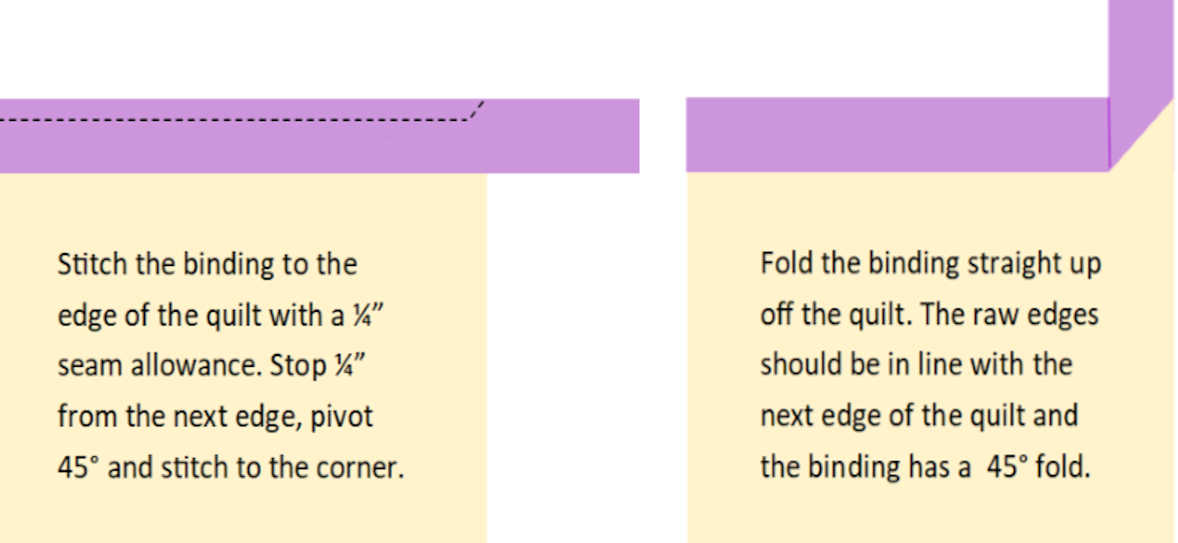
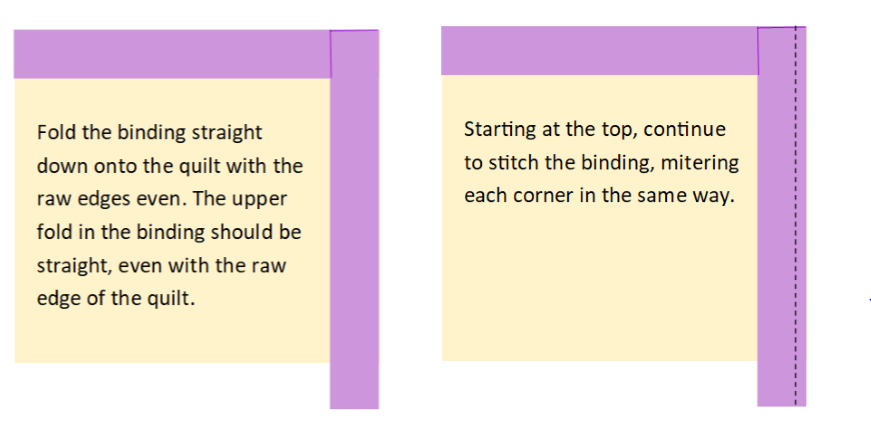
Starting near the bottom on one of the sides, place the folded strip of binding along the edges of the quilt, with raw edges even. Using a ¼” seam allowance, sew the binding to the quilt, folding and mitering the corners as shown below.
Once the binding is sewn to the front of the quilt, fold it tightly to the back and hand stitch it in place.
Finishing Touches
Add your charms, tools, tassels, etc. to the front of the quilt by using the narrow ribbon to hang them from the buttons.