
The start of a new year is a great time to think back and start fresh. Whether you are making resolutions, decluttering your home, or developing your spiritual self, it feels good to move forward, working toward a better you. I think it’s a good time to dig deeper into creative pursuits, learn new techniques, and produce one-of-a-kind sewn projects. I’m working on two projects that may give you a direction to expand your sewing knowledge and express your creativity in a new way.
Coming Soon – New Foot Class
First, over the next few weeks, I’ll be posting my first video course focusing on presser feet. The class, Feet-ology, is an introduction to BERNINA presser feet and covers ALL of the presser feet available for BERNINA machines. You’ll sew faster, better and more creatively if you master the use of these helpful tools made for your machine. I’ll have more information soon, so stay tuned. If you want to be one of the first to know when it is available, sign up below and you’ll get the first email announcement with the details about the course.
YES, I’m Interested!
![]()
Monthly Art Quilt Series
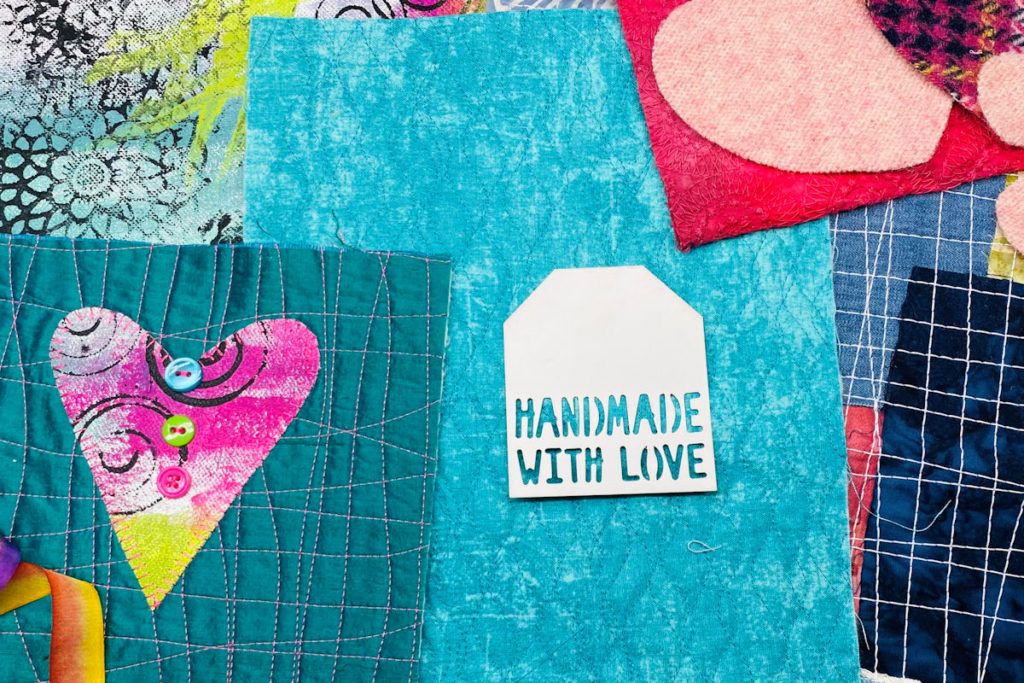
Second, I have a monthly series starting this month that features Mini Art Quilts, otherwise known as MAQs. These small quilts are fun to make and let you really push the boundaries of your creative side. Each month, I’ll bring you an original MAQ that combines sewing and art techniques to create a personal work of art. You can duplicate the quilt I create or use it as a springboard to make one totally unique to you. Making these little quilts is one of my favorite types of sewing and I’d love to share it with you! The photo below shows just a few of the elements I’m using in the MAQs you’ll see in 2021.
Tiny Fun Project
For now, here’s a little project that you can make from stitched bits you just can’t seem to part with. Even the smallest piece of stitched fabric can be beautiful and there are times when it is hard to get rid of leftovers, remnants, and cut-offs from finished projects. In just a few minutes (really!), you can create a mini work of art that is fun to look at, reminding you of your love of fabric and thread. I call these simple projects “Stitchlets”, and I hang them on my corkboard so I can see them as I work.
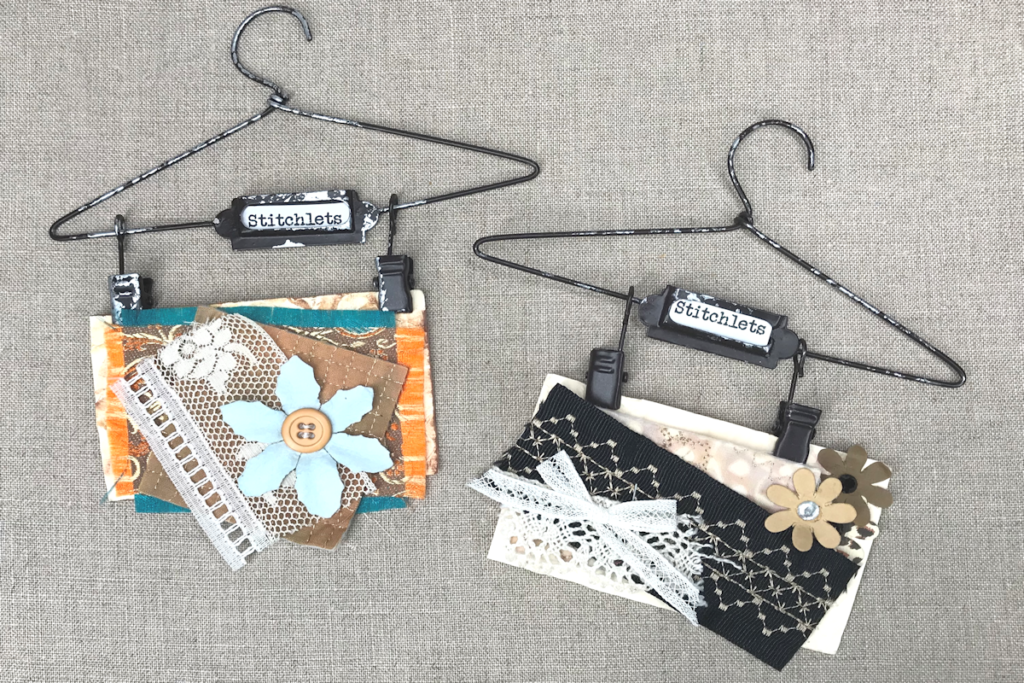
These art pieces are presented with antique-style mini hangers. The ones I used are no longer available but here is an alternative by Tim Holtz. It’s available online and at many craft stores.

Building a Base
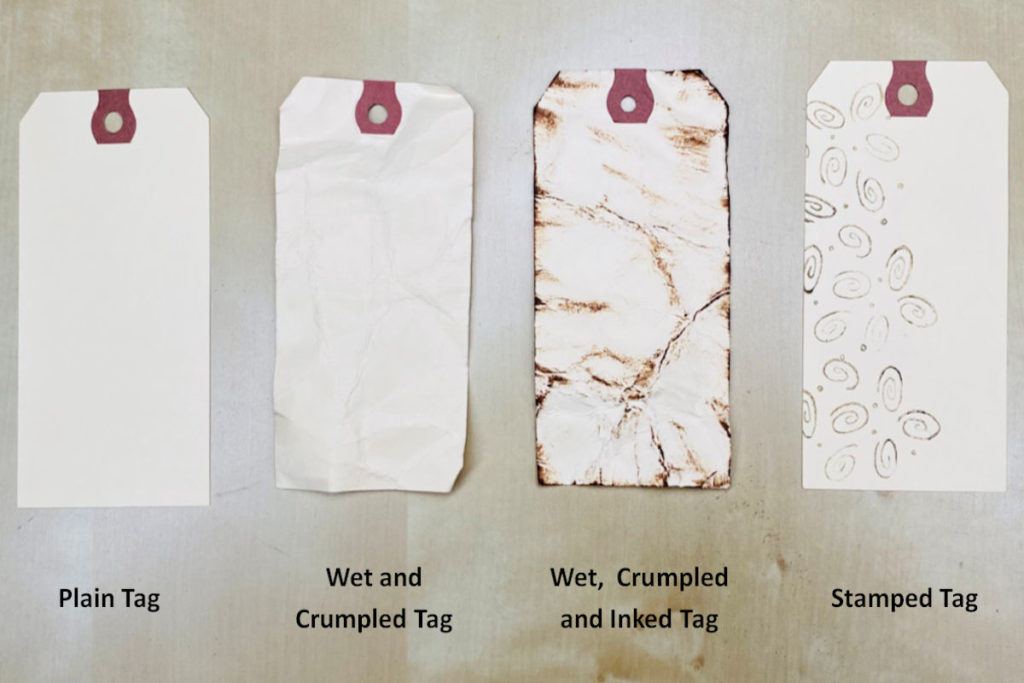
Let’s start with building the base for your art piece. I use a manila shipping tag as a base. Simple cardstock will also work. You can use the tag as is – smooth and plain. I sometimes like to add texture by getting the tag wet and crumpling it to create folds and creases. After crumpling the tag, gently unfold it and let it dry. If you want a vintage look (my favorite, so I do a lot of antique-like pieces), use an ink pad to “dirty” it up a bit. Rub the ink pad along the edges and over the raised texture of the tag. Another option is to do some simple stamping on the a tag. Even though you may not see much of the tag once you add bits of fabric and trims, the texture and color peeking through adds character to the finished Stitchlet.
Adding Layers
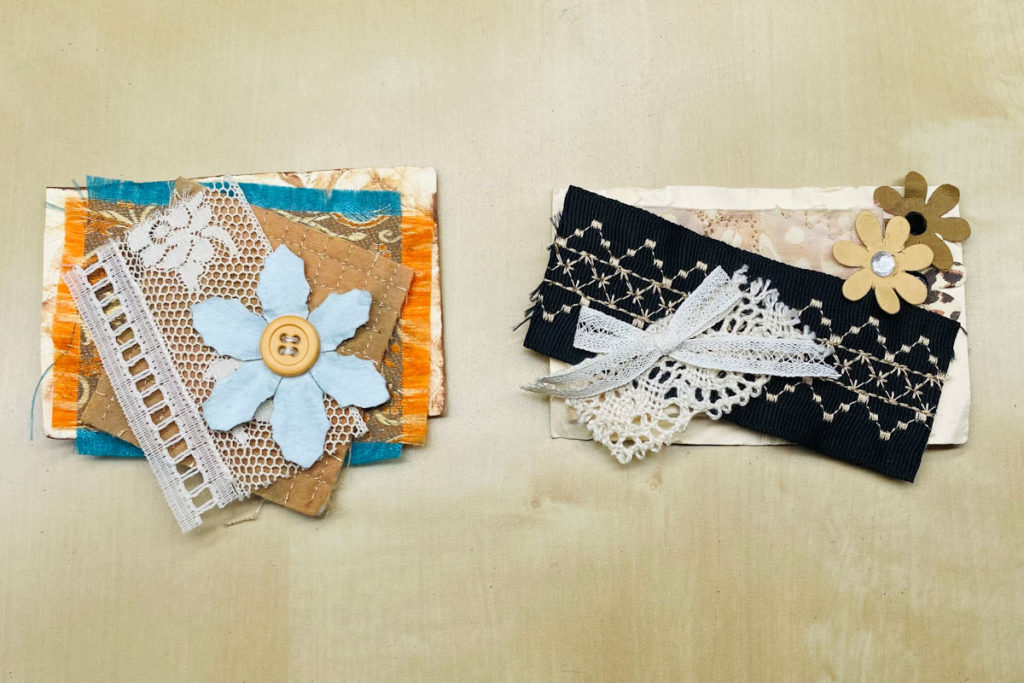
Trim the tag or cardstock to the size you want. I make mine about 4” x 2½”. Just make sure that it fits the hanger as the card is the base of your project and will clip to the hanger. The next step is to create the layered swatch that will be mounted on the prepared tag. The swatch should be small to fit the scale of the tag but can extend beyond the tag edges. Using flat fabric pieces, stitched fabrics, scraps of lace, trims, ribbons, and buttons, layer them as you like and stitch them together. When the arrangement suits you, mount it on the prepared tag using glue.
Finishing Steps
Clip the finished tag to the hanger. Create a label for the hanger by printing, stamping, or handwriting a descriptive word to suit the style of the art you’ve created. I used the word, “Stitchlets” but you can get creative with naming your artwork.
Making these tiny pieces of art is a great way to begin 2021, creating something beautiful, unique to you!
