
If you’re looking for a way to make sewing fun again, mini art quilts may be just the thing! Combining art techniques and sewing applications with a bit of scrapbooking thrown in opens a world of creative possibilities to make unique works of art. The best thing about this mixed media sewing is that you can make pieces like no one else. Show your own personal style, add your own decorative touches, and create projects you’ll love! Keep reading to see the quilt I designed for this post. I’ll tell you about the techniques I used and you can download the full directions here.

Mixed Media Sewing
Mixed media sewing is all about layers—adding technique on top of technique to give depth and dimension to your art. You start with a background and build on top of it, adding layers of color and texture Because we are making a quilt, albeit mini, we’ll start with a quilted background. This can be as simple or as complex as you like. The background will be covered with techniques and embellishments so most of it will end up being covered. The parts that show give it texture, adding to the overall look of the quilt. For today’s mini quilt, I used one piece of fabric and did some really simple quilting with a wonky grid pattern. Place batting behind the fabric and stitch random lines of horizontal and vertical straight stitching.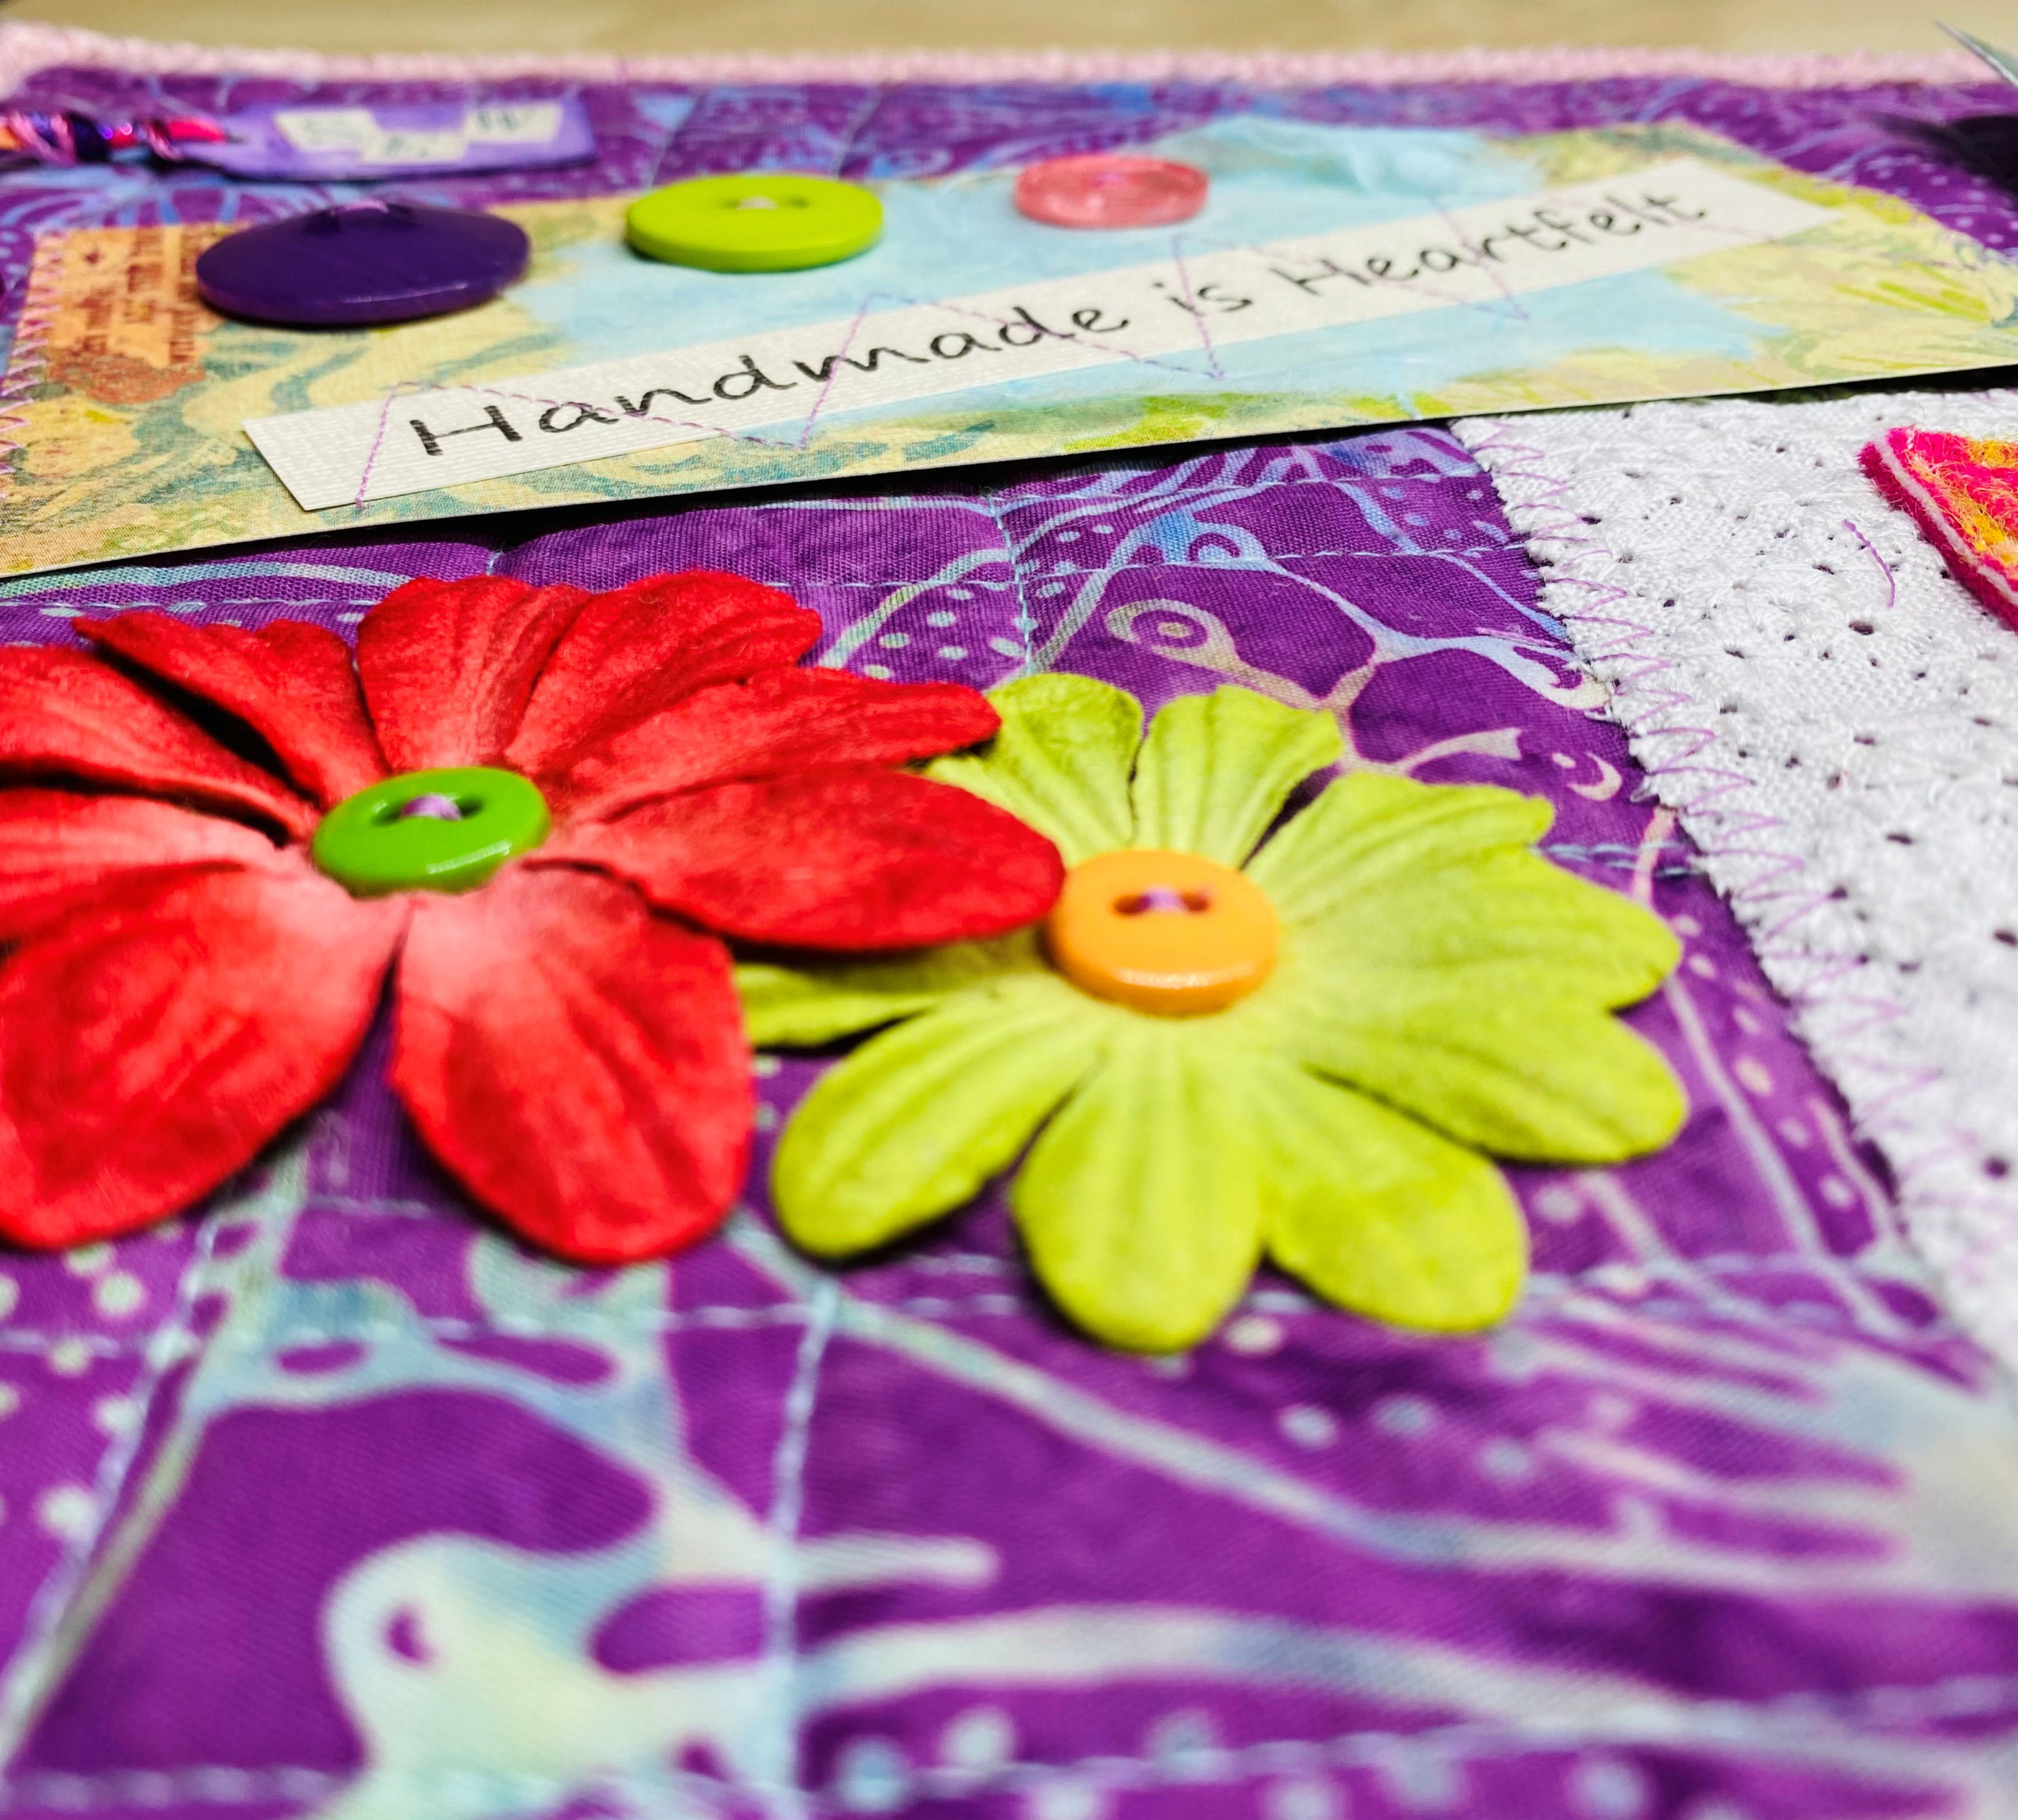
Composition
When making these mini quilts, I usually start with an idea, a color scheme, and a few odds and ends such as buttons, charms, and technique swatches. As I work on it, it evolves as I edit the elements I started with and add other pieces to balance and complete the composition. An easy way to approach a composition is looking at it as a grid. A 3 x 3 grid is common, but for this quilt, I used a 2 x 2 grid. If you are a quilter, think of a 4-patch when placing the elements on your quilt. Overlapping items, combining straight edges with curved ones, and placing elements at different angles keep it from looking boxy and square. Lay out your elements and play with the arrangement to see how you want to place them for the final design.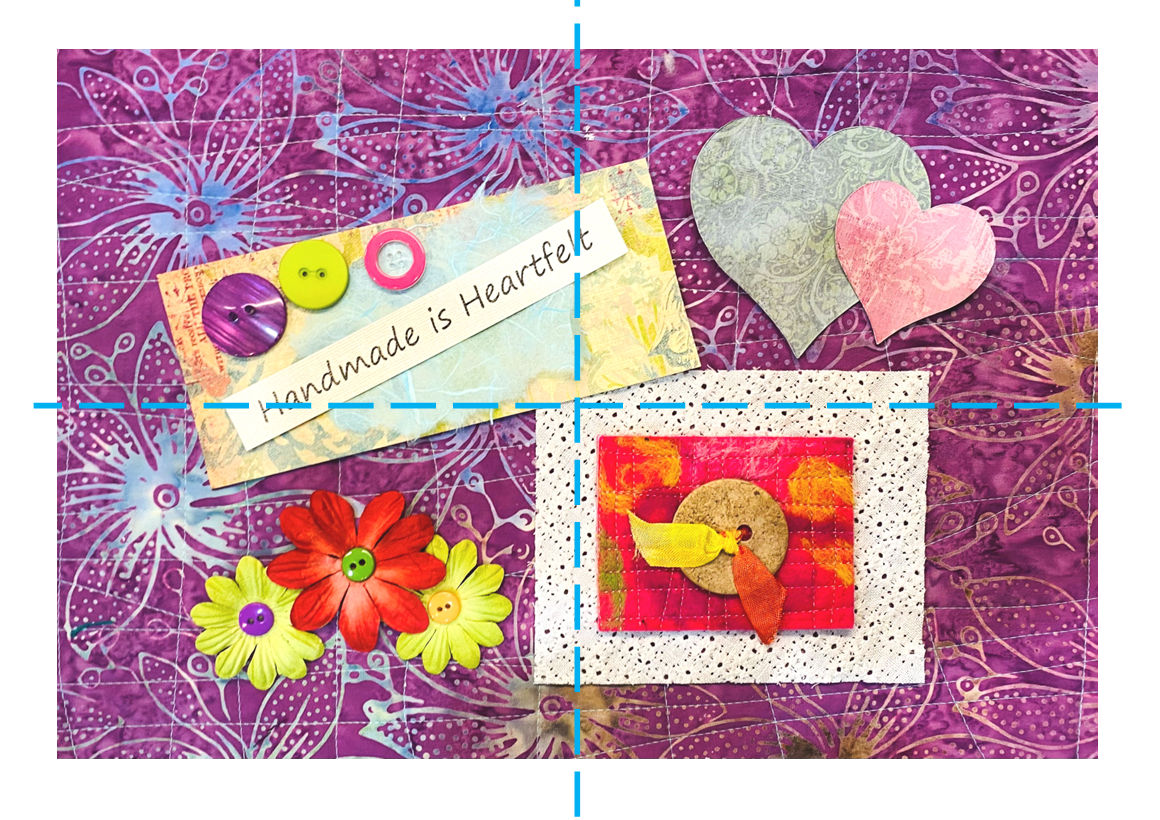 Sewing Techniques
I have two sewing technique patches on this quilt, and I chose both because they add texture to the piece, each different from the other. The first one is hemstitching with a wing needle, which is a wide, flat needle designed to make decorative holes in natural fiber fabric. Use a decorative stitch that goes in and out of the same holes multiple times. 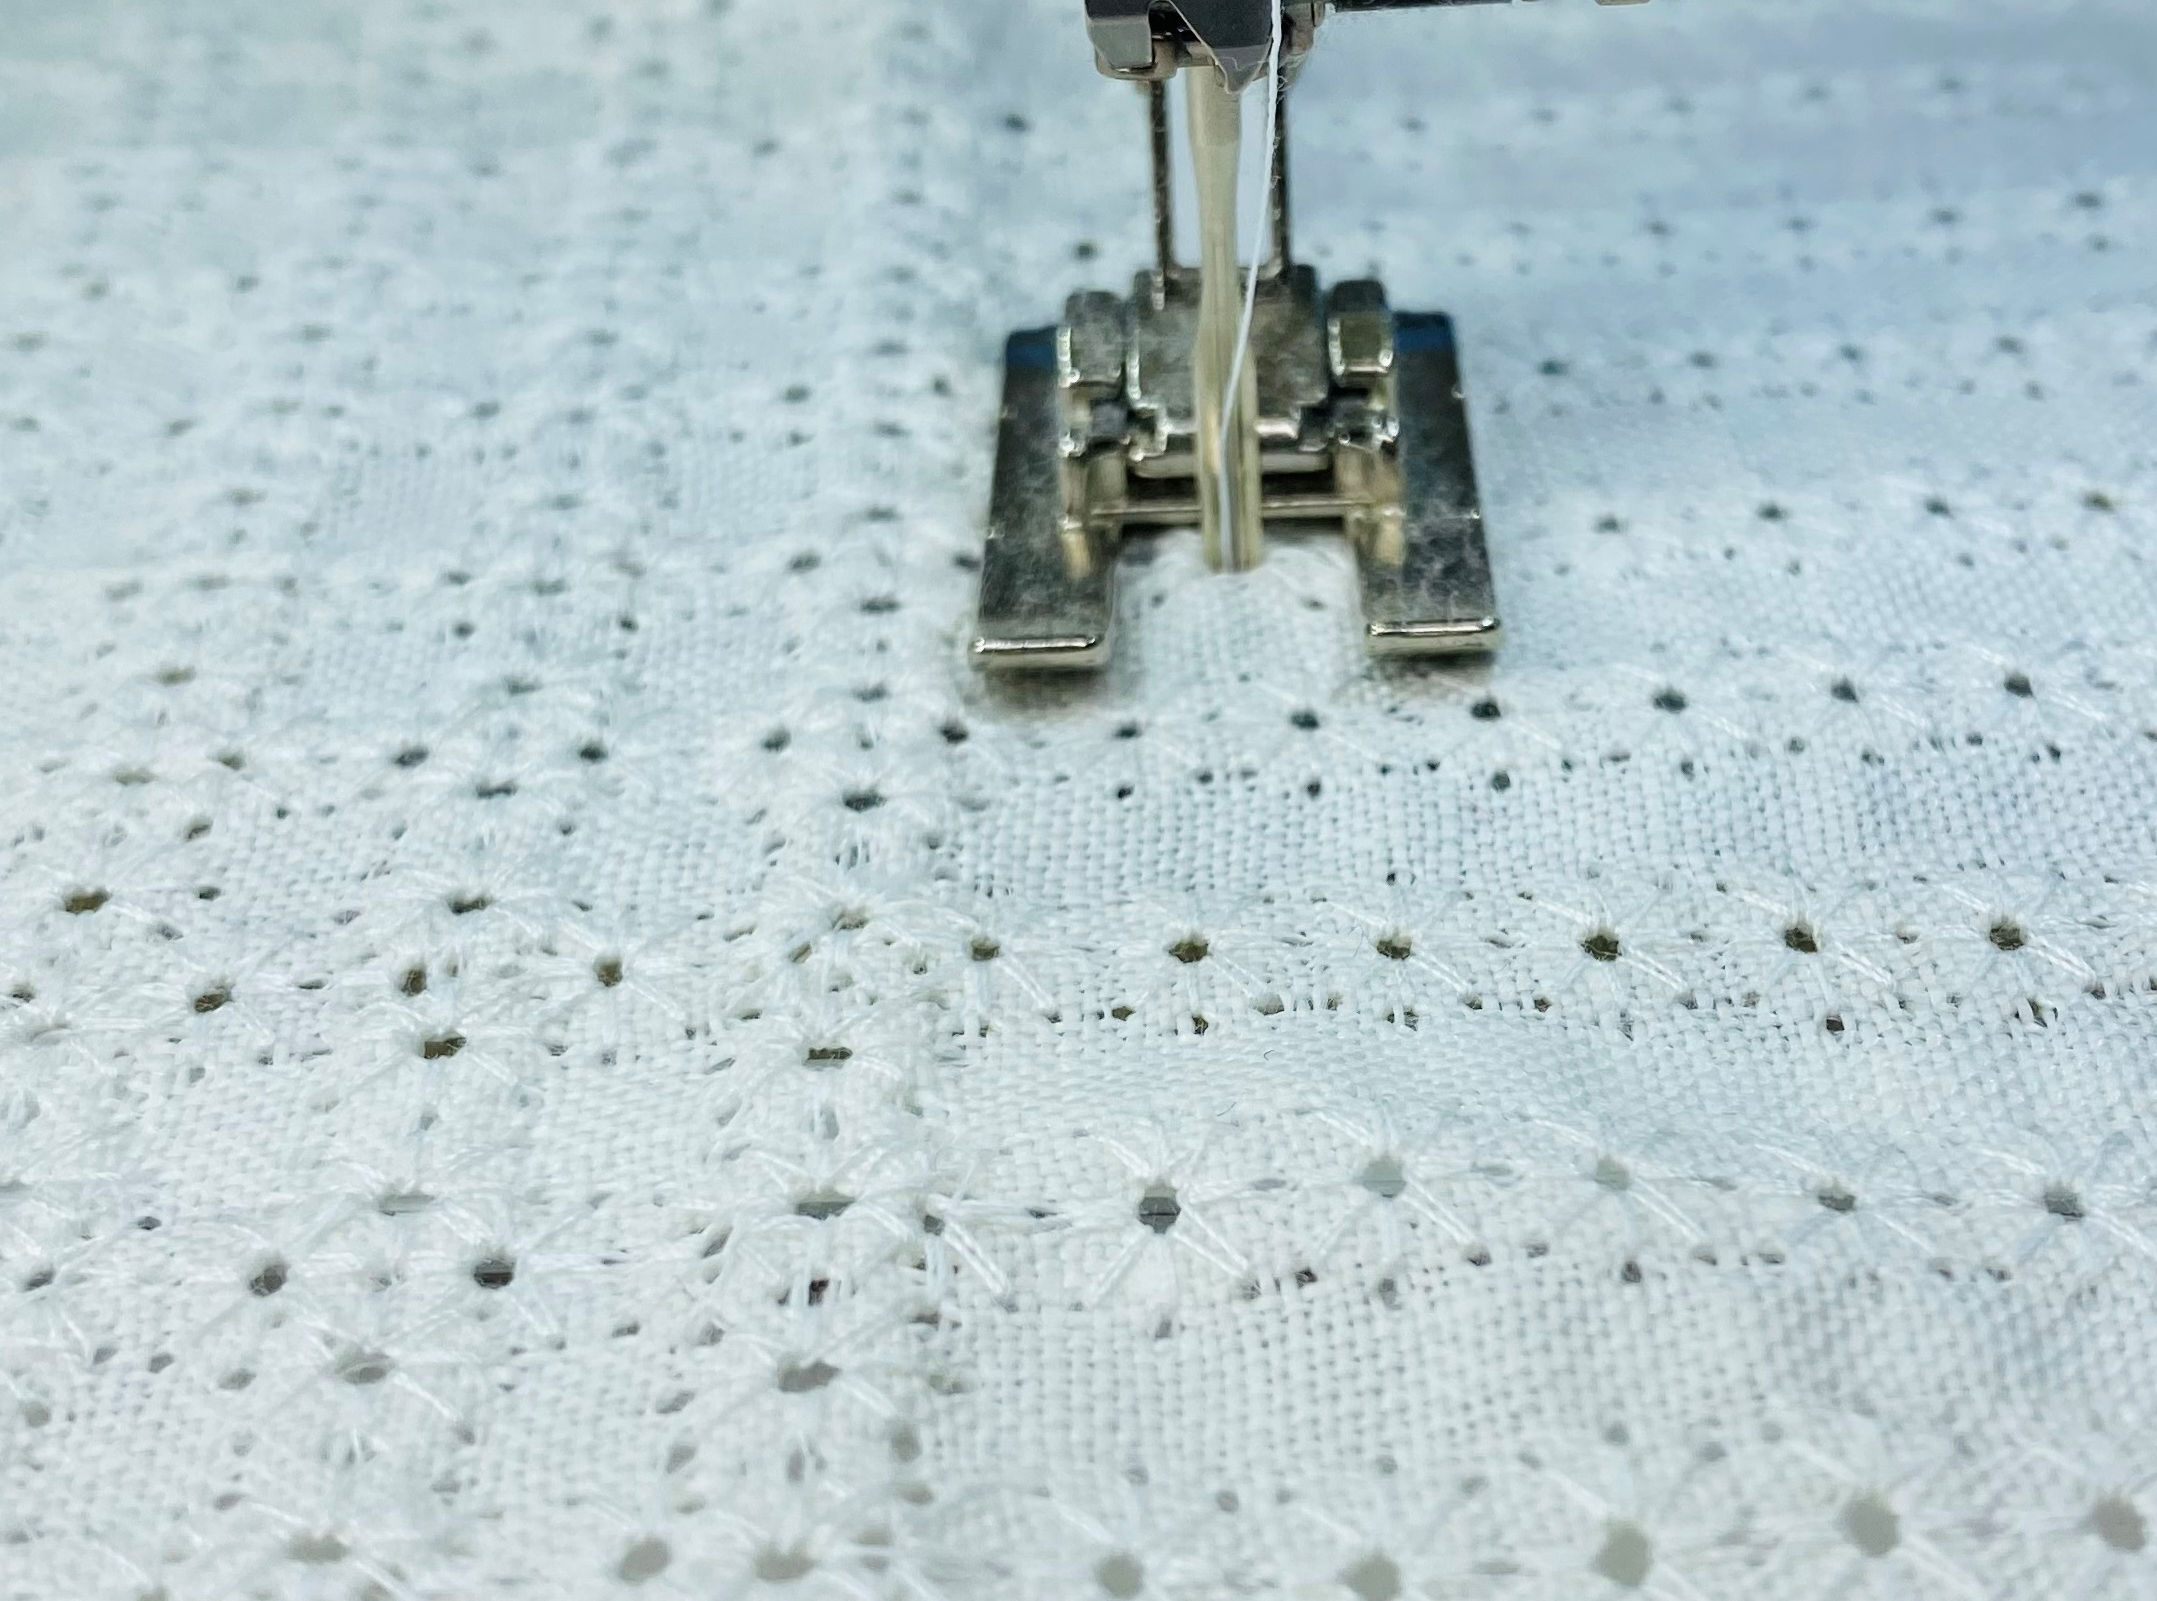
The second technique is felting with the machine. Using a multicolored yarn, I punched it into a piece of wool felt in a random swirl pattern. I added batting behind the wool felt and did the same wonky grid pattern I used on the quilt background. After finishing these two techniques, I trimmed the linen to 5″ x 4″ and the felt to 3″ x 2½”. Stacked together, I edgestitch the felt in place and then stitched the pair to the quilt using a zigzag stitch.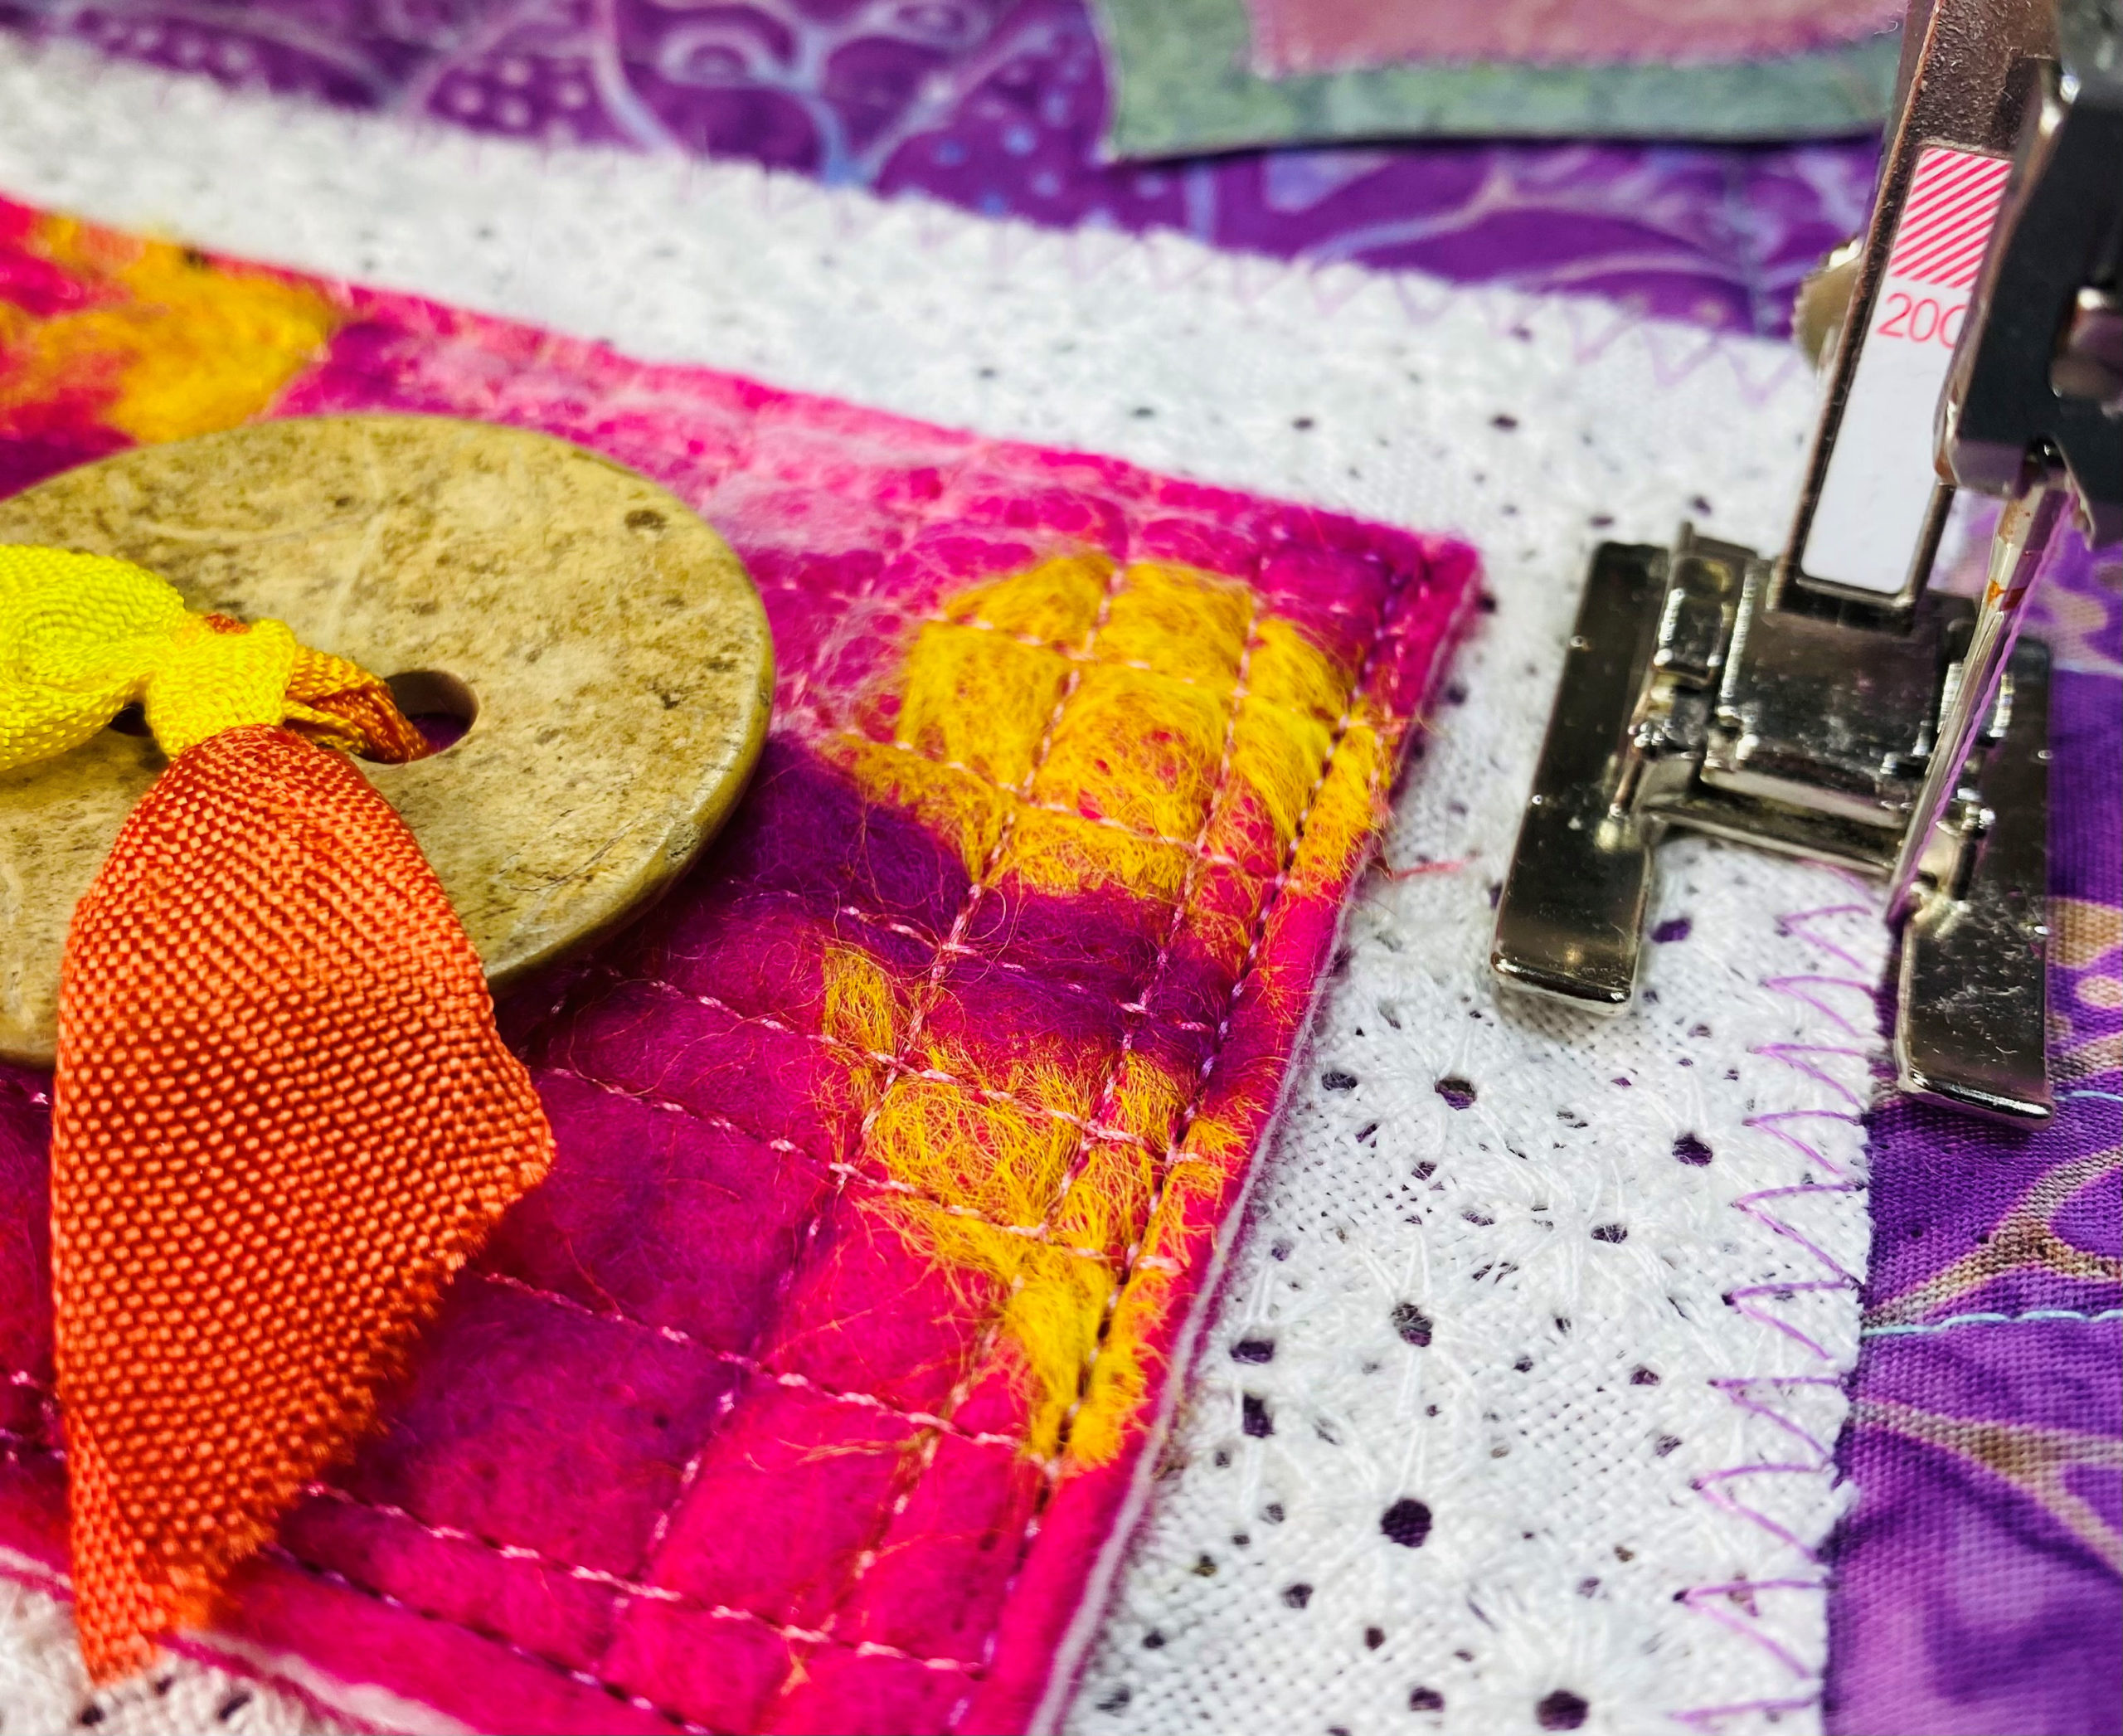
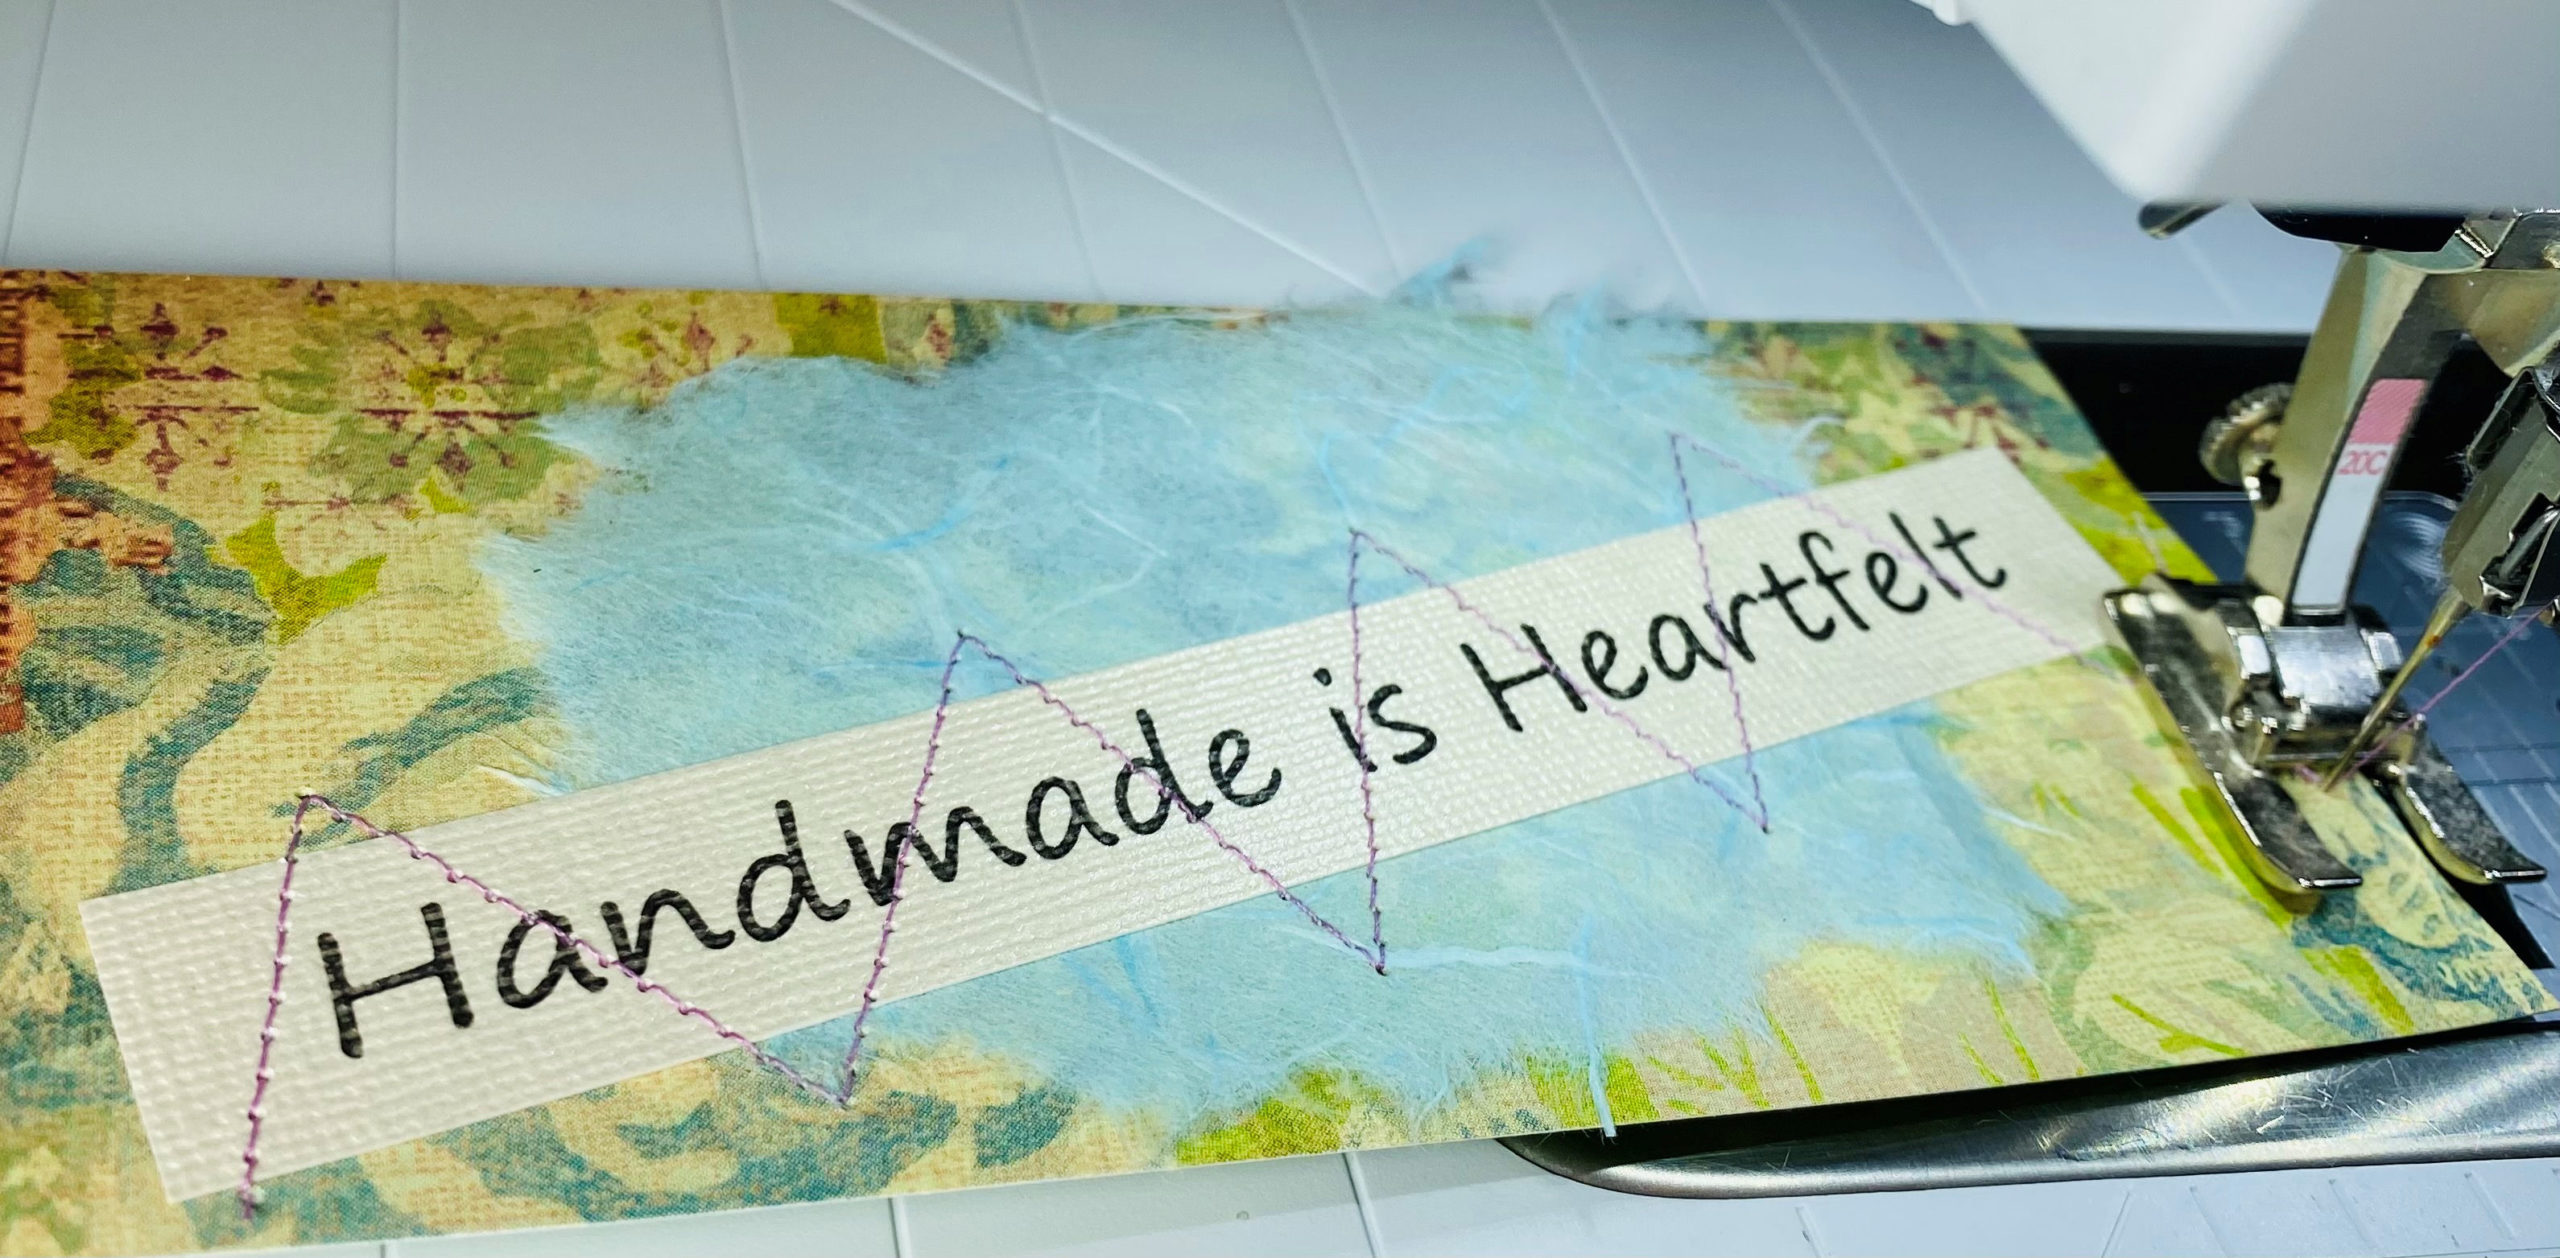
Paper Stitching
Add color and graphic interest to the quilt by using decorative papers and cardstocks. I used an interesting printed cardstock for the base and a lightweight mulberry paper with torn edges in the middle. For the top piece, I used a textured light-colored cardstock so my printed phrase would stand out. I stacked these three papers and stitched over the saying with a straight stitch in a large “zigzag” pattern. Know that sewing paper dulls you needle so be prepared to change your needle when you go back to fabric. Then I placed the stack on the quilt background and used a medium zigzag stitch to sew each end to the quilt.
 Decorative Elements
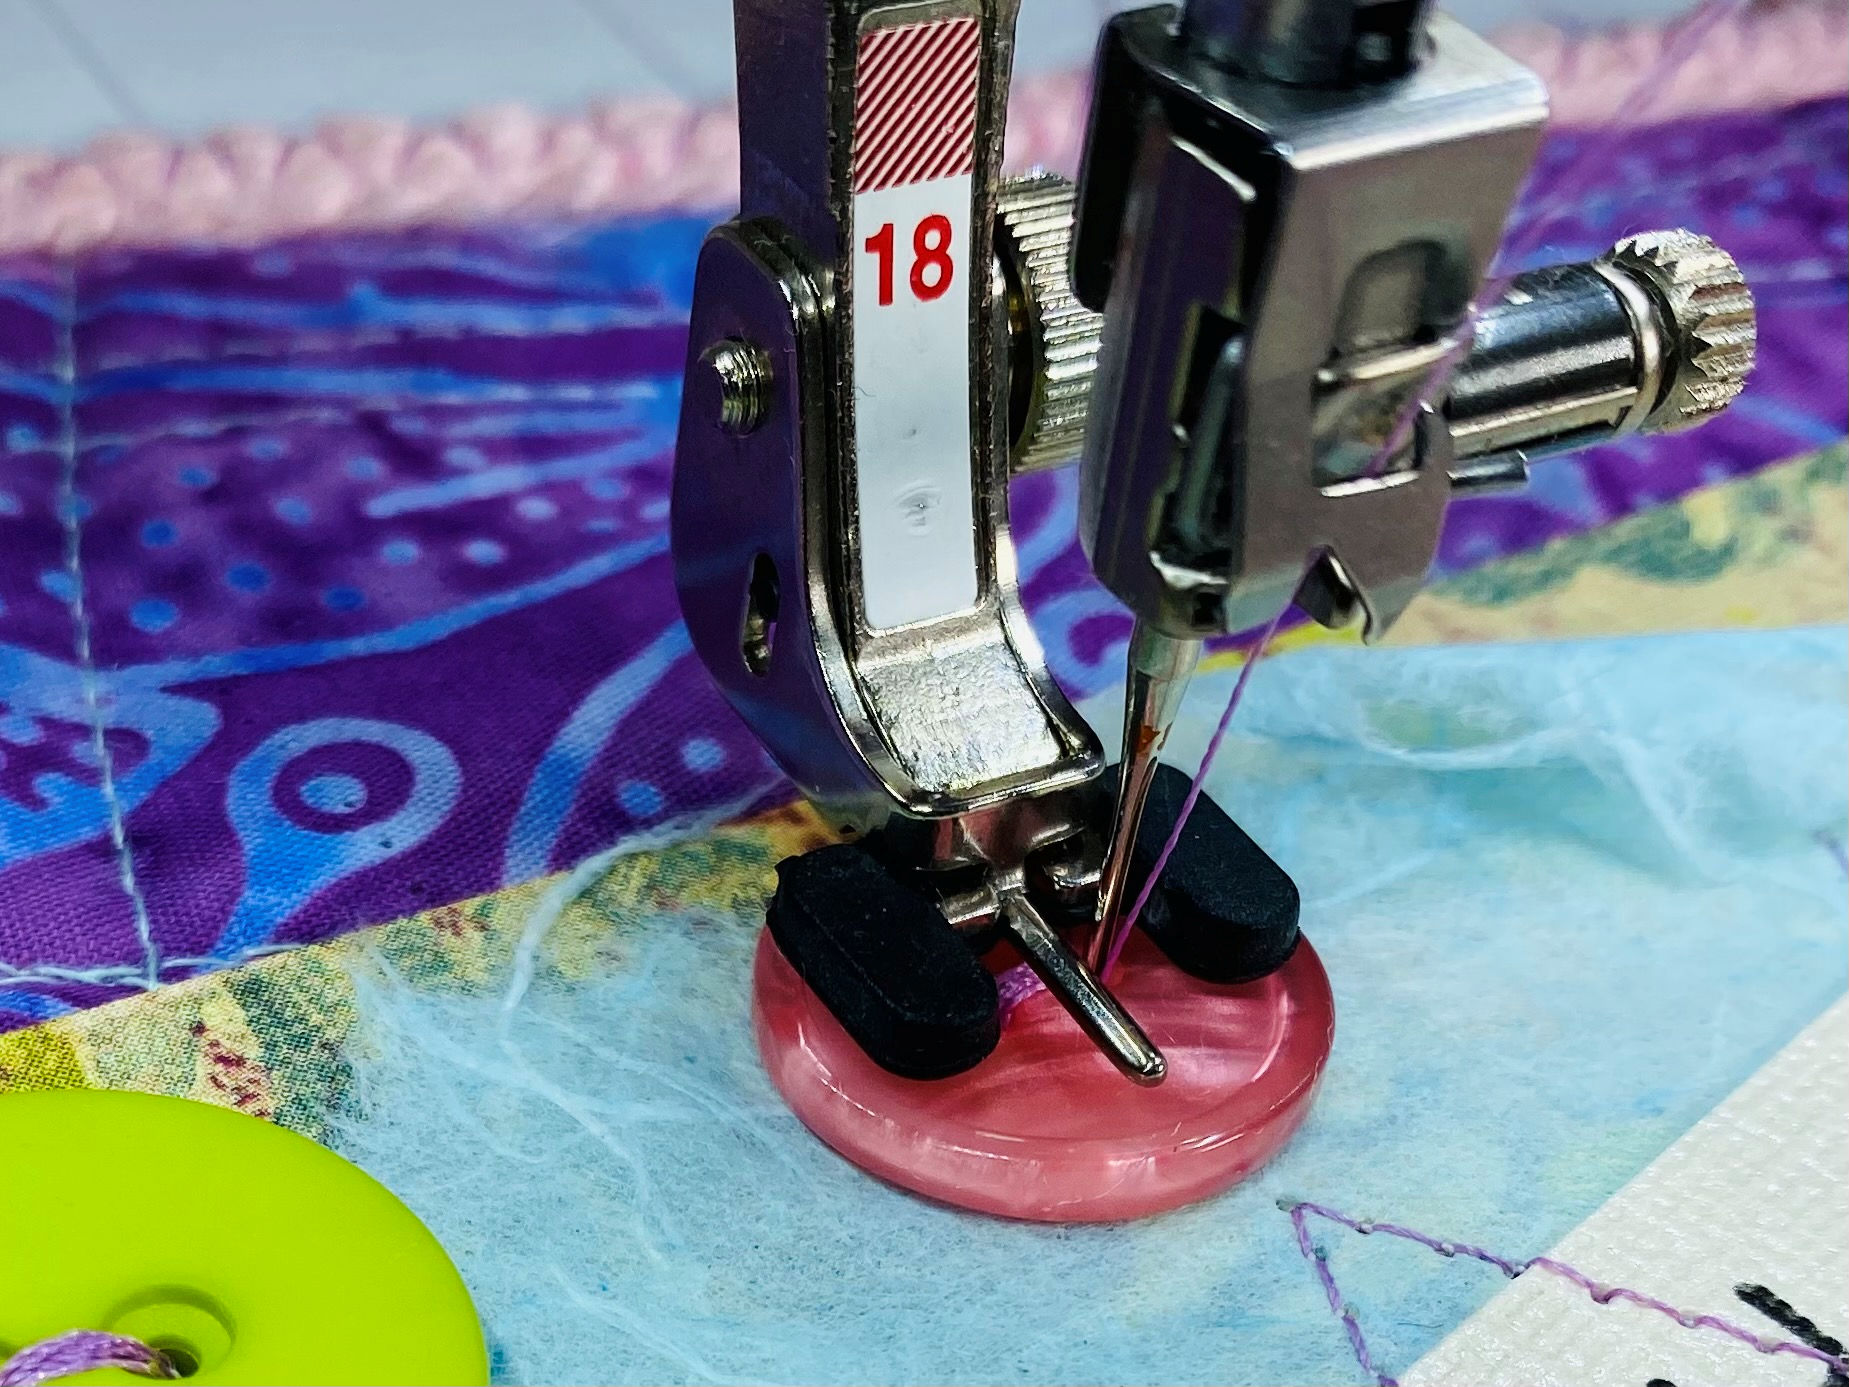
Fun buttons, ribbons, and paper flowers are a few elements I used to “accessorize” the main components of the quilt. These will not be the same as mine but here’s what used: One 1½” 2-hole button with silk ribbon threaded through the holes; three ⅜” buttons for the center of the flowers; three decorative buttons of different sizes, colors, and styles. Use Button Sew-On Foot #18 to make attaching these fast and secure.
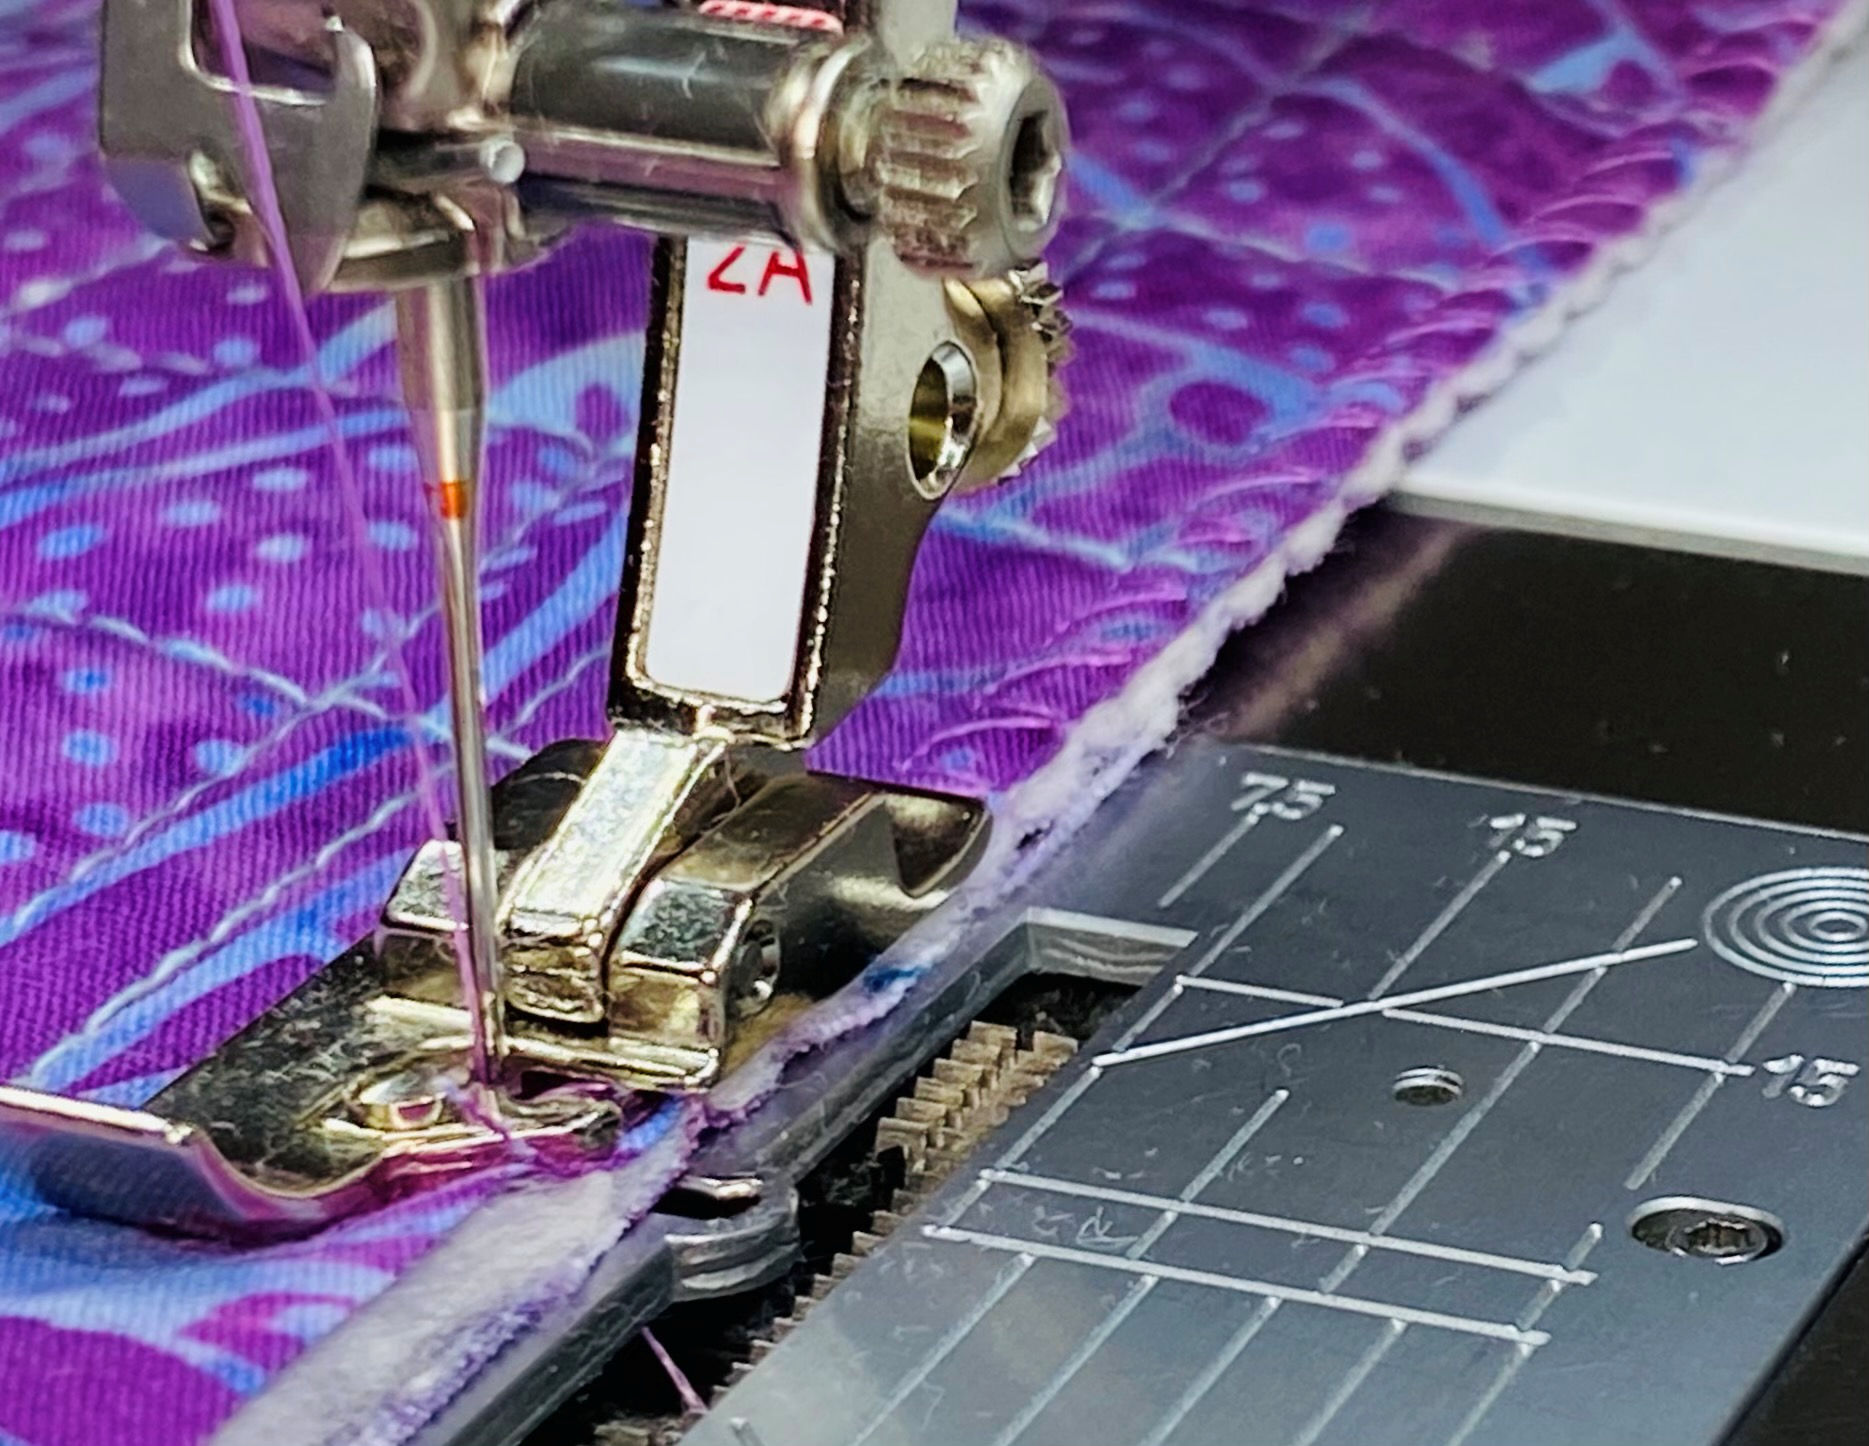
Backing and Edge Finish
After all of the design elements have been secured on the background, place the quilt and the backing wrong sides together. Using Overlock Foot #2/2A, overlock all four edges of the quilt. Align the right edge of the presser foot with the edge of the quilt. This seals the edges, flattening them for the final edge finish.
Couched Edging
Place yarn on top of the overlocked edge of the quilt. I used a small diameter yarn so I took four strands and twisted them together as I stitched. Select the zigzag stitch and adjust the width so it is wide enough to go over the yarn. Using the Bulky Overlock Foot #12/12C, zigzag over the yarn overlapping the starting and ending points.

I hope this inspires you to make your own mini art quilt. Follow my directions or use it as a springboard to create your own unique quilt. I’d love to see what you create! 
