
This tutorial features my latest MAQ (mini art quilt) and I loved sewing it for two reasons. One, I’m using fabric and materials that I really like and two, I challenged myself to make it without buying anything! Everything I used is from my stash of fabrics, buttons, trinkets, cardstock, etc. If I make about a thousand more doing this, I just might make a dent in my supplies! Below a list of supplies I used. Yours will be slightly different than mine but that’s what makes these little quilts unique.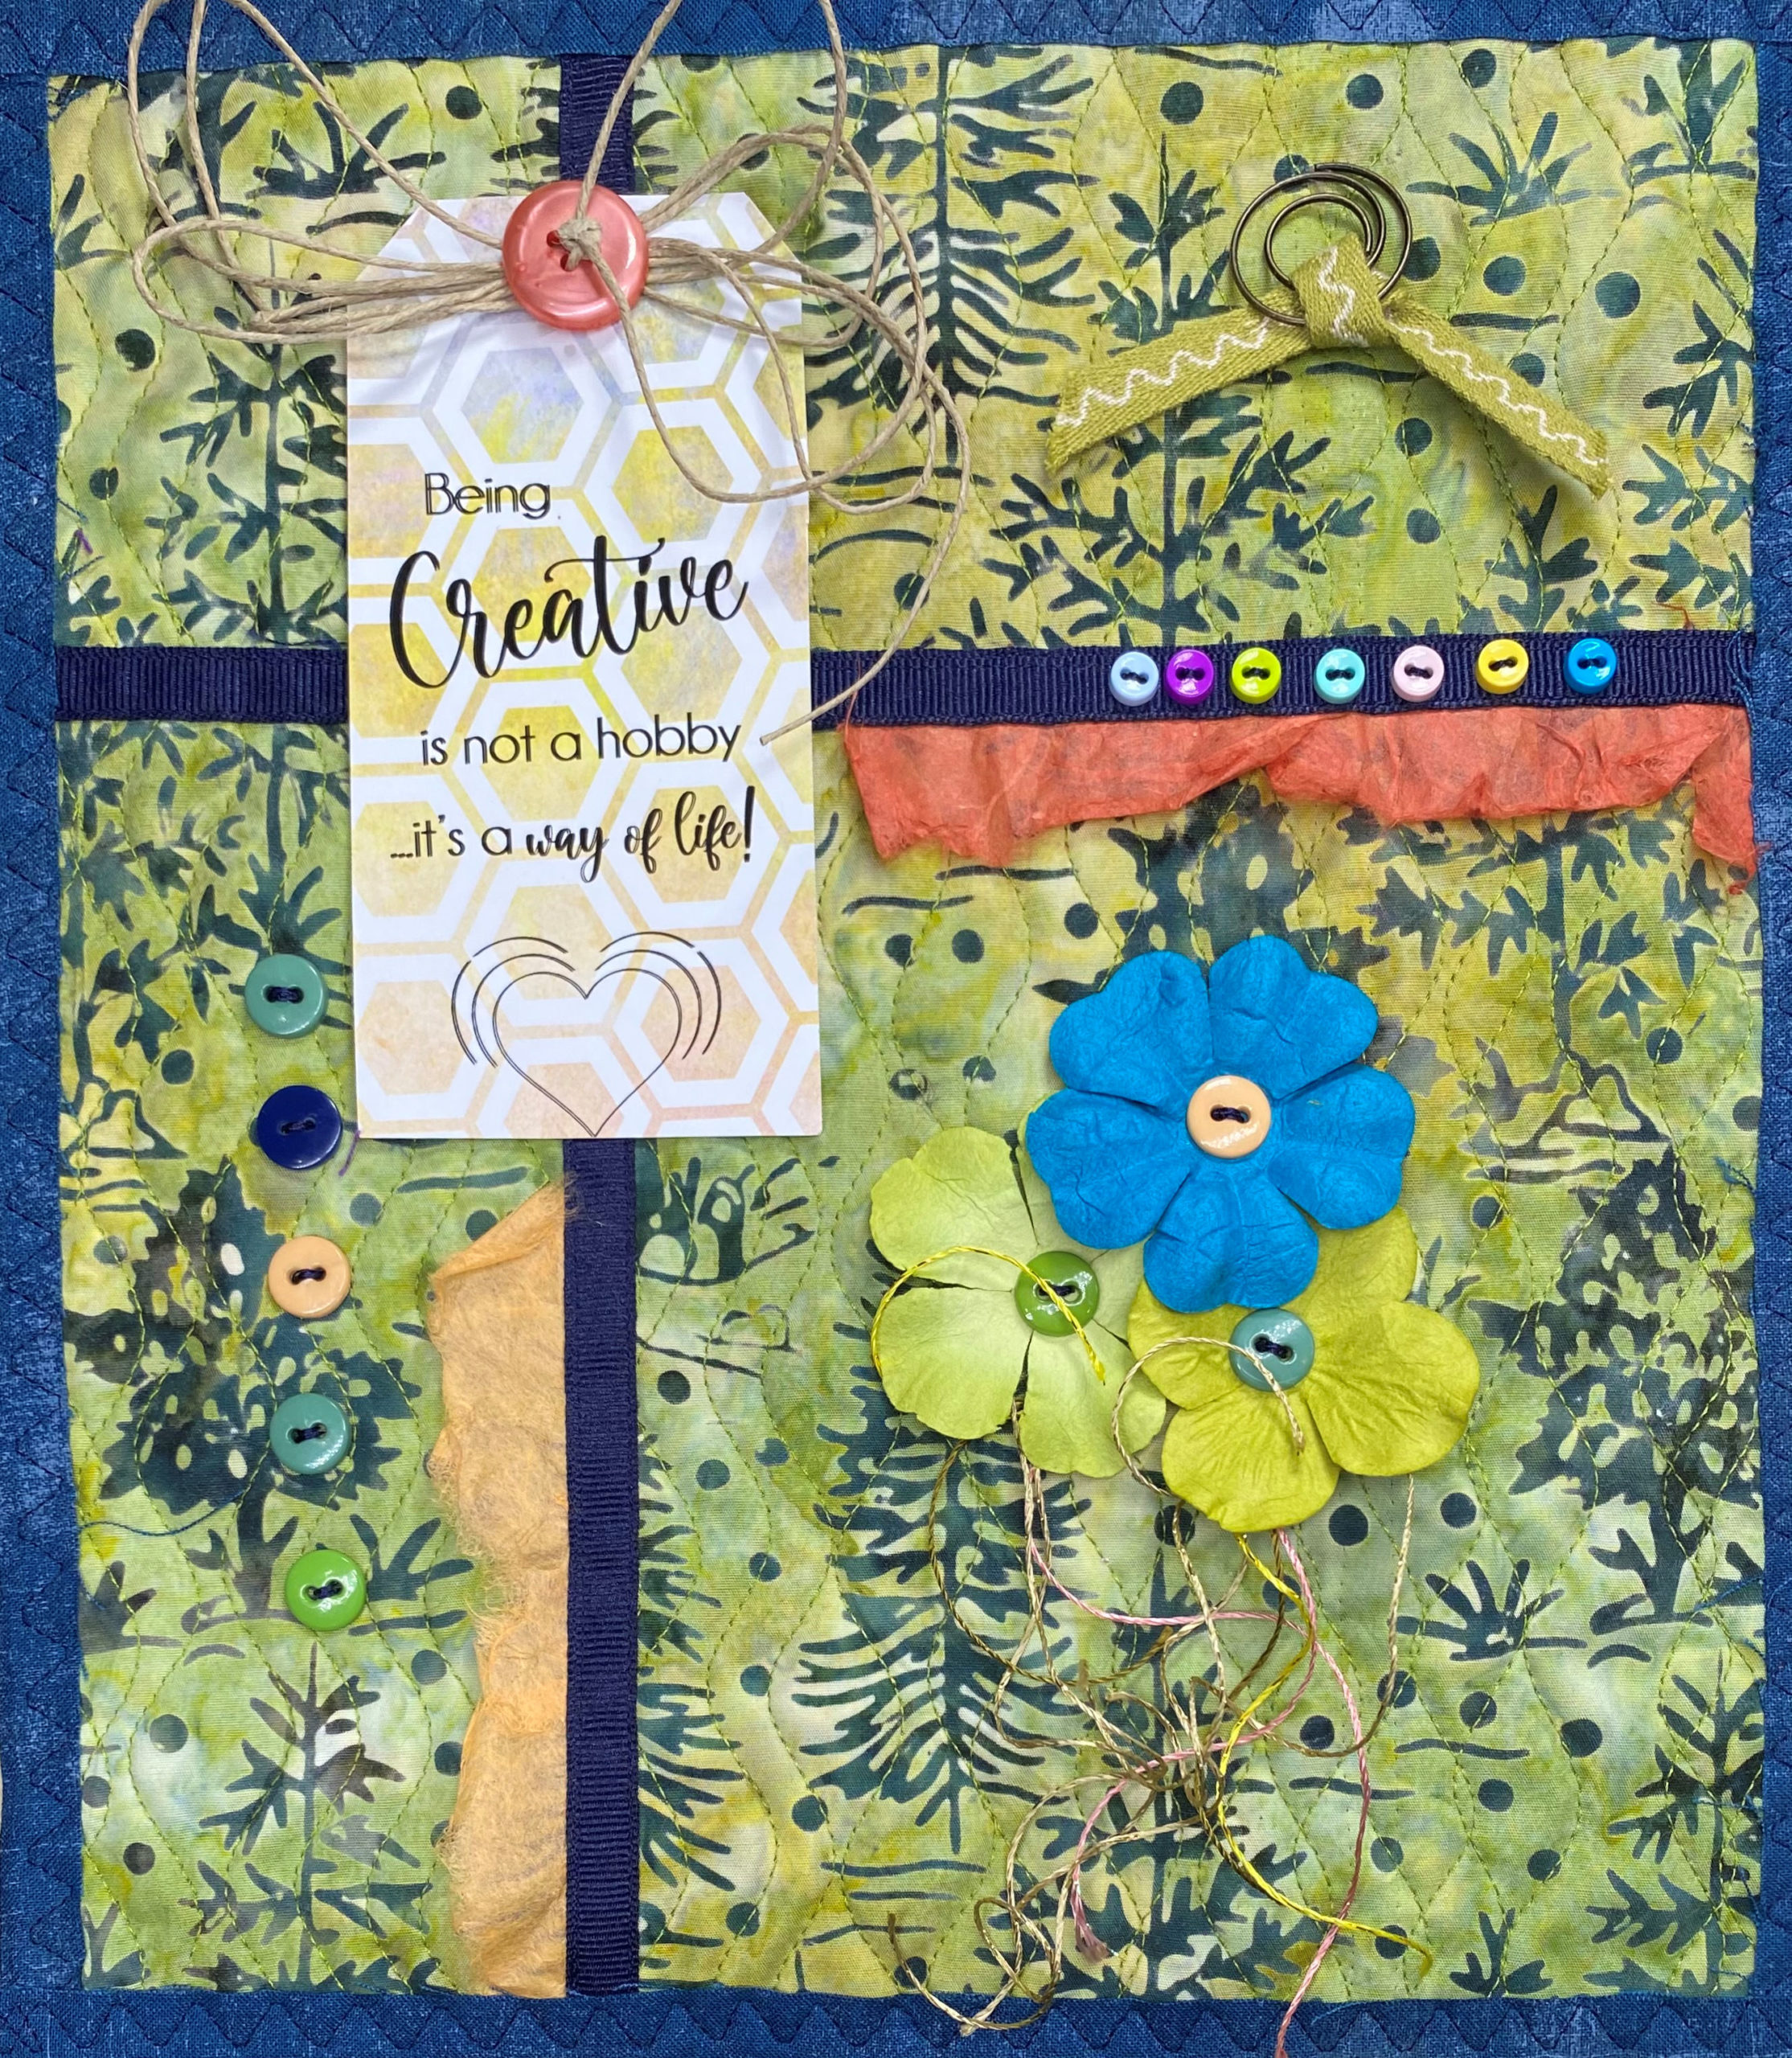
Supplies
- Quilt Fabric, Batting, and Backing, 12″ x 13″ each
- Two strips of binding, 1” x 12”
- Two strips of binding, 1” x 10”
- Two pieces of ⅜” wide grosgrain ribbon, 12” and 10” long
- Two strips of torn Mulberry paper, each one about ¾” x 8”
- Assorted buttons as desired. I used 7 mini buttons and eight ⅜” buttons
- One sheet of decorative cardstock, 8 ½” x 11”
- One ¾” decorative button
- About 30” of narrow paper twine, ribbon, or trim
- 10-12 strands of decorative thread, about 12” long
- About 30” of narrow paper twine, ribbon, or trim
- Three paper or silk flowers
- One charm, trinket, piece of jewelry etc.
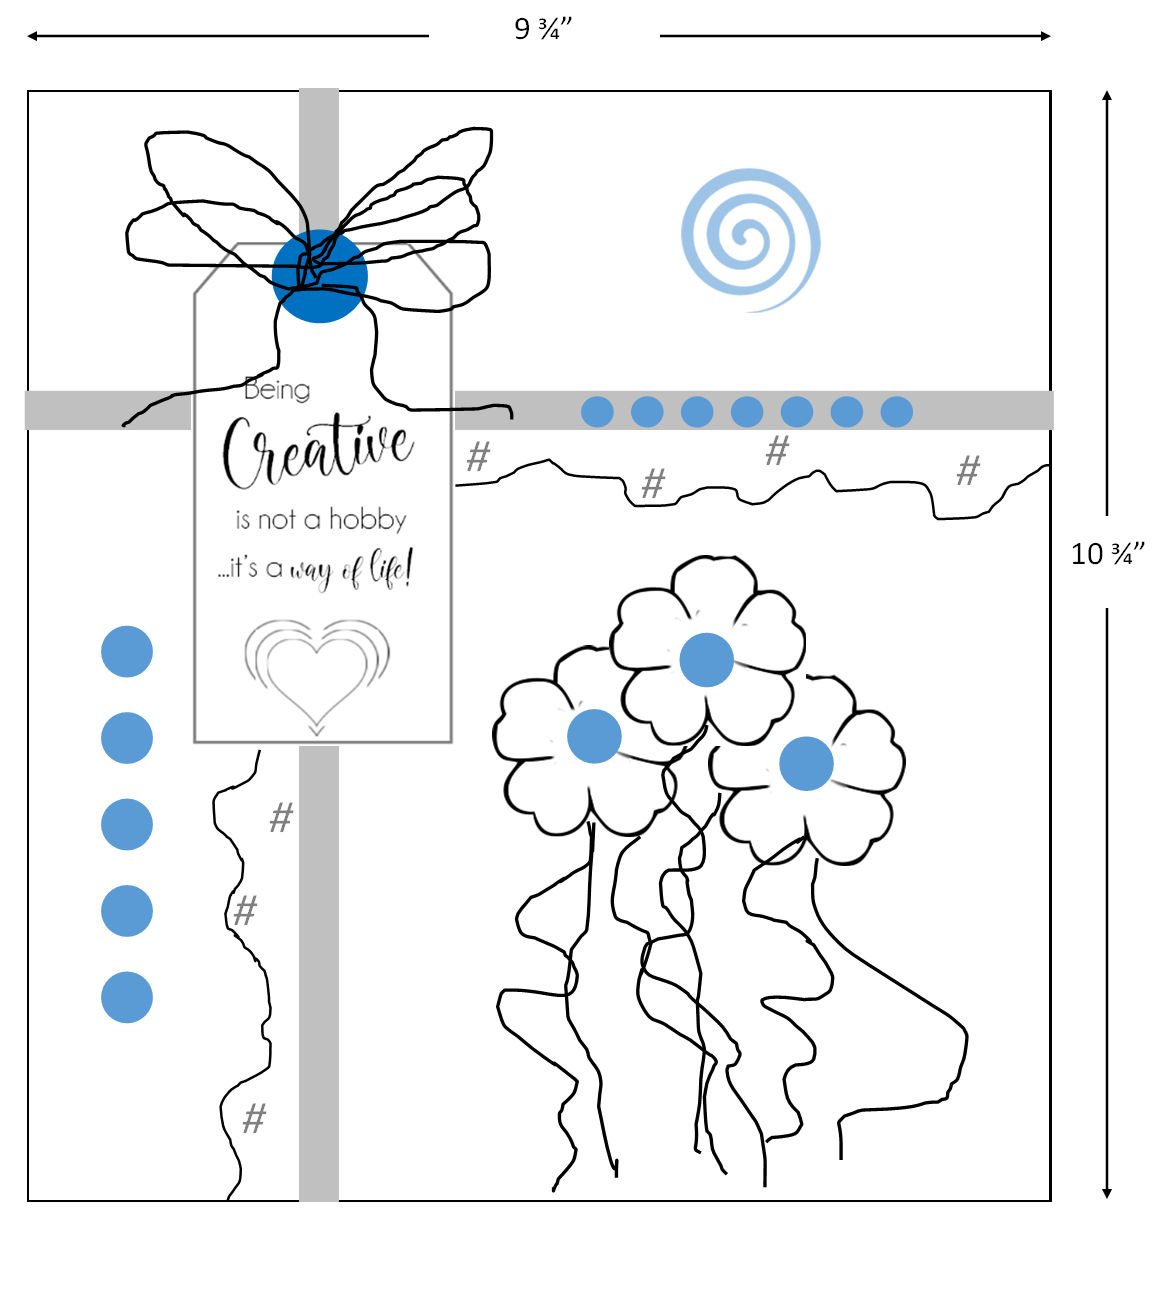
Below is a diagram of the quilt I made – sometimes it’s hard to see the details in a photo. You don’t have to be precise about any of the measurements and placements but the diagram gives you an idea of how I put my quilt together. The main thing you want to do is make something that looks good to you.
Quilted Background
I started with one piece of fabric, about 12” x 14”. Place a piece of batting behind it and quilt the two layers together. I did some simple quilting using a curvy line straight stitch. Click here to see a post I wrote for WeAllSew.com about curvy line quilting. You can stitch these curvy straight stitches in any way you want. I stitched them vertically with random spacing, creating texture on the surface of the fabric. The presser foot I used was an open embroidery foot to see exactly where the needle was stitching. When it was fully quilted, I trimmed the fabric to 9 ¾” ” x 10 ¾”.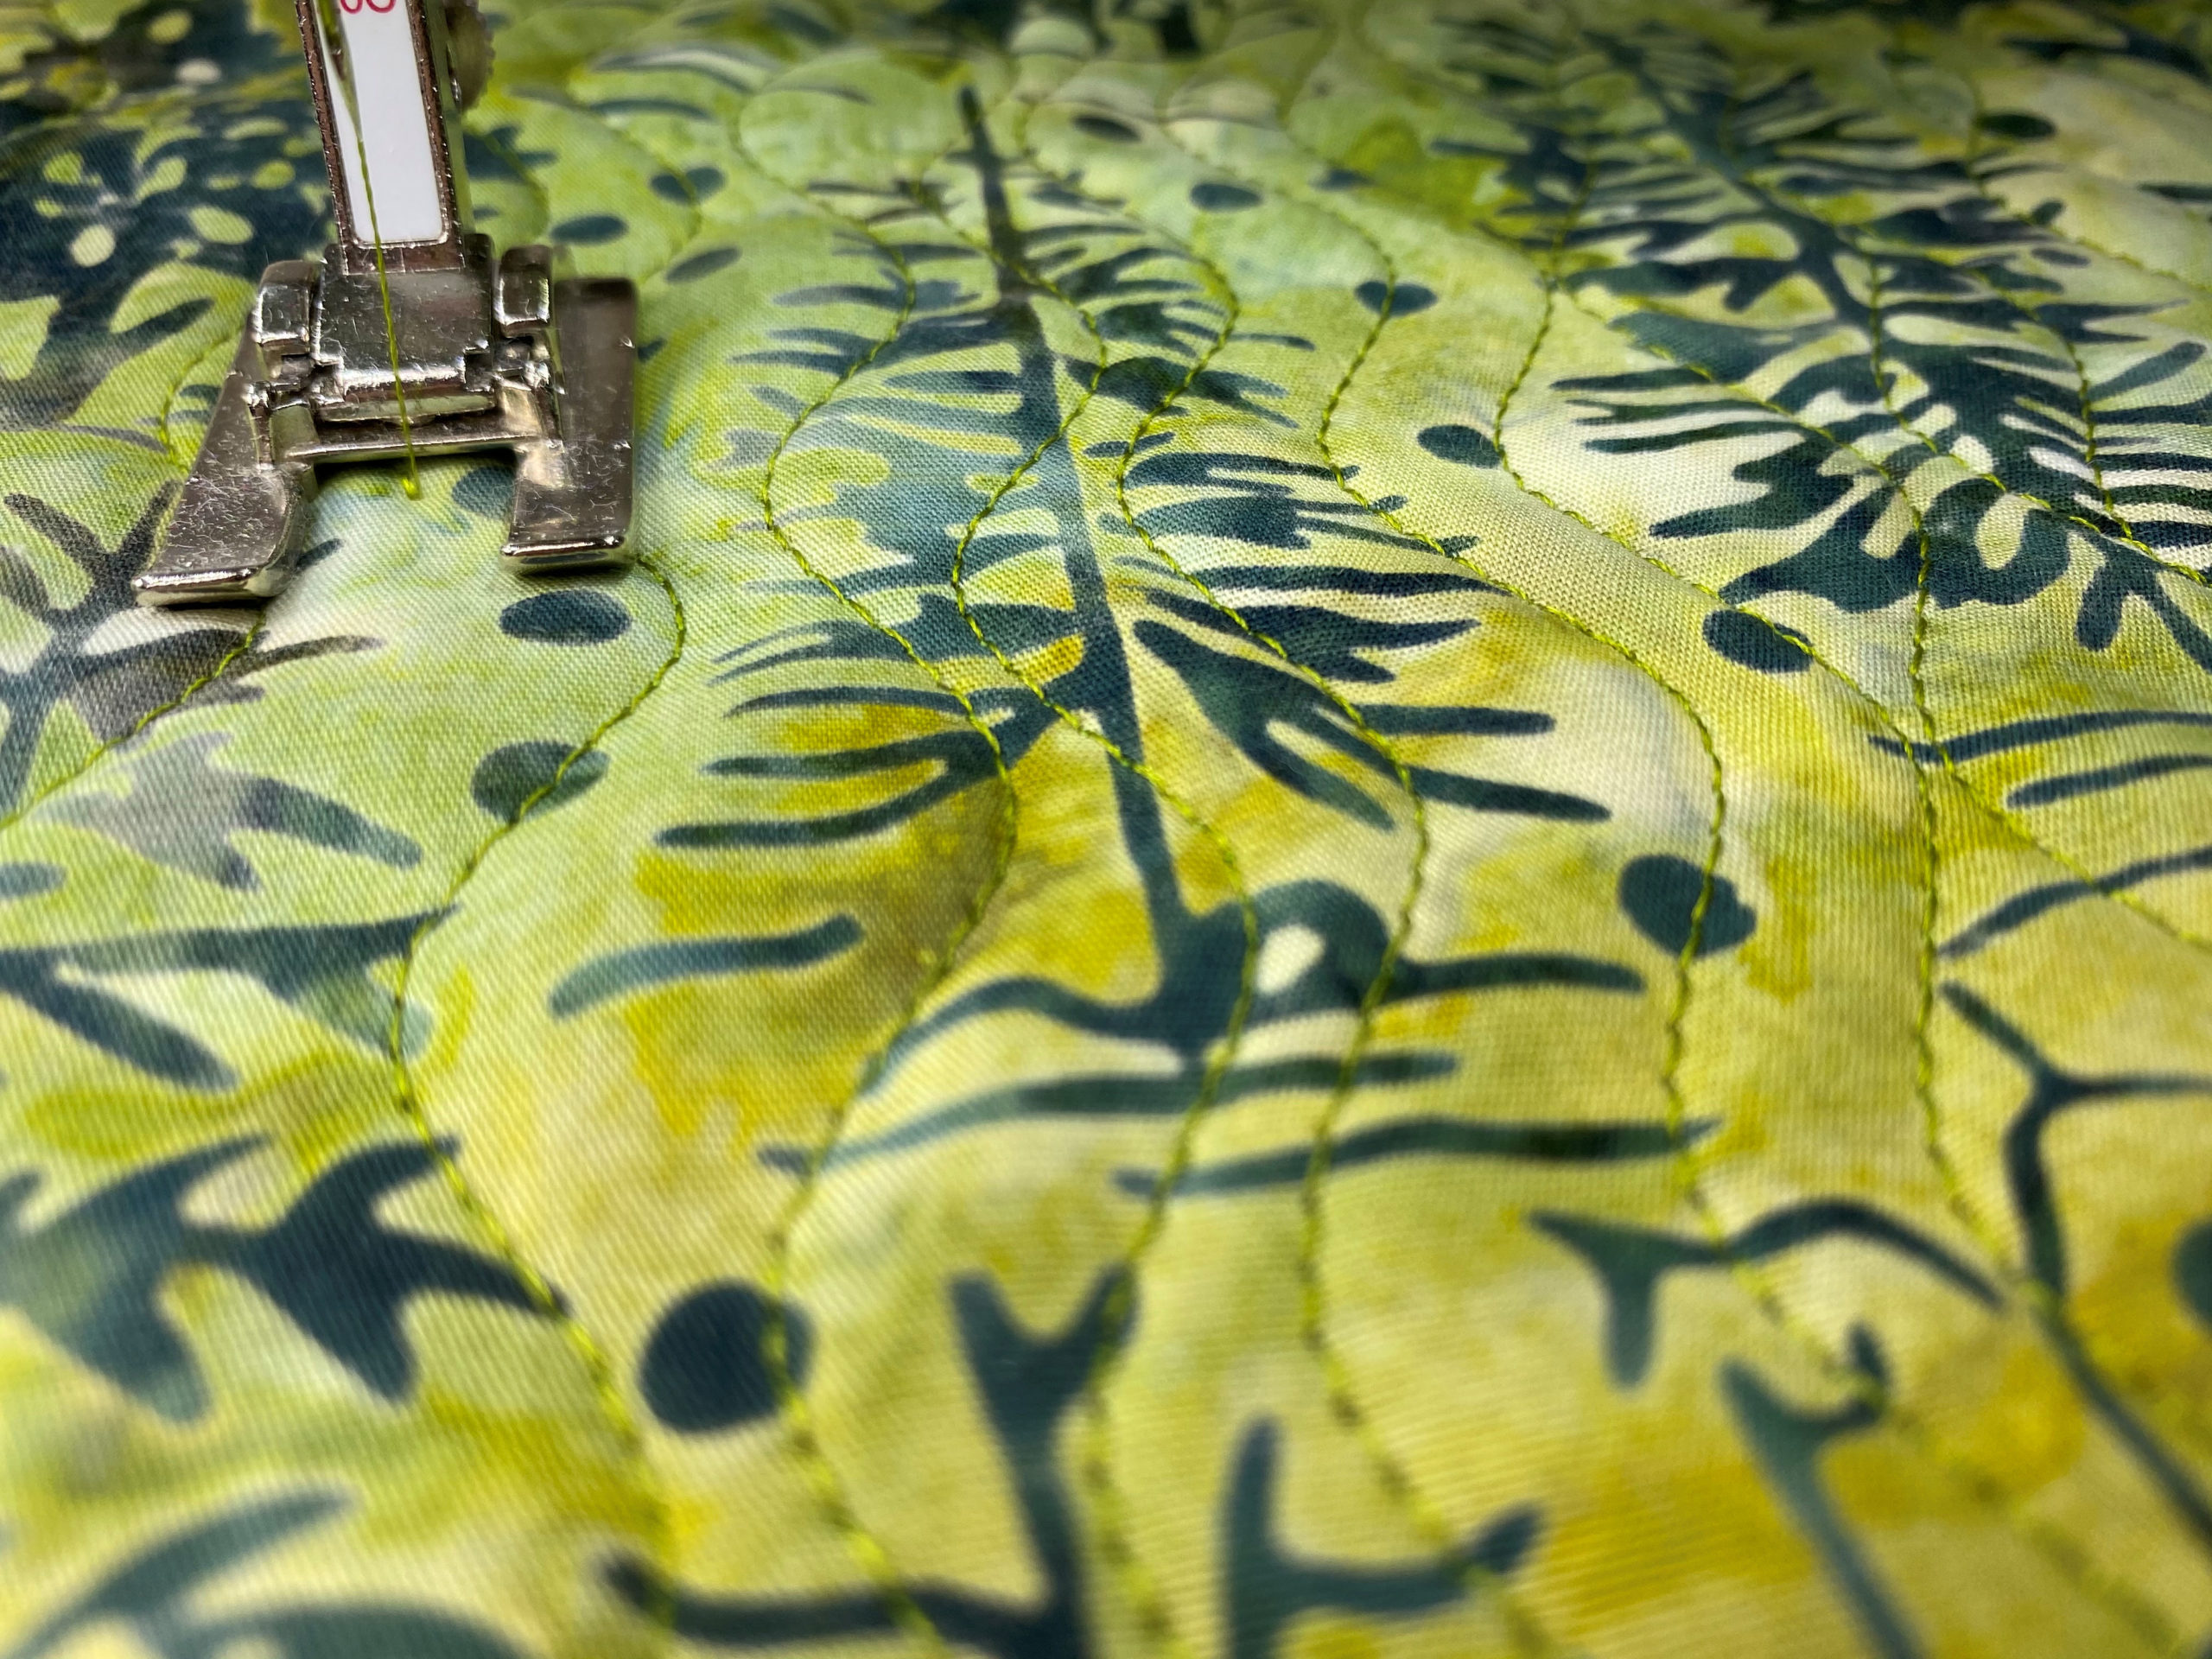
Ribbon Separations
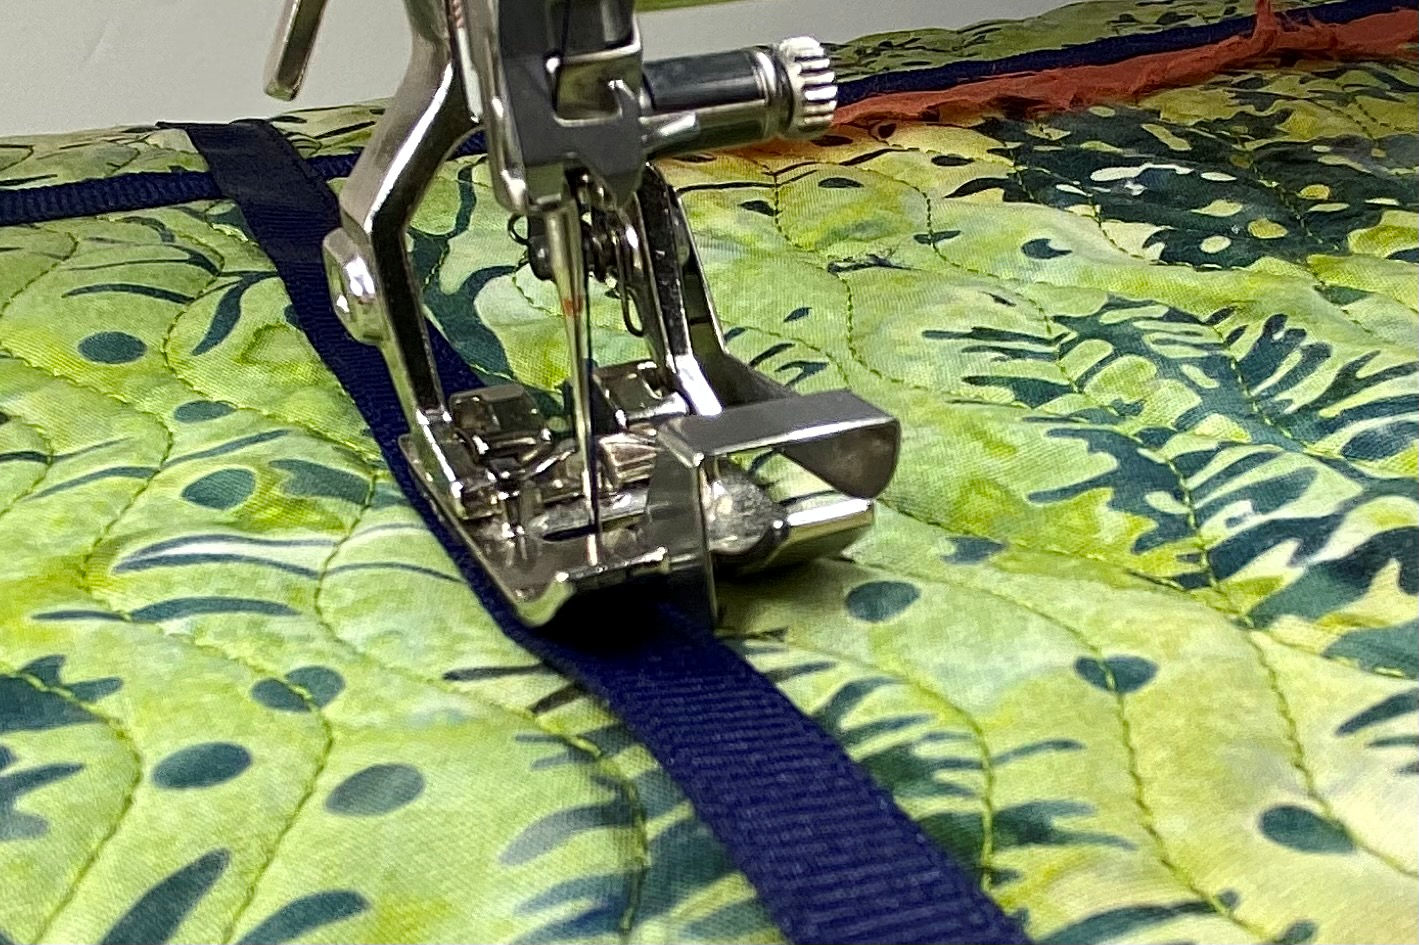
Narrow ribbon in a strong contrasting color gives a little structure to the design of your quilt. The ribbon separates the single piece of fabric into “compartments”, giving you some direction for placing the embellishments that give your quilt character. I stitched the ribbon in place using an edgestitch foot and an adjusted needle position. For a bit of color and texture, I tore strips of mulberry paper and slipped it under the edge of the ribbon before I edge stitched it. If you wet the paper before you tear it, you will get more texture as you pull the paper apart. An easy way to do this is to dip a paint brush in water and draw a line, straight or curved, where you want to tear it.
Decorative Buttons
Use a Button Sew-on Foot to add decorative buttons where you want to add color and texture. I put mini buttons on the ribbon sashing and other buttons vertically next to the left edge of the tag.
Paper Flowers and Decorative Thread
I love Wonderfil threads. They have great threads, some with added sparkle that give just a hint of glamour to your art quilts. For this quilt, I used them to add texture below the flowers. Take 10-12 strands together and bartack the center to the quilt where you want to place the flowers. Position the flowers over the bar tacked area, letting the threads hang loose below the flowers. Secure the flowers by stitching a button in the center of each one.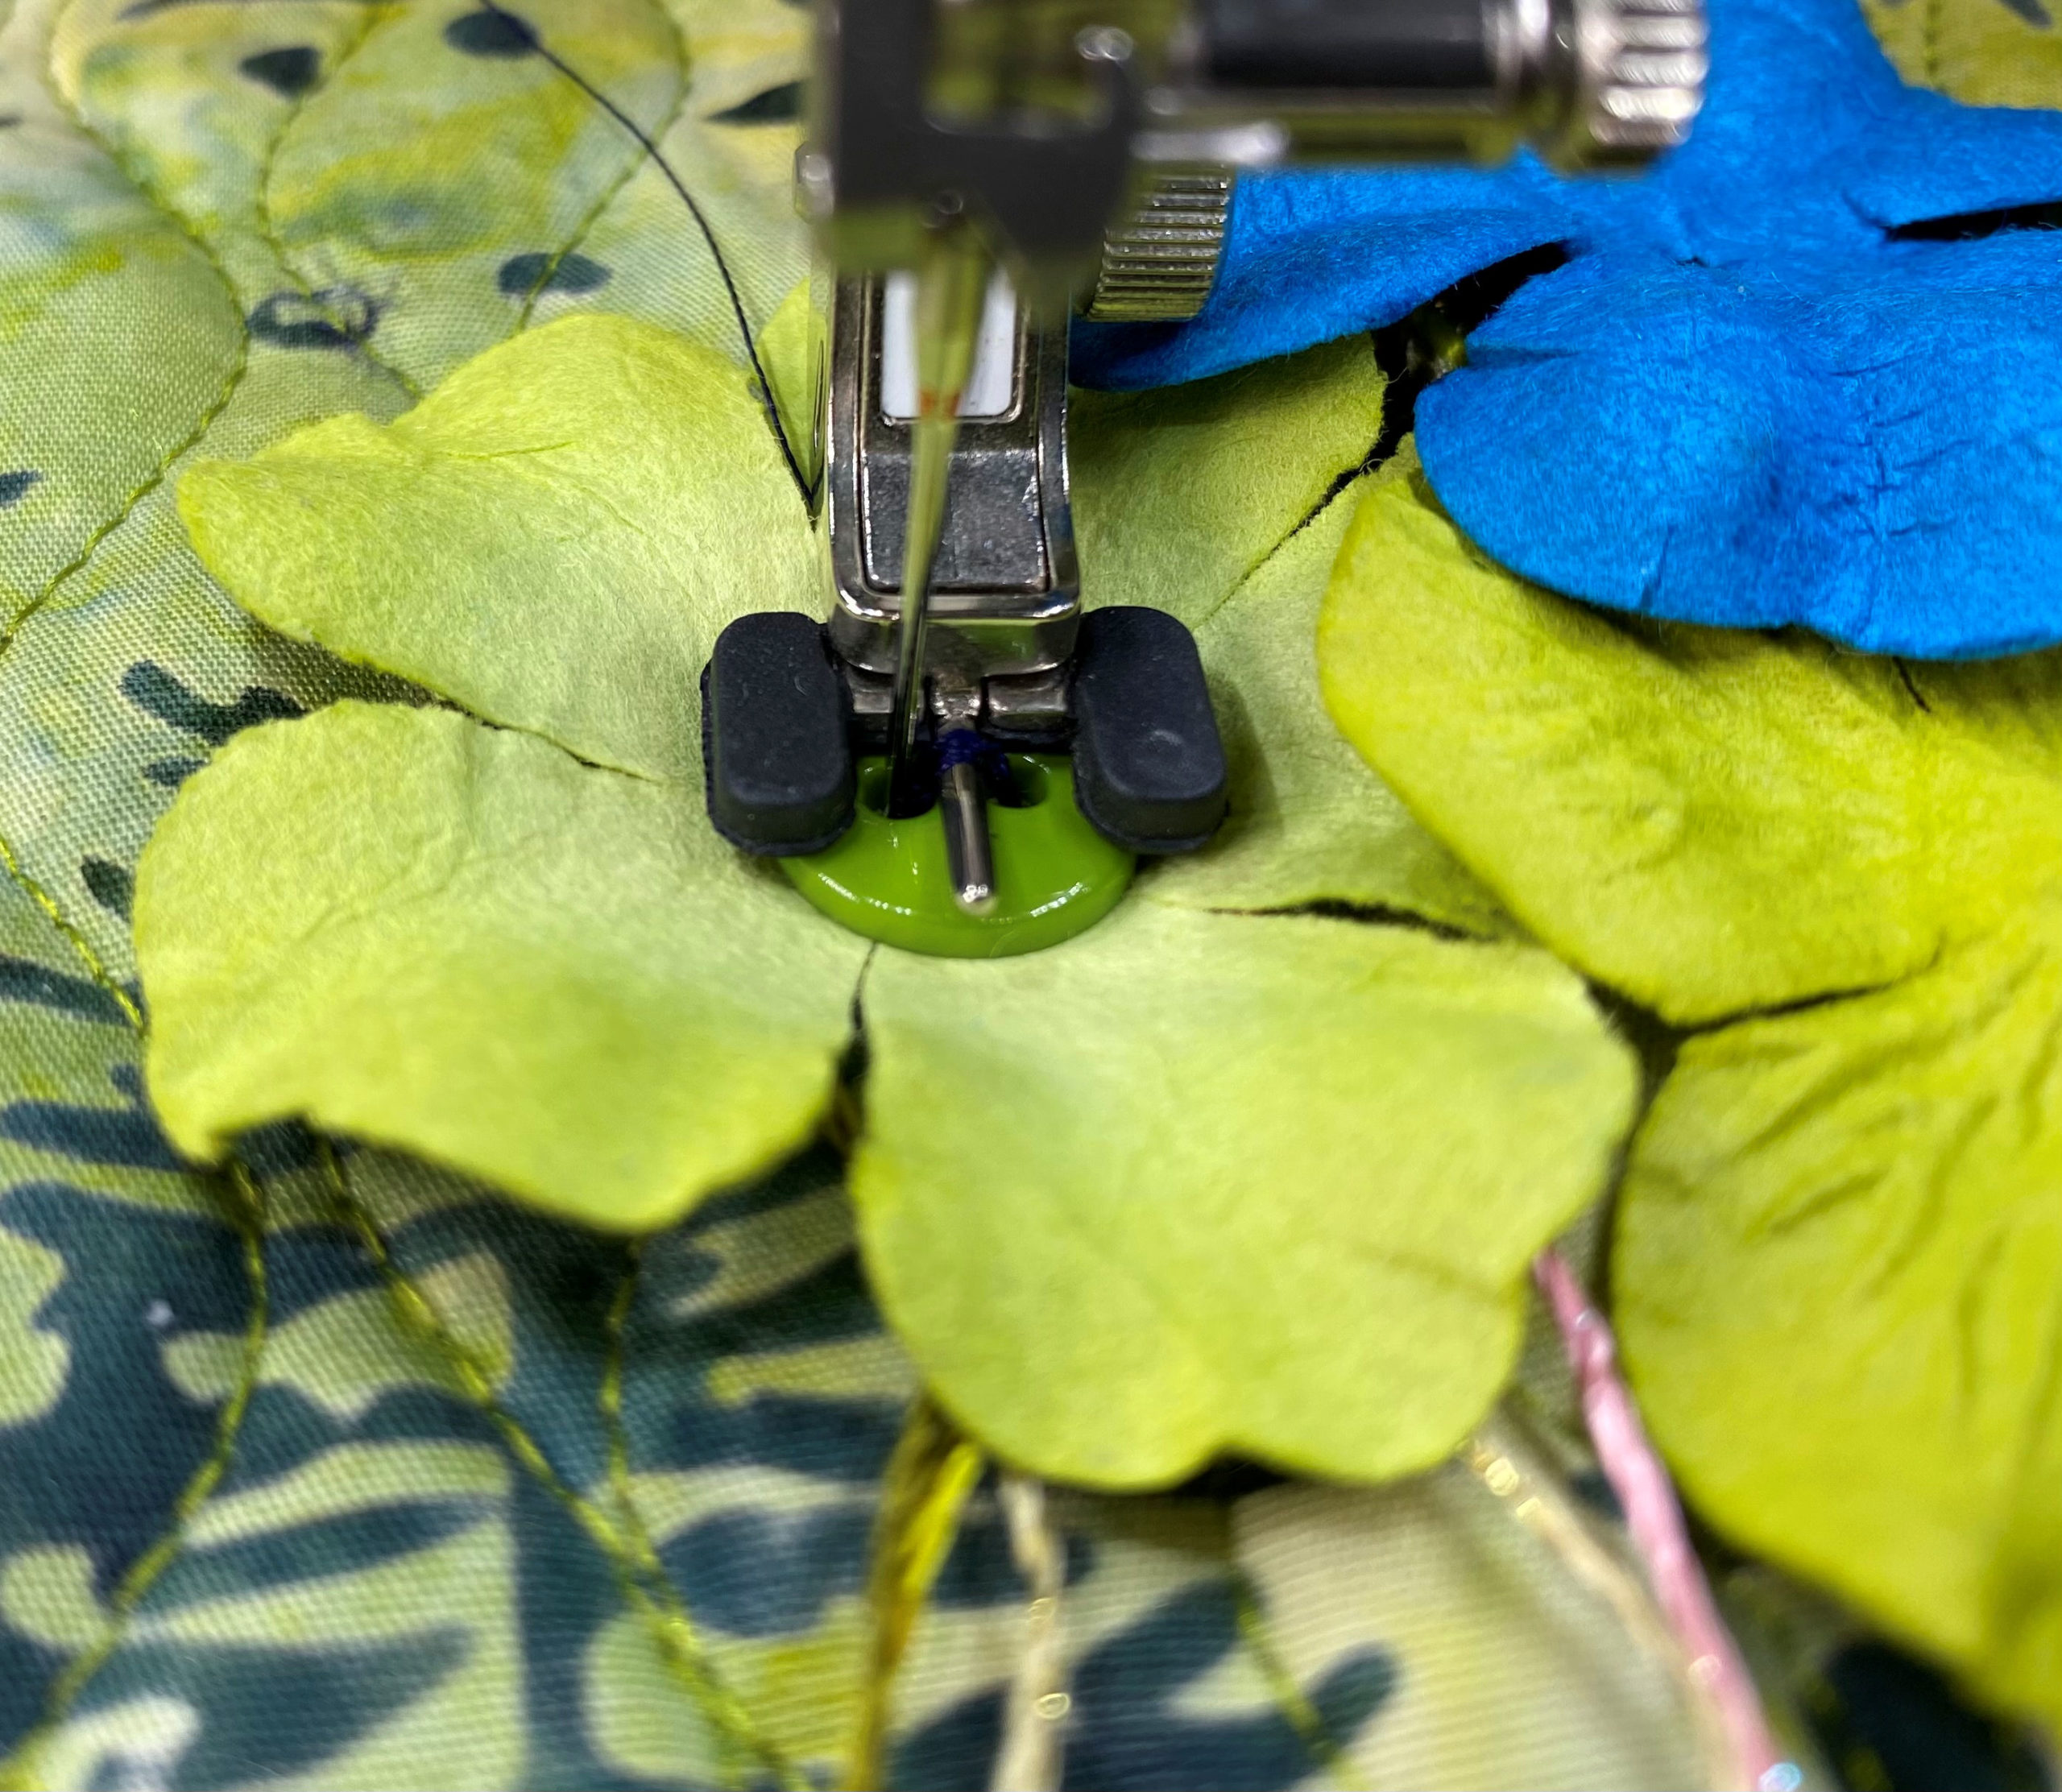
Trinket with Ribbon
In the upper right area of the quilt, I have a little metal spiral that is actually a paper clip! I tied a short piece of decorative twill tape that is the same color green as the quilt fabric. Look around and see if you have something that will work here. A odd piece of jewelry, an old key or some other charm or trinket could be the perfect embellishment for this quilt.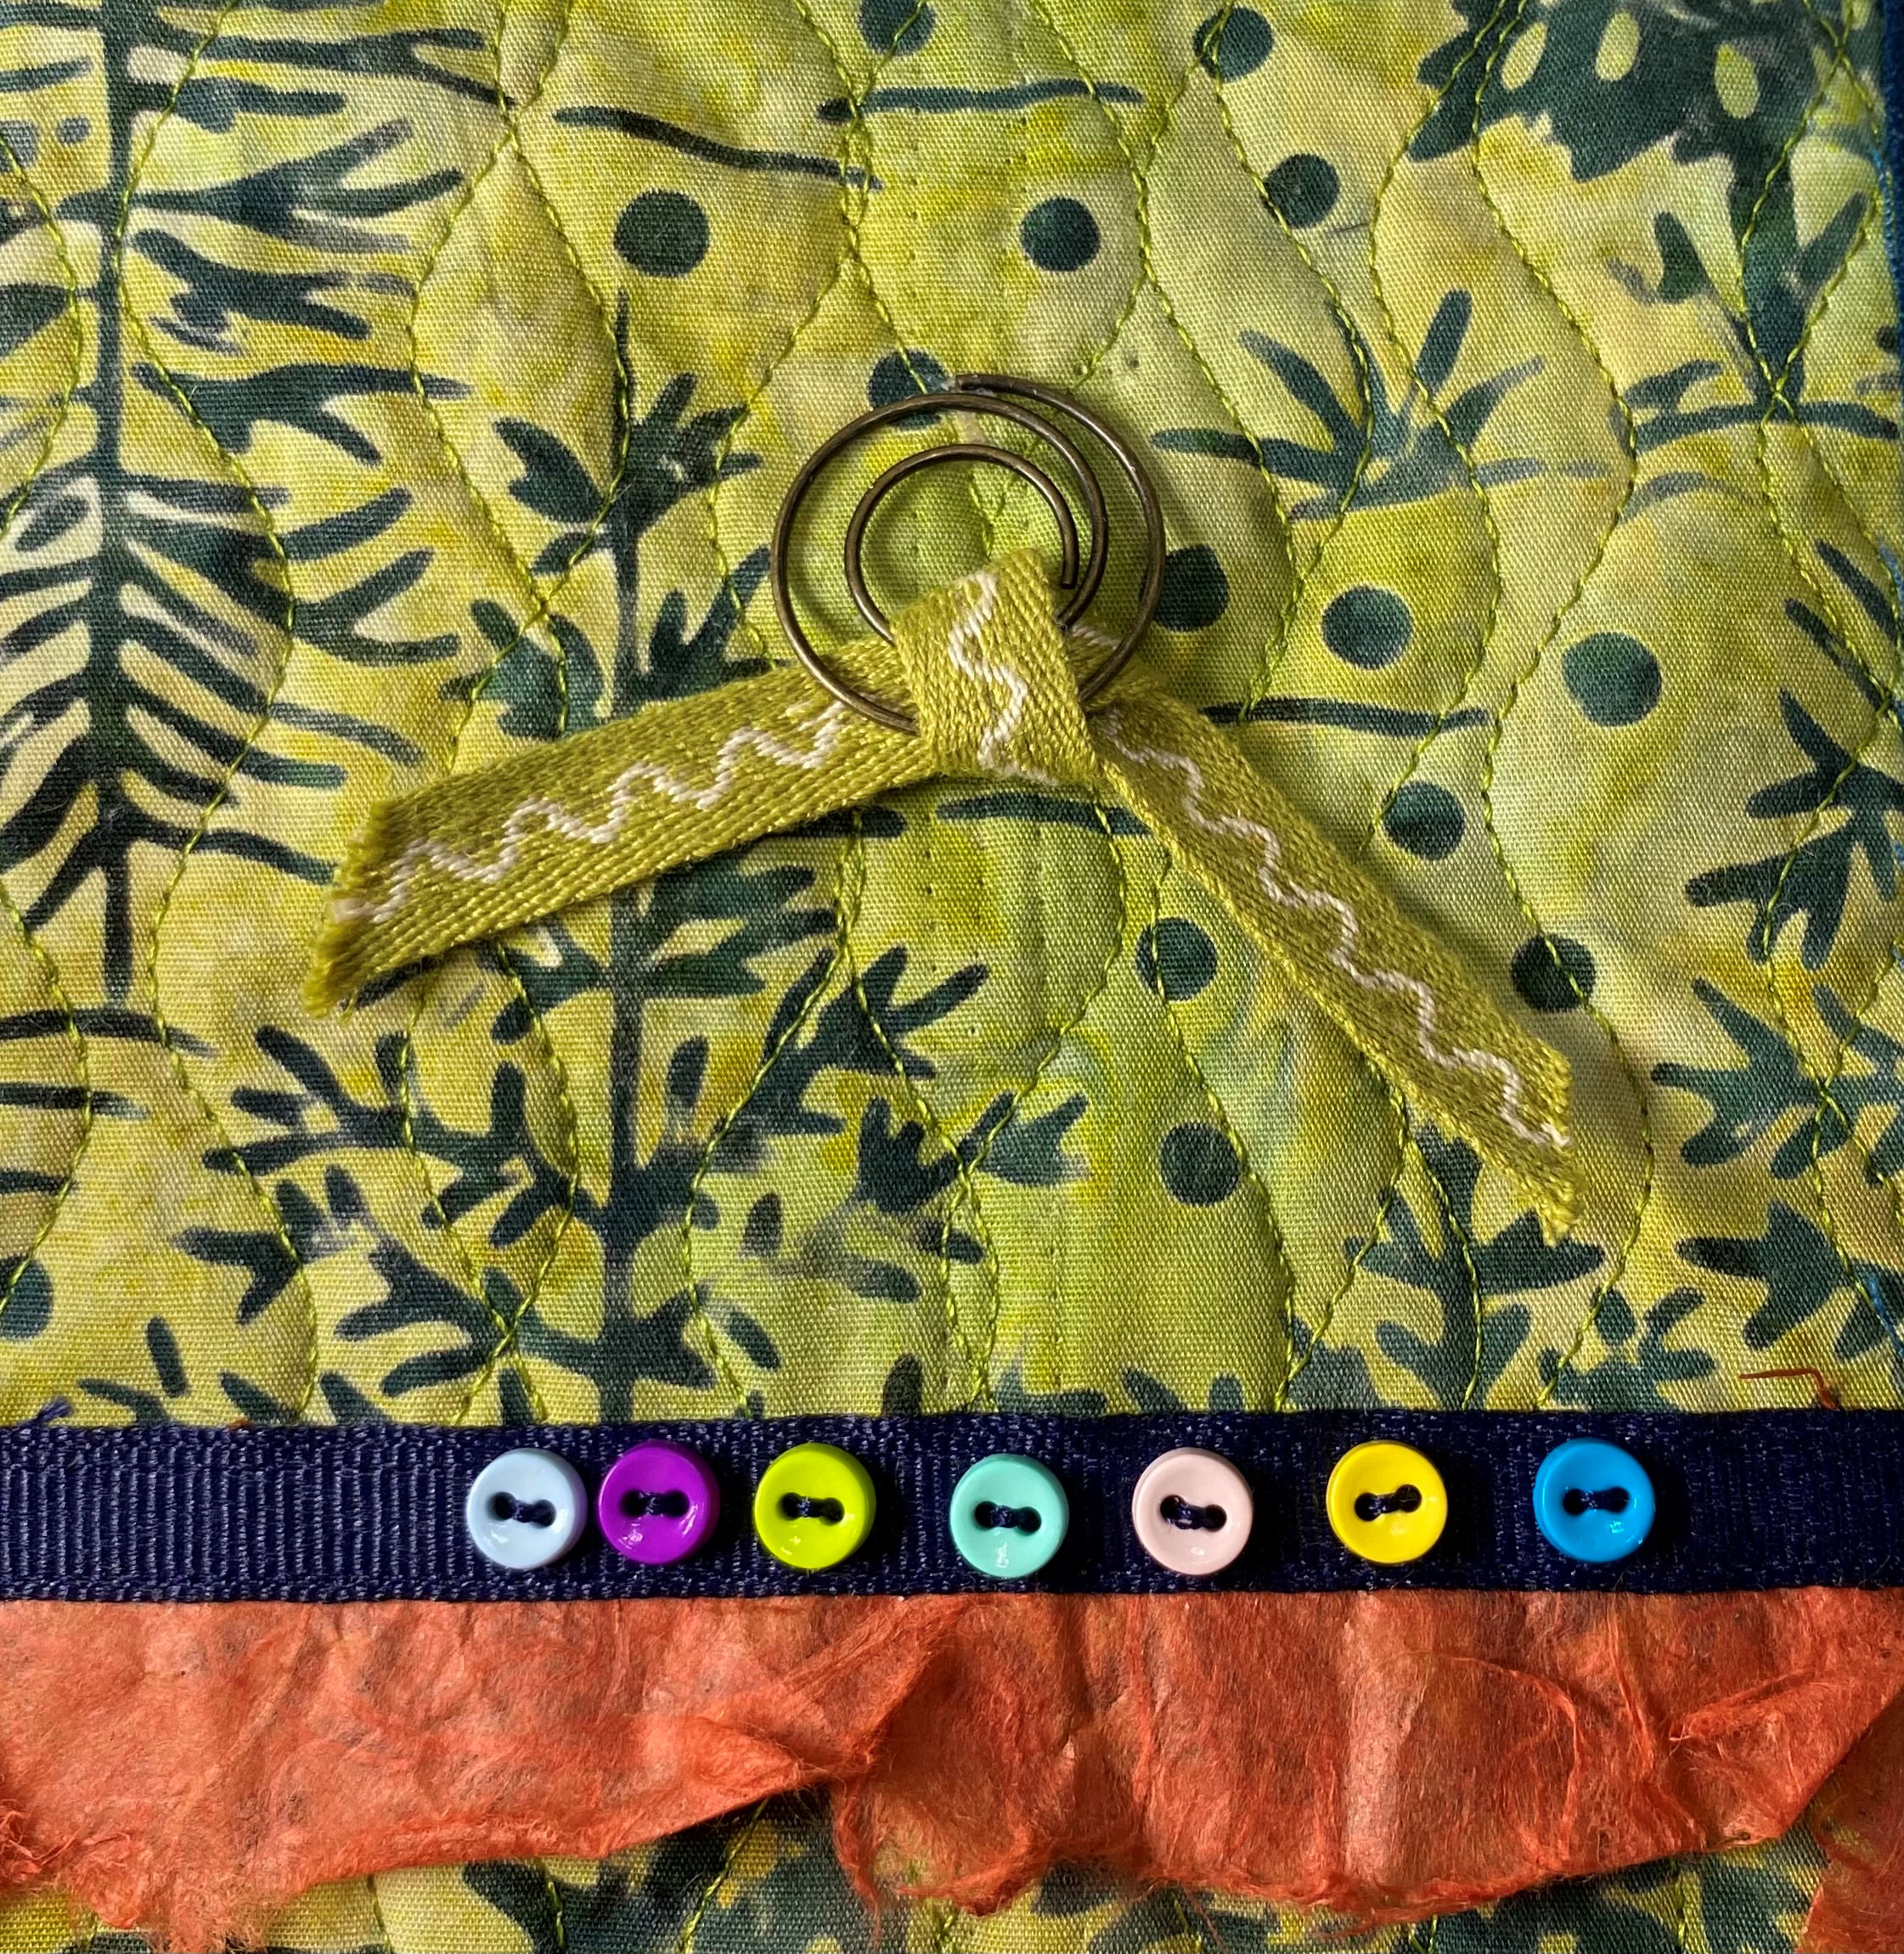
Creativity Tag
Click here to download a PDF of the tag and print it on a decorative scrapbooking cardstock. Cut it out just inside the outer line of the tag. Position the tag on the quilt and bartack across the “hole” at the top to secure it to the quilt. I used paper twine and a decorative button to finish it off. Put the twine through the holes of the button and tie a knot, then loop the twine to make a free-form bow, gluing it to the back of the button. Then glue the button to the tag over the bartack.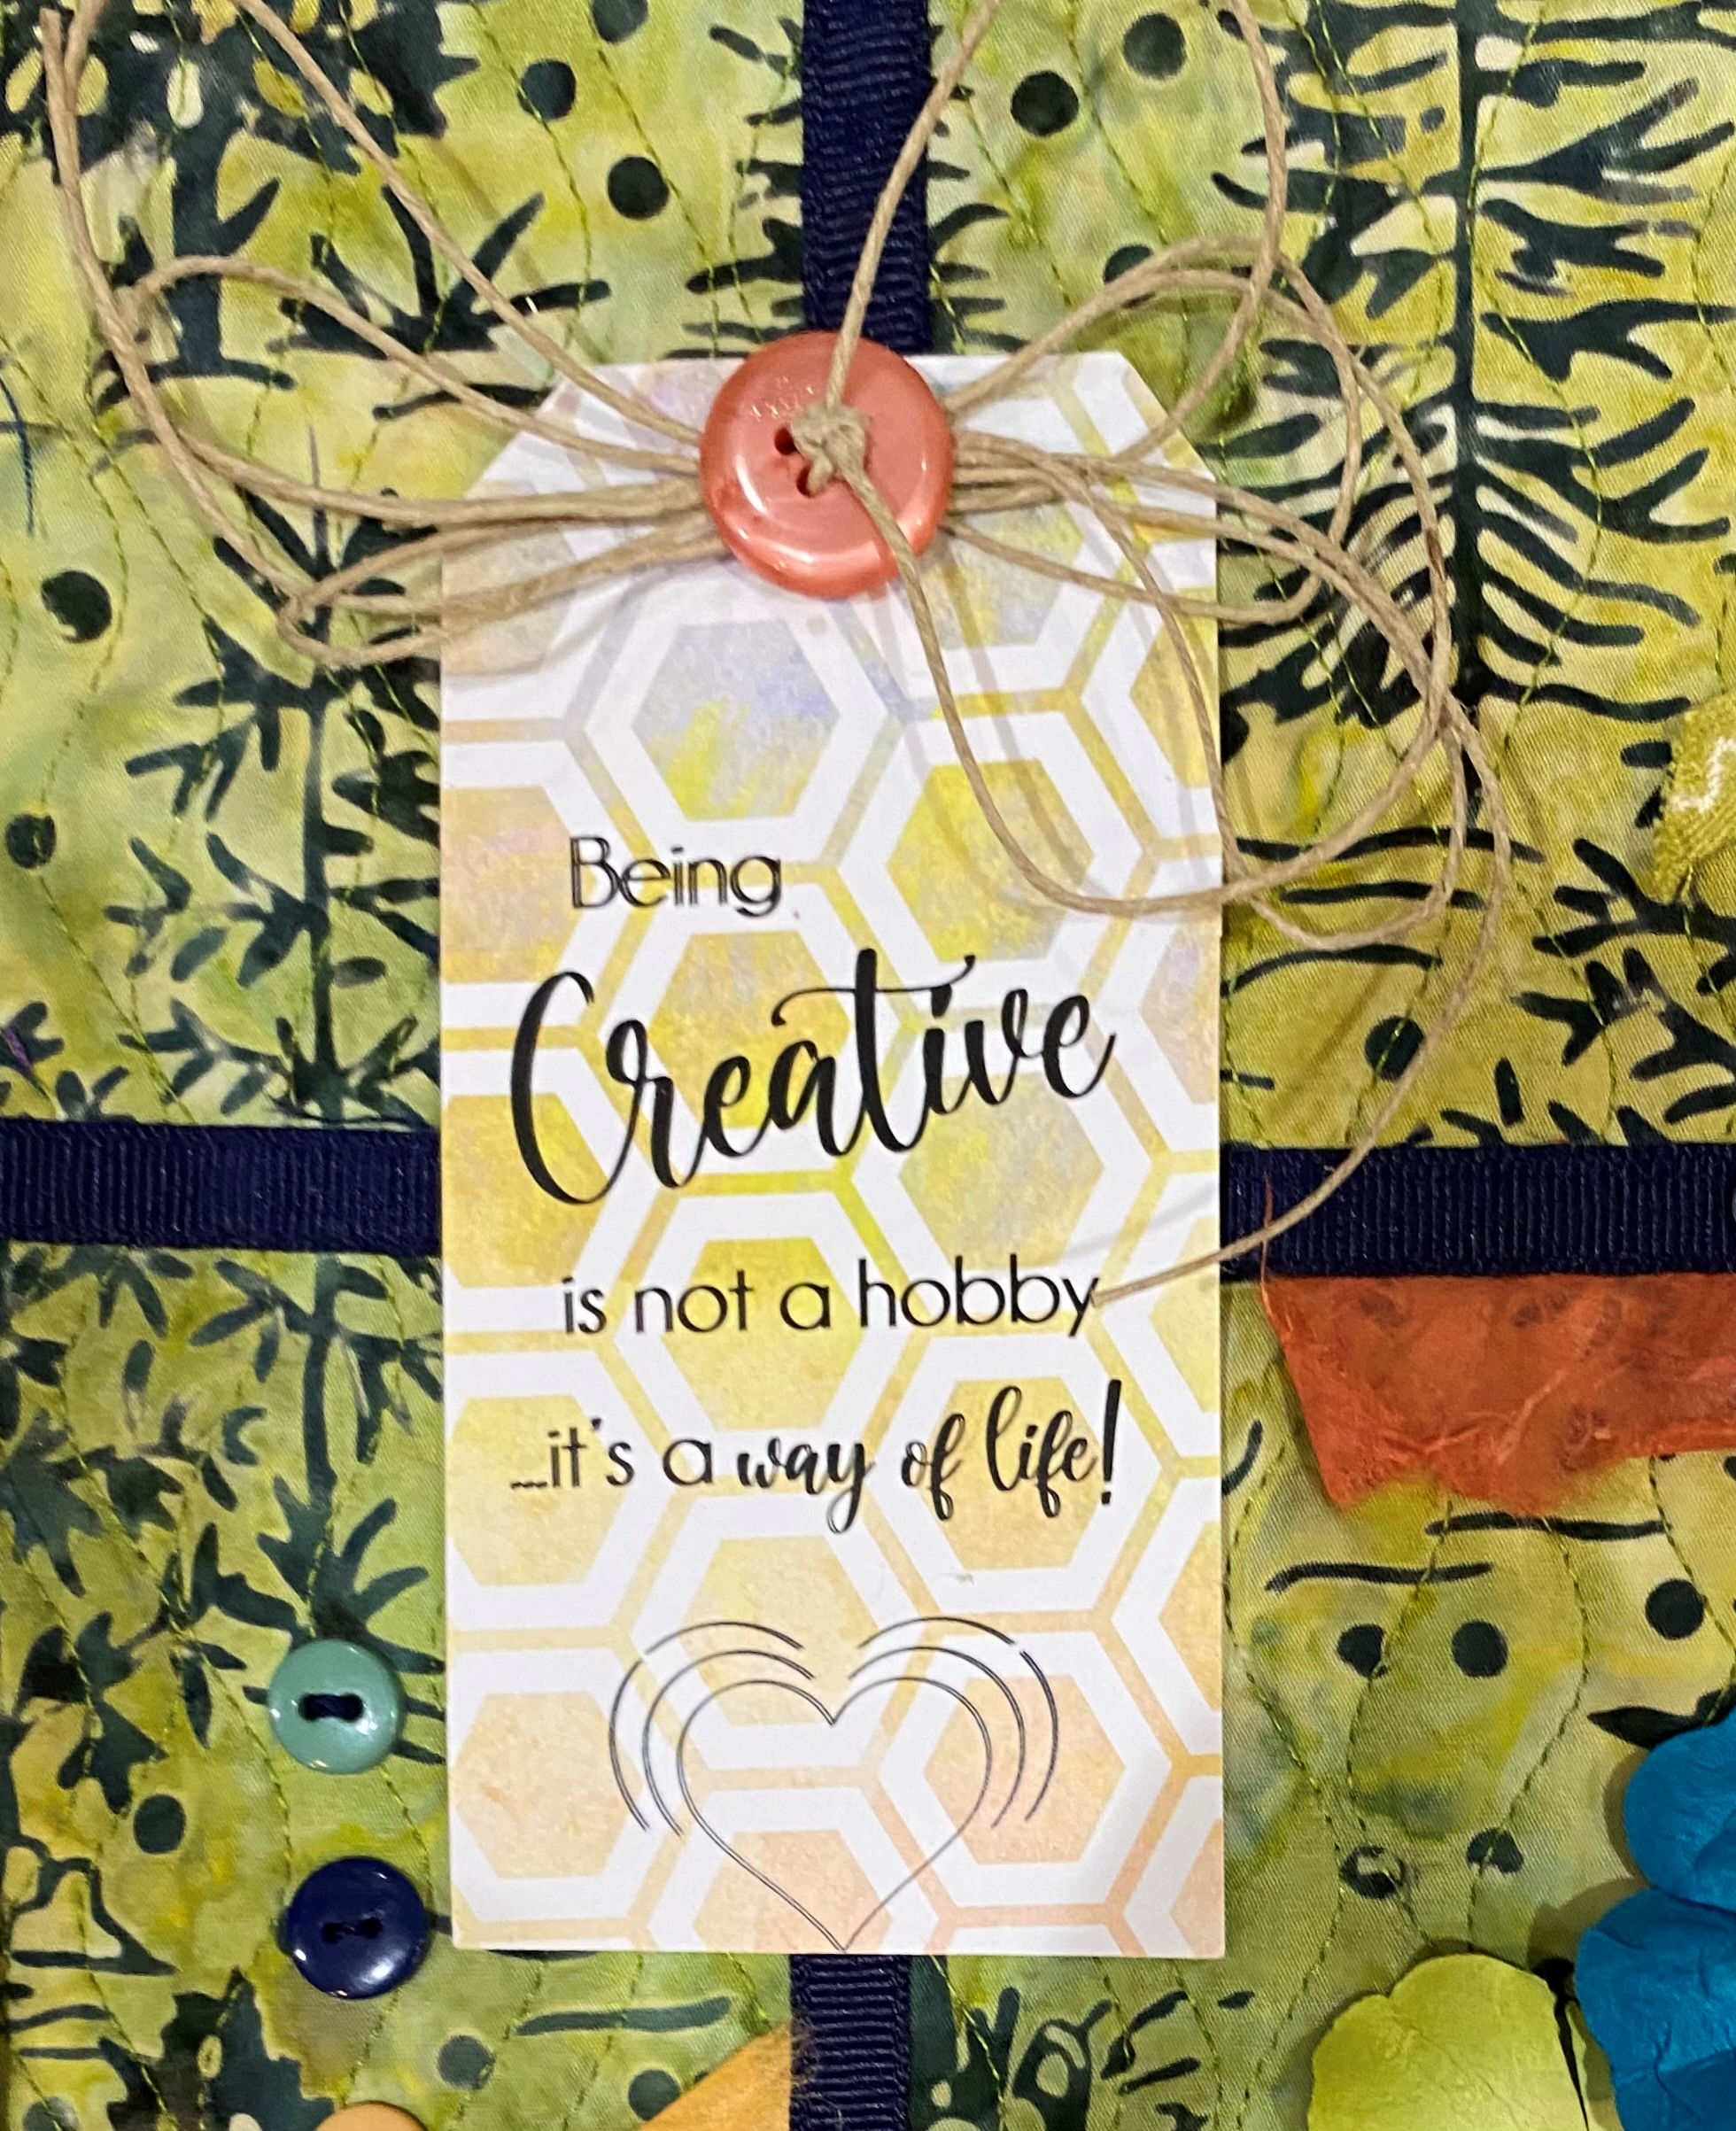
I created this tag with two fonts, Hello Cello and Champagne & Limousines that I downloaded from creativefabrica.com. If you want to create your own graphics, this is a great place to get inexpensive (many are free!) fonts. In addition, they have embroidery designs, sewing patterns, Cricut and Silhouette files and more. You can sign up for a subscription, or just download FREE files every day! You’ll love this site if you are into art quilts and mixed media sewing. There are so many ways to be super creative using the downloads from creativefabrica.com, Use my code for a generous discount if you decide to go beyond the free offers: SEWFEET35
Backing and Binding
Cut the binding to match the quilt and use temporary spray adhesive to adhere the wrong side of it to the batting. Use an open embroidery foot and align the raw edge of the binding with the inside toe of the foot. Stitch along all four edges of the quilt to prepare the edges for binding. I used an easy, fun binding technique that is great for little quilts like this. Fold your four 1” binding strips in half and press them. Slip one side edge of the quilt into one of the longer binding strips, making sure it goes all the way into the fold. Use Wonder Clips to secure the binding. Stitch on the binding using a running or serpentine stitch. Trim the ends even with the quilt. Repeat with the remaining side and them bind the upper and lower edges in the same way.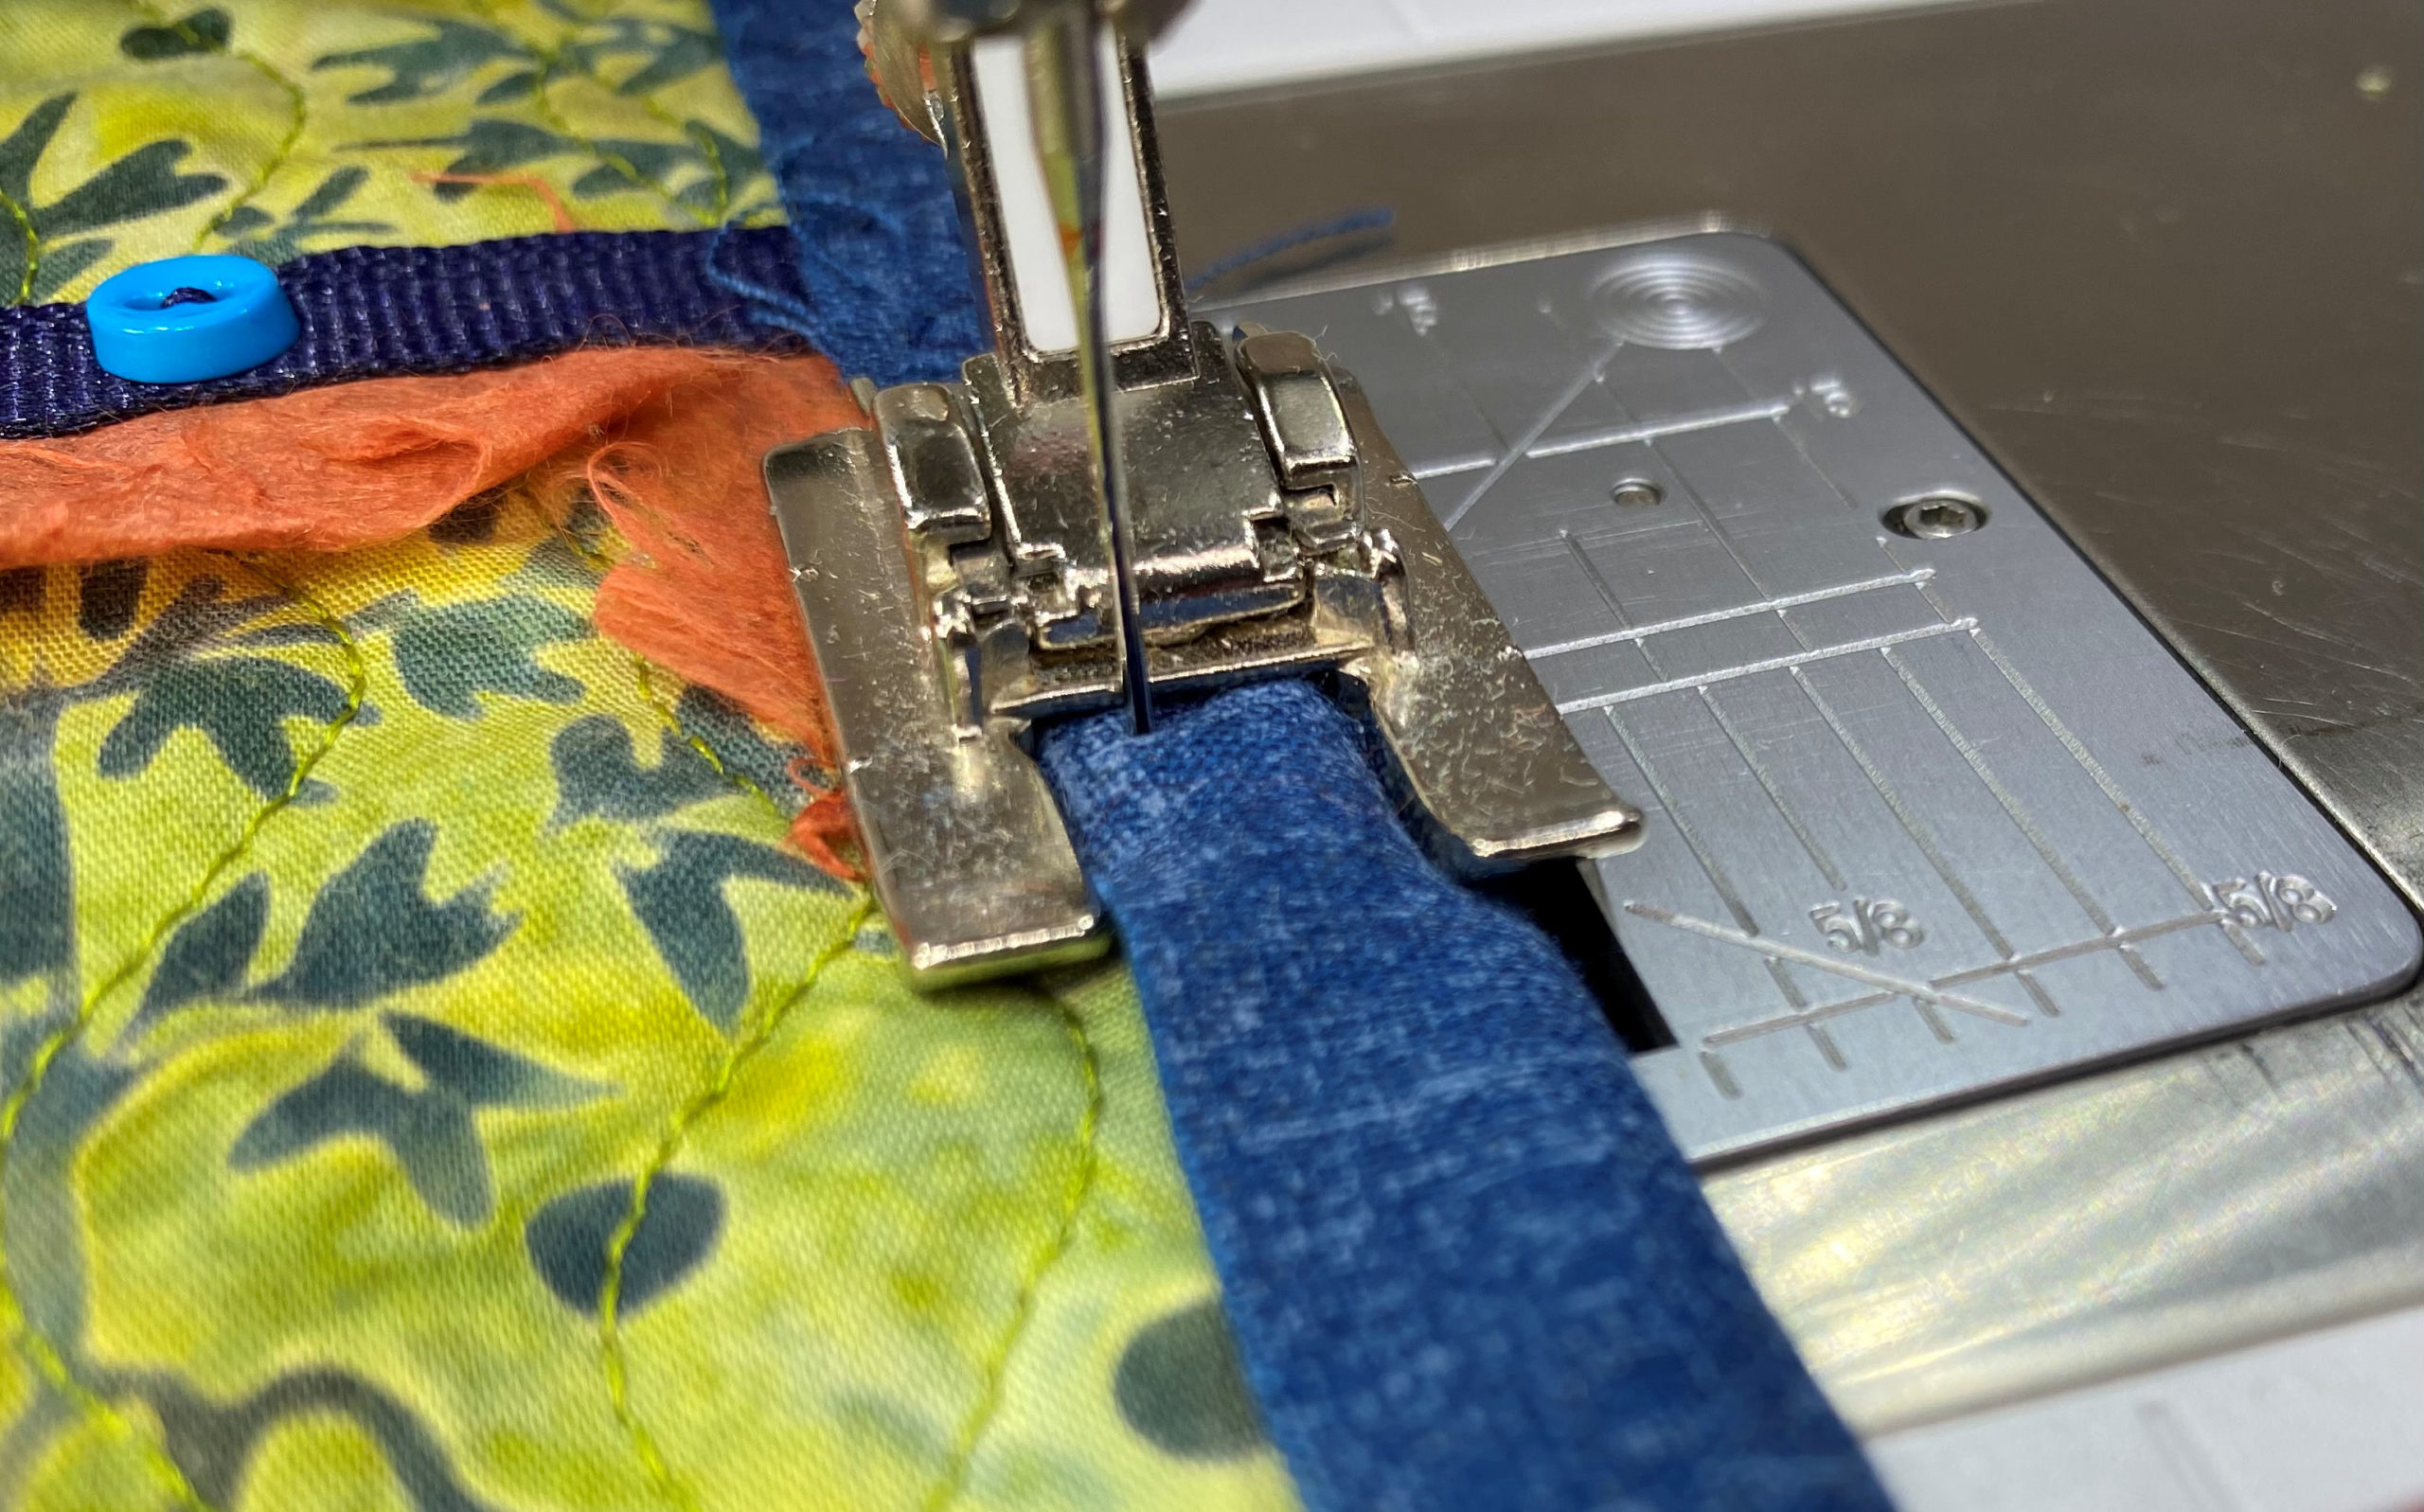
Thanks for letting me share my little quilt. Please leave a comment to let me know if you are inspired to make one. I’d love to see it!

Do you need a Bernina to make these products?? Can you use these feet a huskvarna