
A few weeks ago, I gave you a sneak peek at my latest embroidery project and now I’m ready to show you my finished wall hanging. Click here to see my previous post that shows the beginning of my Modern Petals wall hanging. I embroidered 16 tiles and stitched them together to make a small art piece.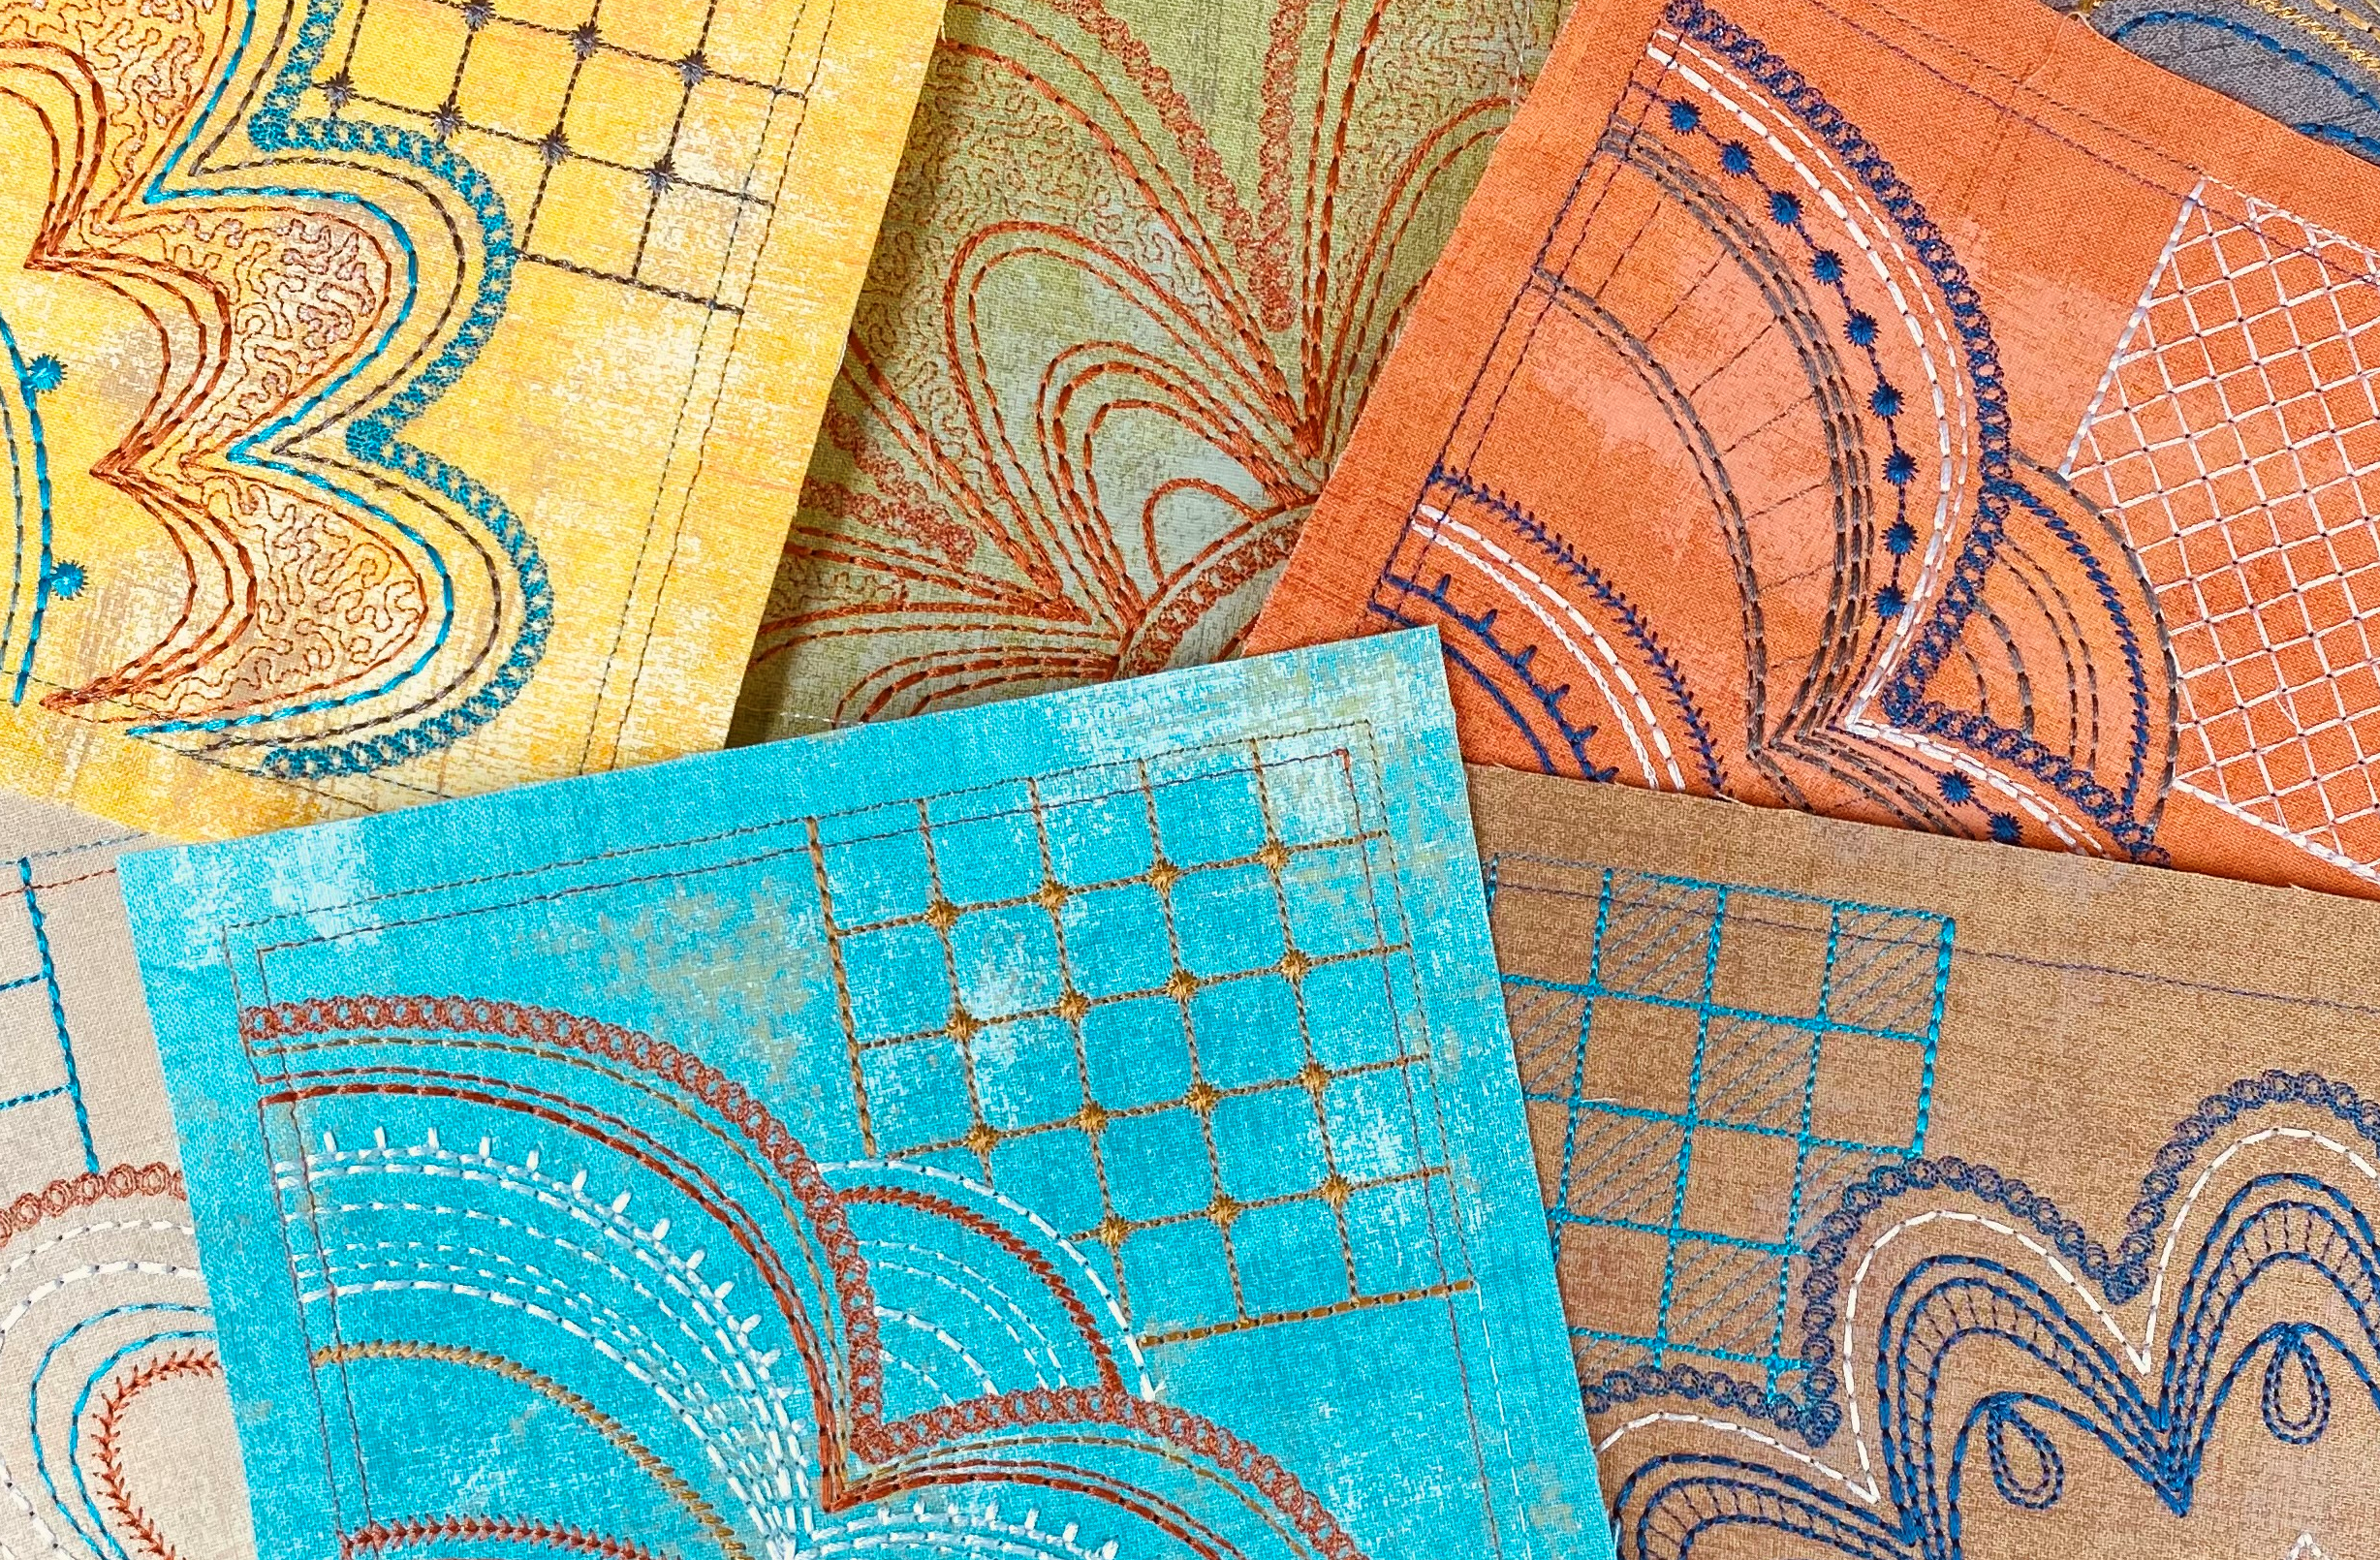
I love the results! It’s bright and colorful with abstract floral designs for an overall modern look. Once the tiles were sewn together, I added batting and backing and then quilted it using the stitch-in-the-ditch technique. Keep reading for a few tips on stitch-in-the-ditch quilting.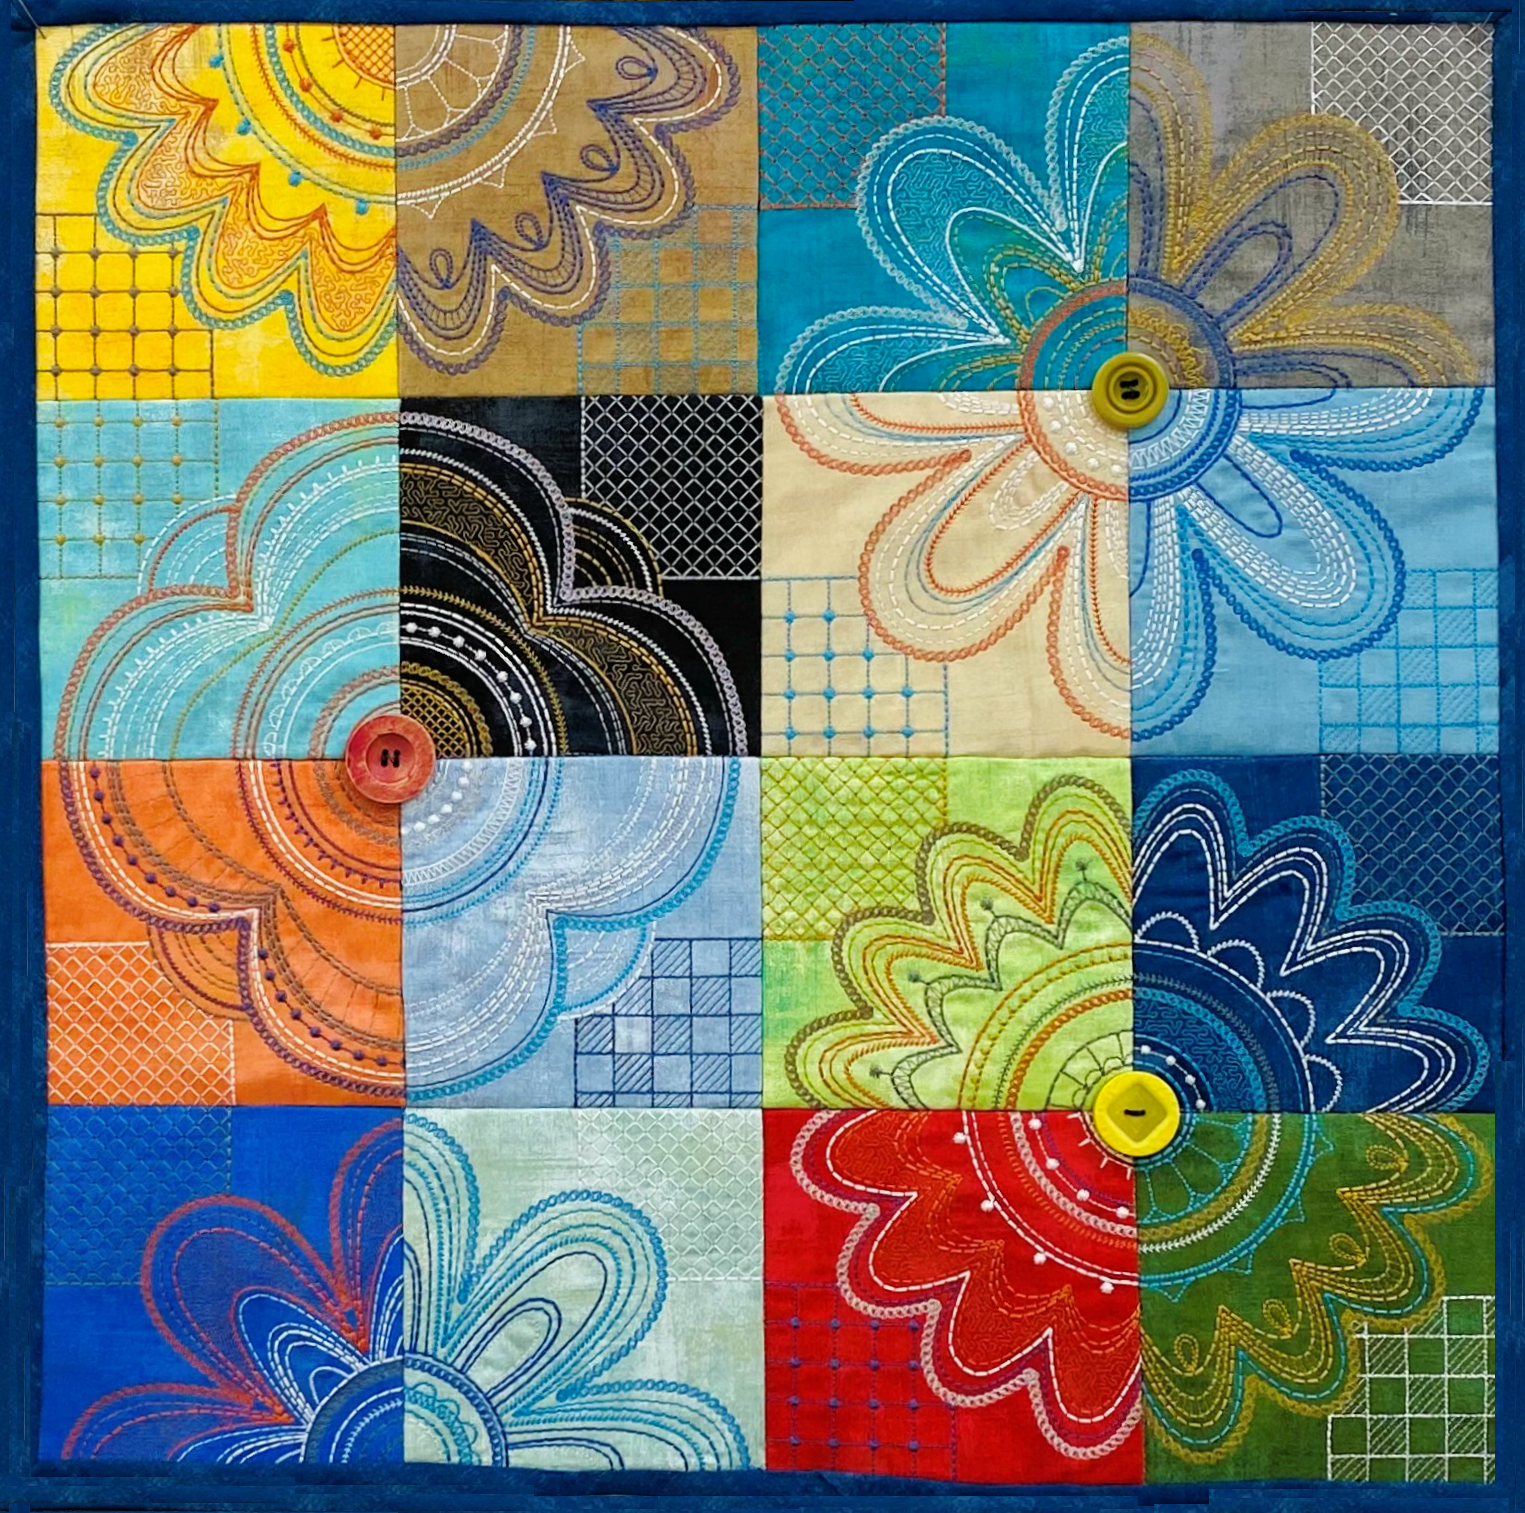
Stitch-in-the-Ditch Tips
In theory, stitching-in-the-ditch is a simple way to quilt. It’s all straight stitching, you follow the seams of your quilt, and all-in-all, it’s a straightforward process. However, it doesn’t always turn out like you hope. It requires a fair amount of concentration to keep your needle in the ditch and it’s not uncommon to see your stitching here and there in places where the needle strayed and missed the ditch. If this happens to you, try these tips to improve the finished look of your “ditch stitching”.
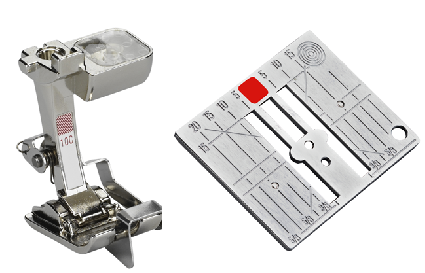
Presser Foot & Stitch Plate
A presser foot with a guide such as an edgestitch foot or a walking foot with a center guide is the best way to guide the needle along the ditch. Place the guide in the ditch. The needle should be in the center position so it follows the guide. As you stitch, watch the guide of the foot, and make sure it stays in the ditch. Trying to watch the needle doesn’t help because as it moves up and down, making it is difficult to be sure that it lands in the ditch with every stitch. Using a straight stitch plate results in a more precise stitch, making it easier to hit the ditch as you sew.
Needle & Thread
Use a fine thread such as a 60, 80 or 100 weight thread that will meld into the seam and be less visible than a heavier thread. A sharp needle with a smaller point such as a 60 or 70 makes a smaller hole and may fit into the “well” of the seam better than a larger needle. Microtex needles have a very thin acute point that creates beautiful topstitching and perfectly straight stitches. The sharp point helps to precisely stitch in the ditch of the seam.
Pay Close Attention
When stitching on a sewing machine, you should pay attention to what you are doing and where the needle is stitching. First, for safety reasons, and second, to get the beautiful, finished results you want. This is especially true with stitch-in-the-ditch quilting. Always keep your eyes on your work because even a brief lack of focus can cause the needle to wander outside of the ditch. The guide on an edgestitch foot makes a big difference and sewing at a slow speed can also help you keep the needle exactly where it needs to be.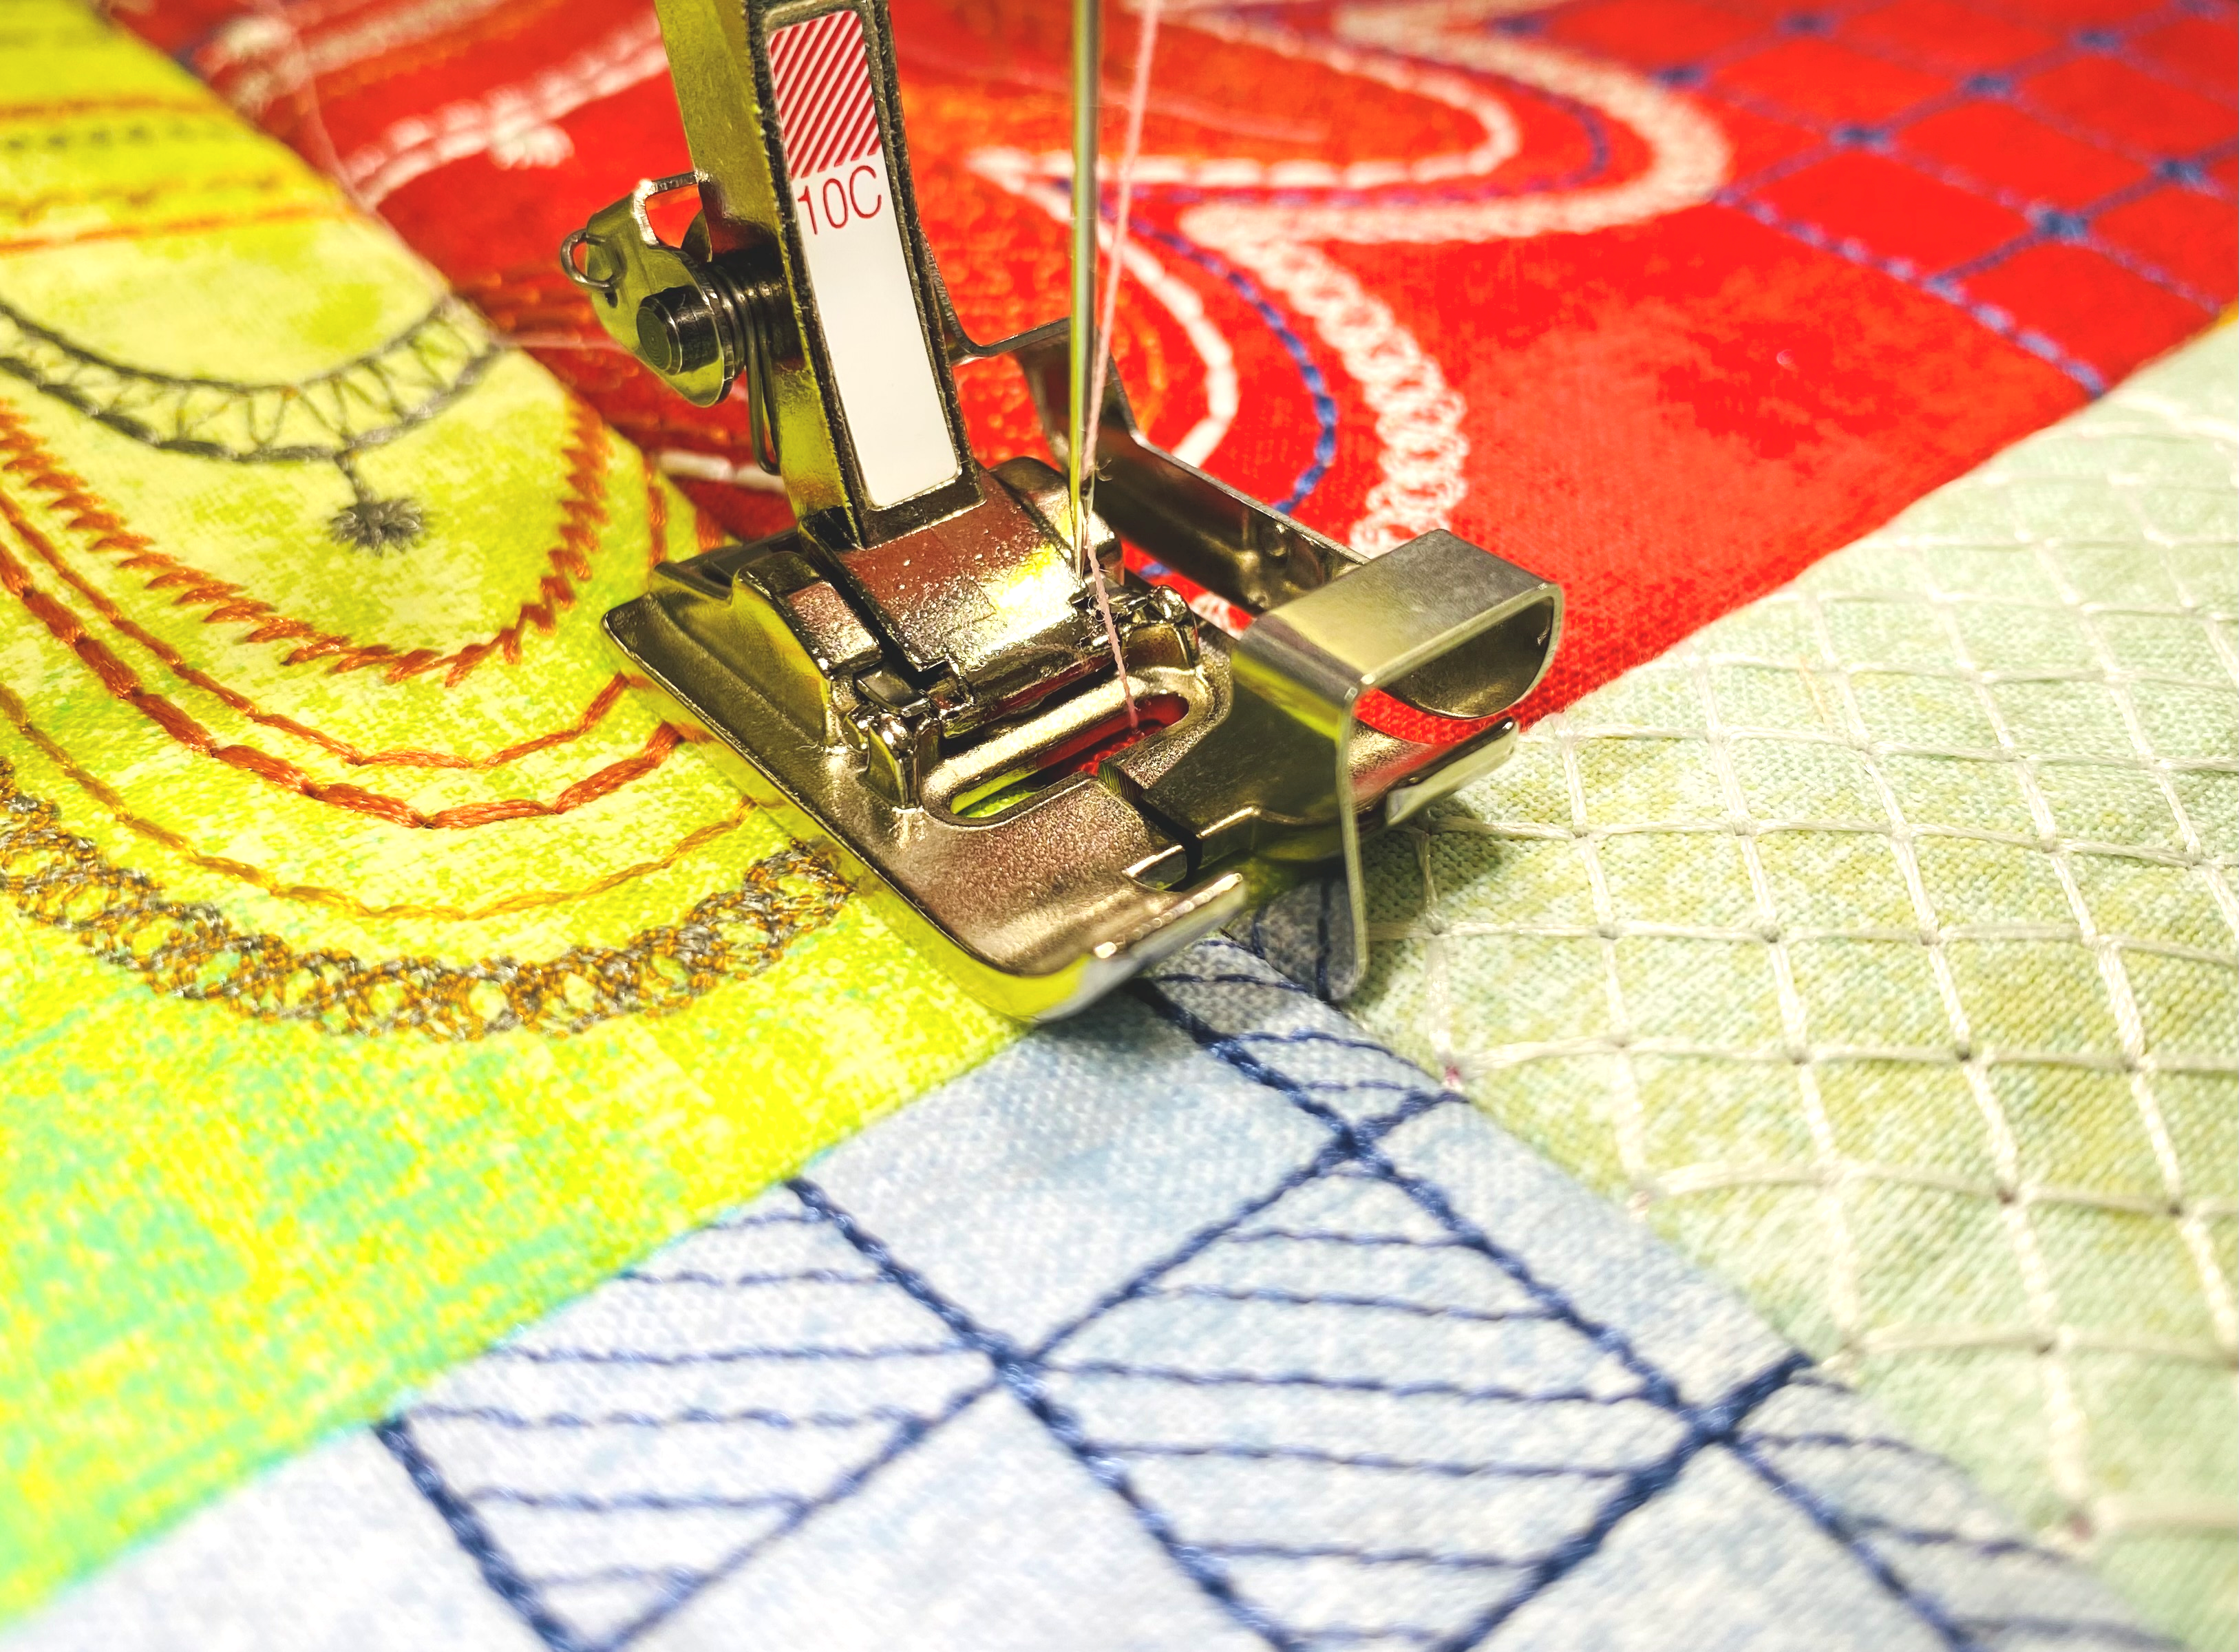
Now that I’ve finished my Modern Petals wall hanging, I can cross this off my “to sew” list, hang it on the wall of my sewing room, and enjoy looking at it every day!

Excellent! Do you have any tricks for matching the blocks together?
Thanks Anne