
The project for this post is entirely for fun! I’ve been very busy over the last few months, creating and launching my new Feet-ology course, plus multiple work projects, and lot of home things happening – all good, but way too much! So, I just wanted to take a break and sew something, easy, fun, and totally for me. I just finished my latest art “quilt,” and it was just like being in kindergarten – almost. Instead of using fabric to create patchwork blocks, I used paper! I like shopping for decorative scrapbook papers and cardstock almost as much as shopping for fabric. I have all types of pretty papers leftover from previous projects, and I decided to use them to create a simple patchwork “quilt” made of twelve 2 ½” squares stitched together to form a base for some fun embellishments.
Supplies
- Assorted decorative cardstock scrapbooking pages, enough to cut twelve 2 ½” squares
- 4-5 yards of 1/8” yarn or decorative cord
- Embellishment materials such as fabrics, laces, trims, buttons, charms, etc. Your finished quilt will look different from mine because your embellishment materials will be based on what you have or buy to suit your tastes.
- One piece of scrapbooking cardstock for the backing, 7 1/2″ x 10″ (I start with an 8 1/2″ x 11″ cardstock page and trim it to fit my finished quilt)
- Glue stick and white craft glue
Cutting the Squares
I started with 2 ½” squares cut from a variety of scrapbooking cardstock. I used my Go! Baby die cutter from AccuQuilt to cut the squares. It’s a simple cutting machine that’s easy to use and small so it’s easy to store and carry to classes. You can also use a rotary cutter or scissors to cut the squares but the Go! Baby gives you exact squares all the same size. You can plan the colors and pattern to coordinate or go for a scrappy look like I did.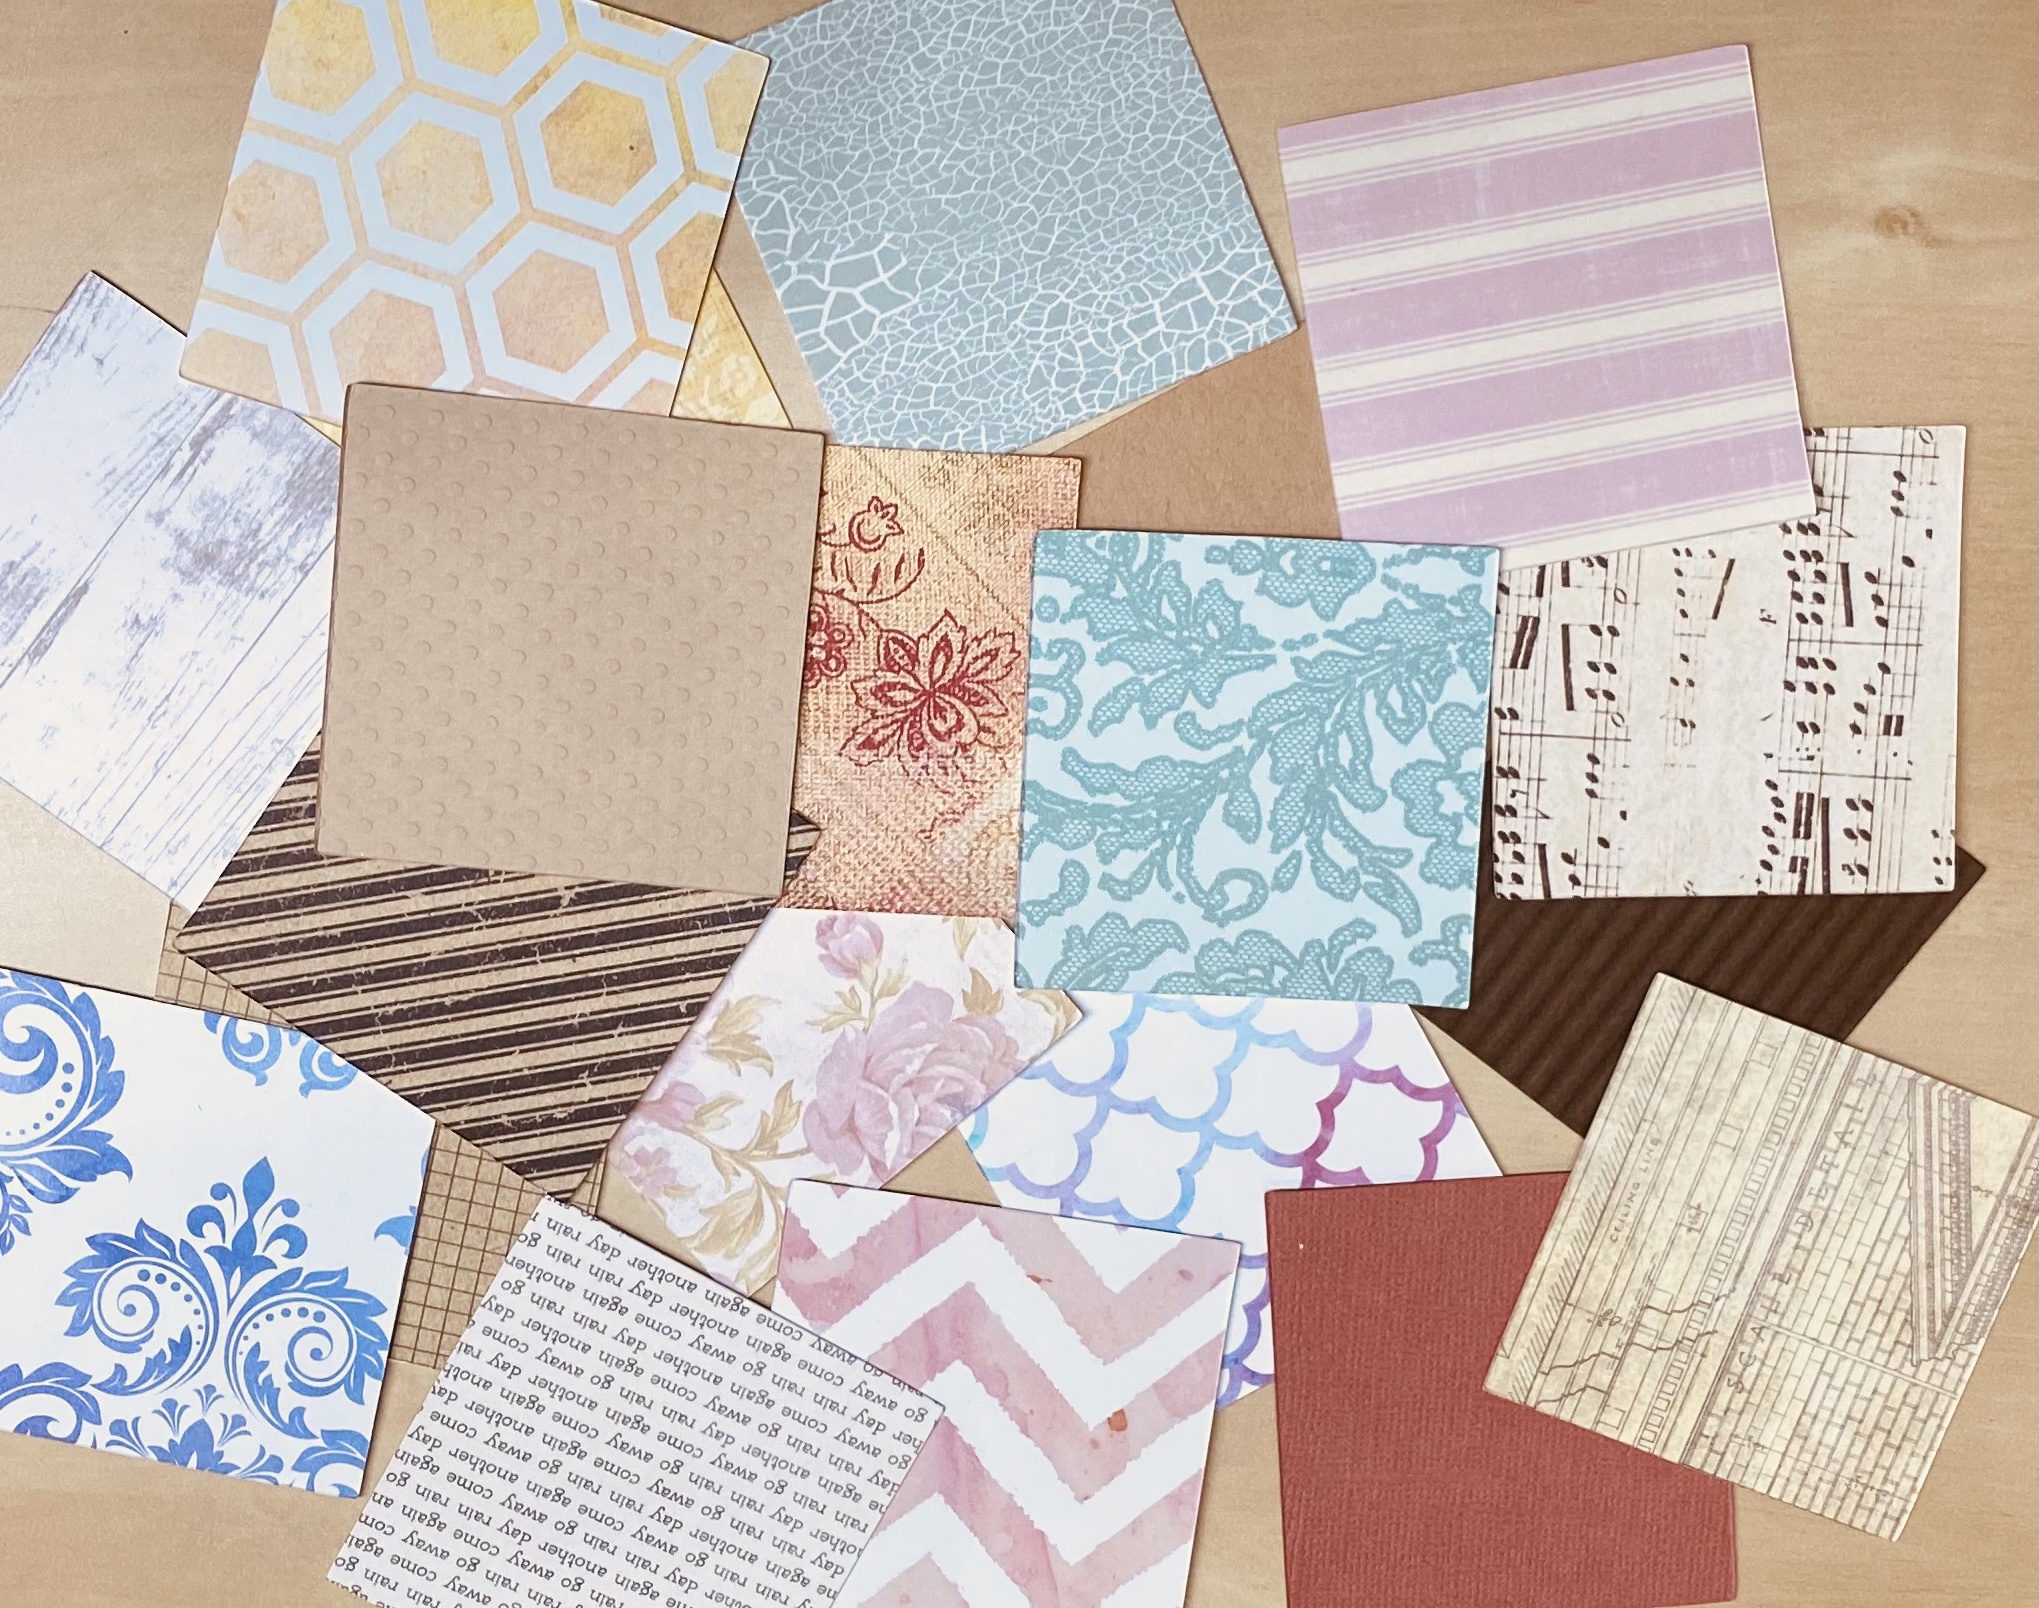
Arranging the Squares
Once the squares are cut, arrange them in the order you want. I try to mix the light and dark colors for contrast and use the same colors in different parts of the quilt to give balance to the entire quilt. You’ll notice that the squares in the photo below are not in the same order as the finished quilt. I couldn’t make up my mind and kept replacing and rearranging right up the second I stitched them together. Tip: Take a photo of the squares placed as you like. This makes it easy to keep them in order as you stitch them together. 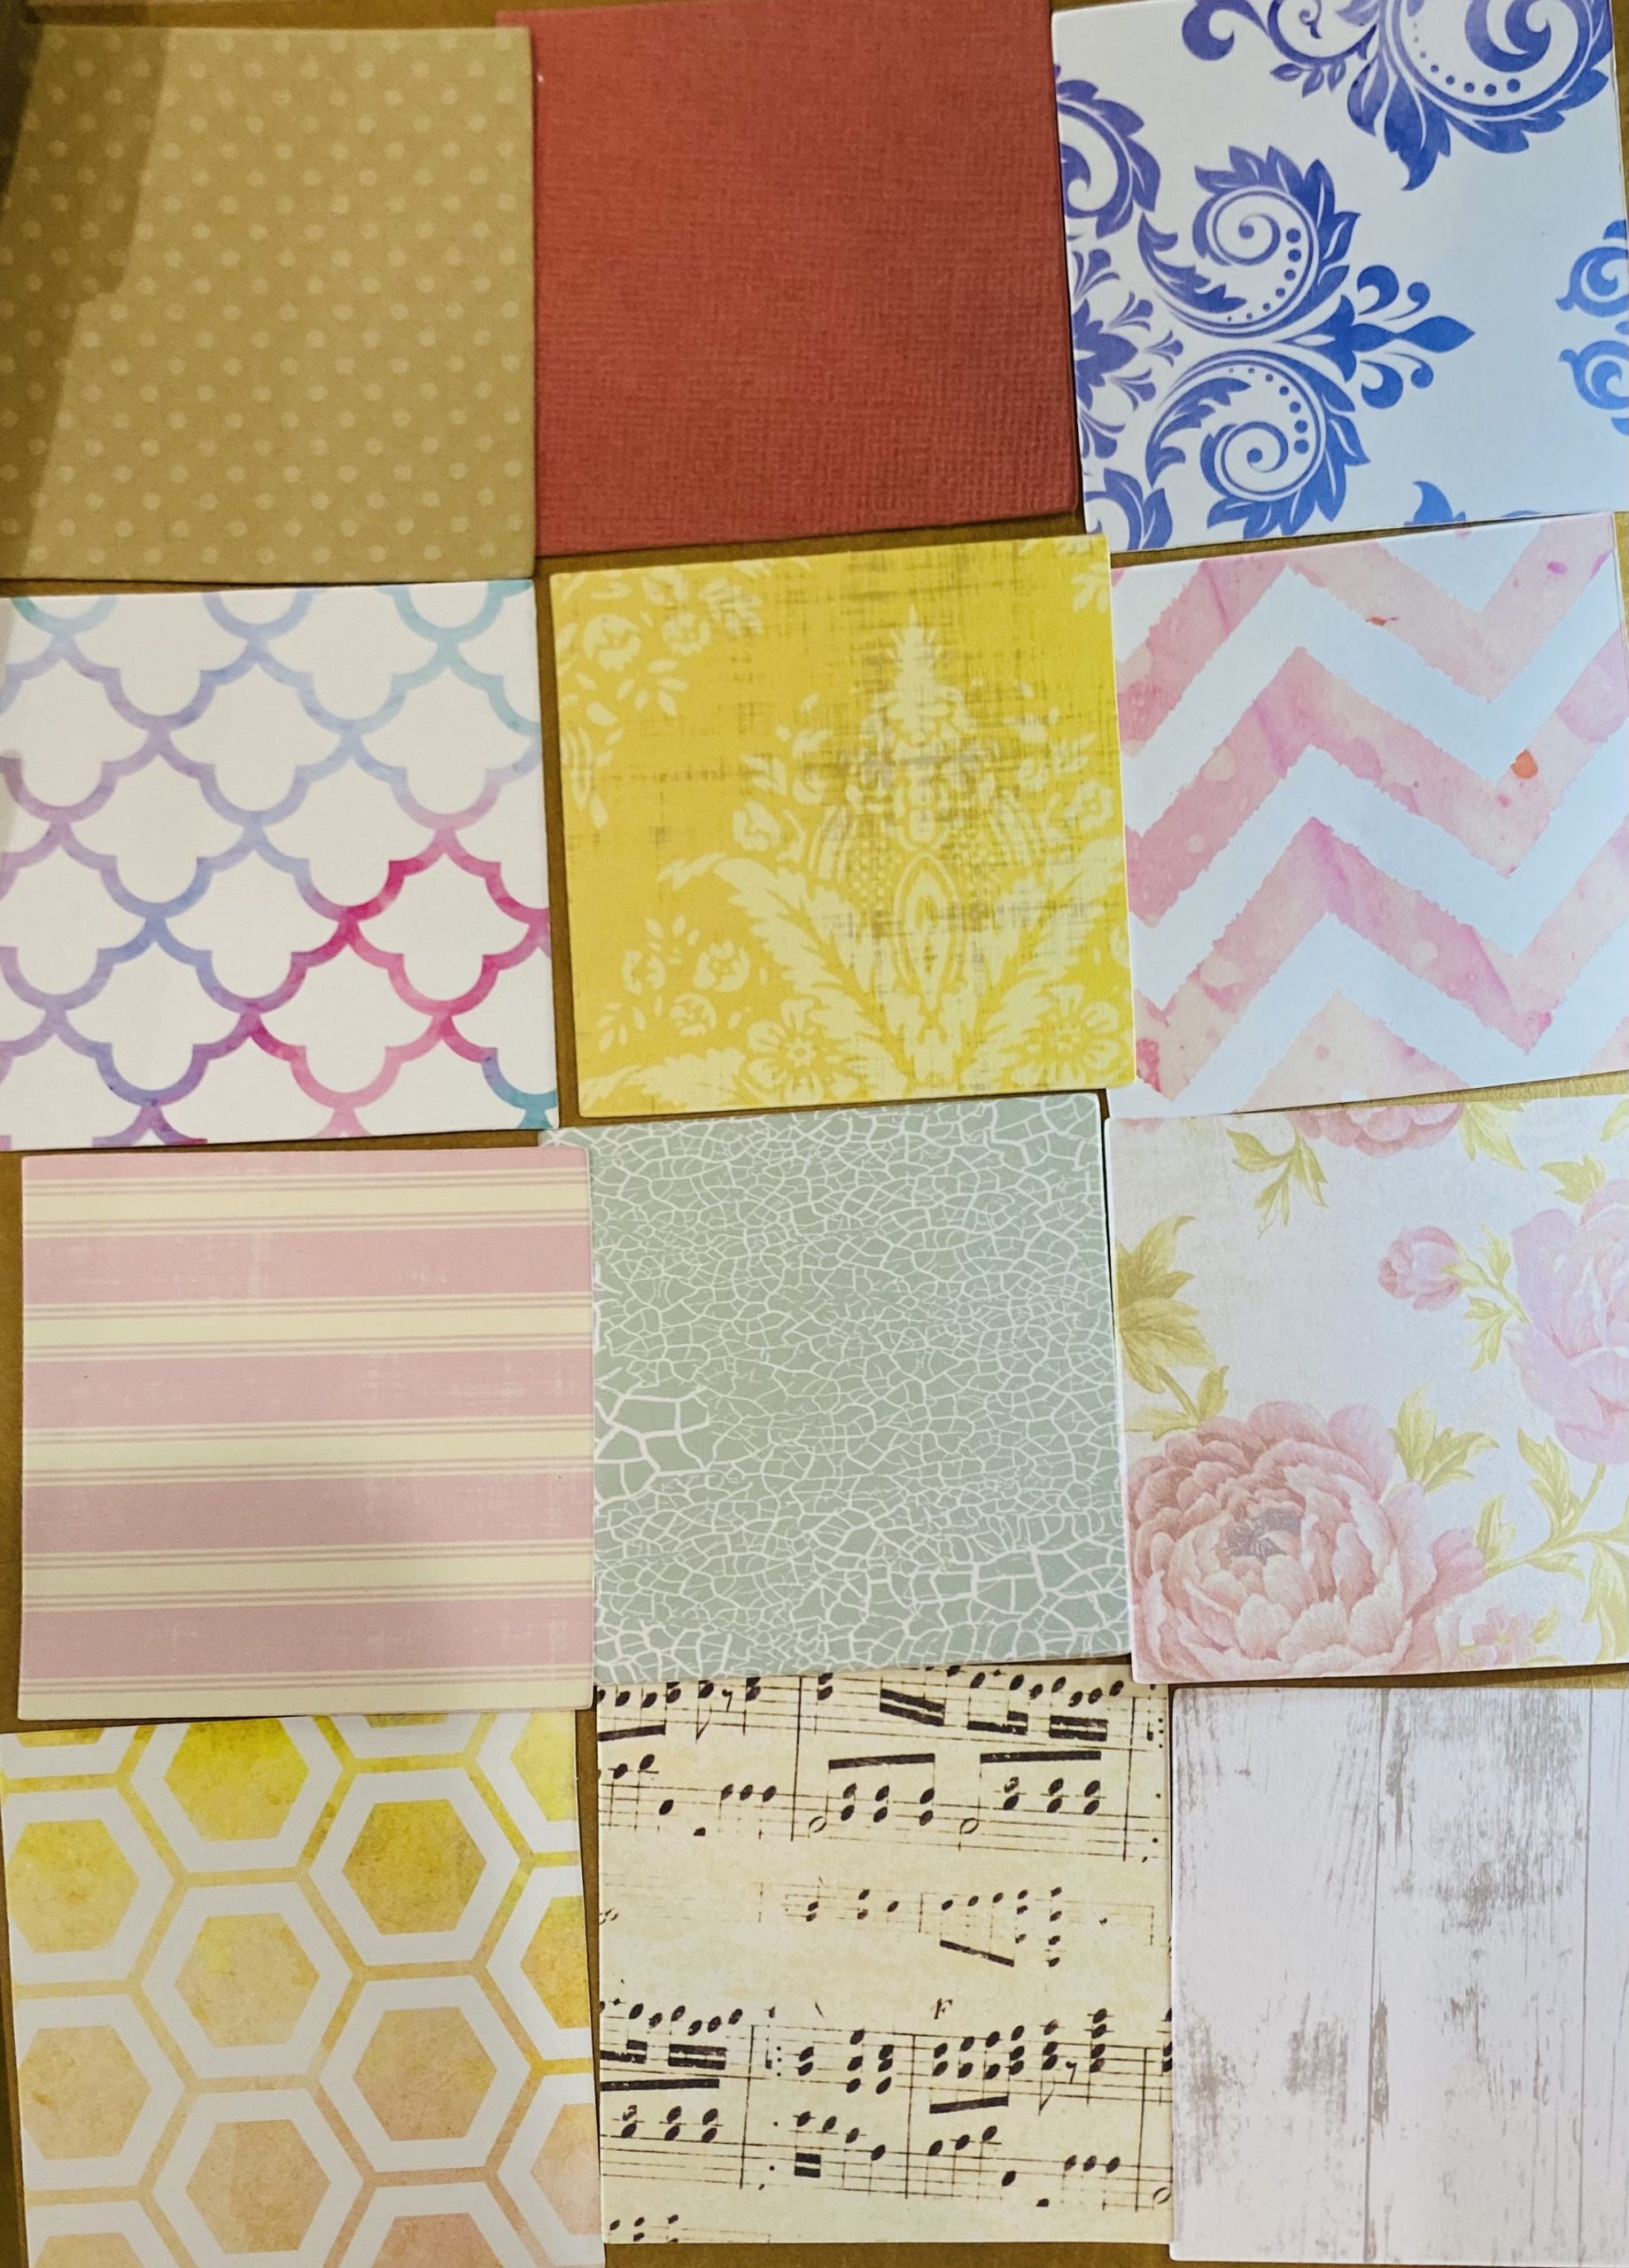
Edge Joining Seams
The next step is to stitch the squares together using a zigzag stitch and an edgestitch foot with a center guide. Set the machine for a zigzag stitch with a width of 2 mm and a length of 3 mm. Put one square on each side of the center guide of the foot. As you stitch, the edges of the squares are pulled edge-to-edge, nice and flat without overlapping. Click here for a previous post about stitching on paper.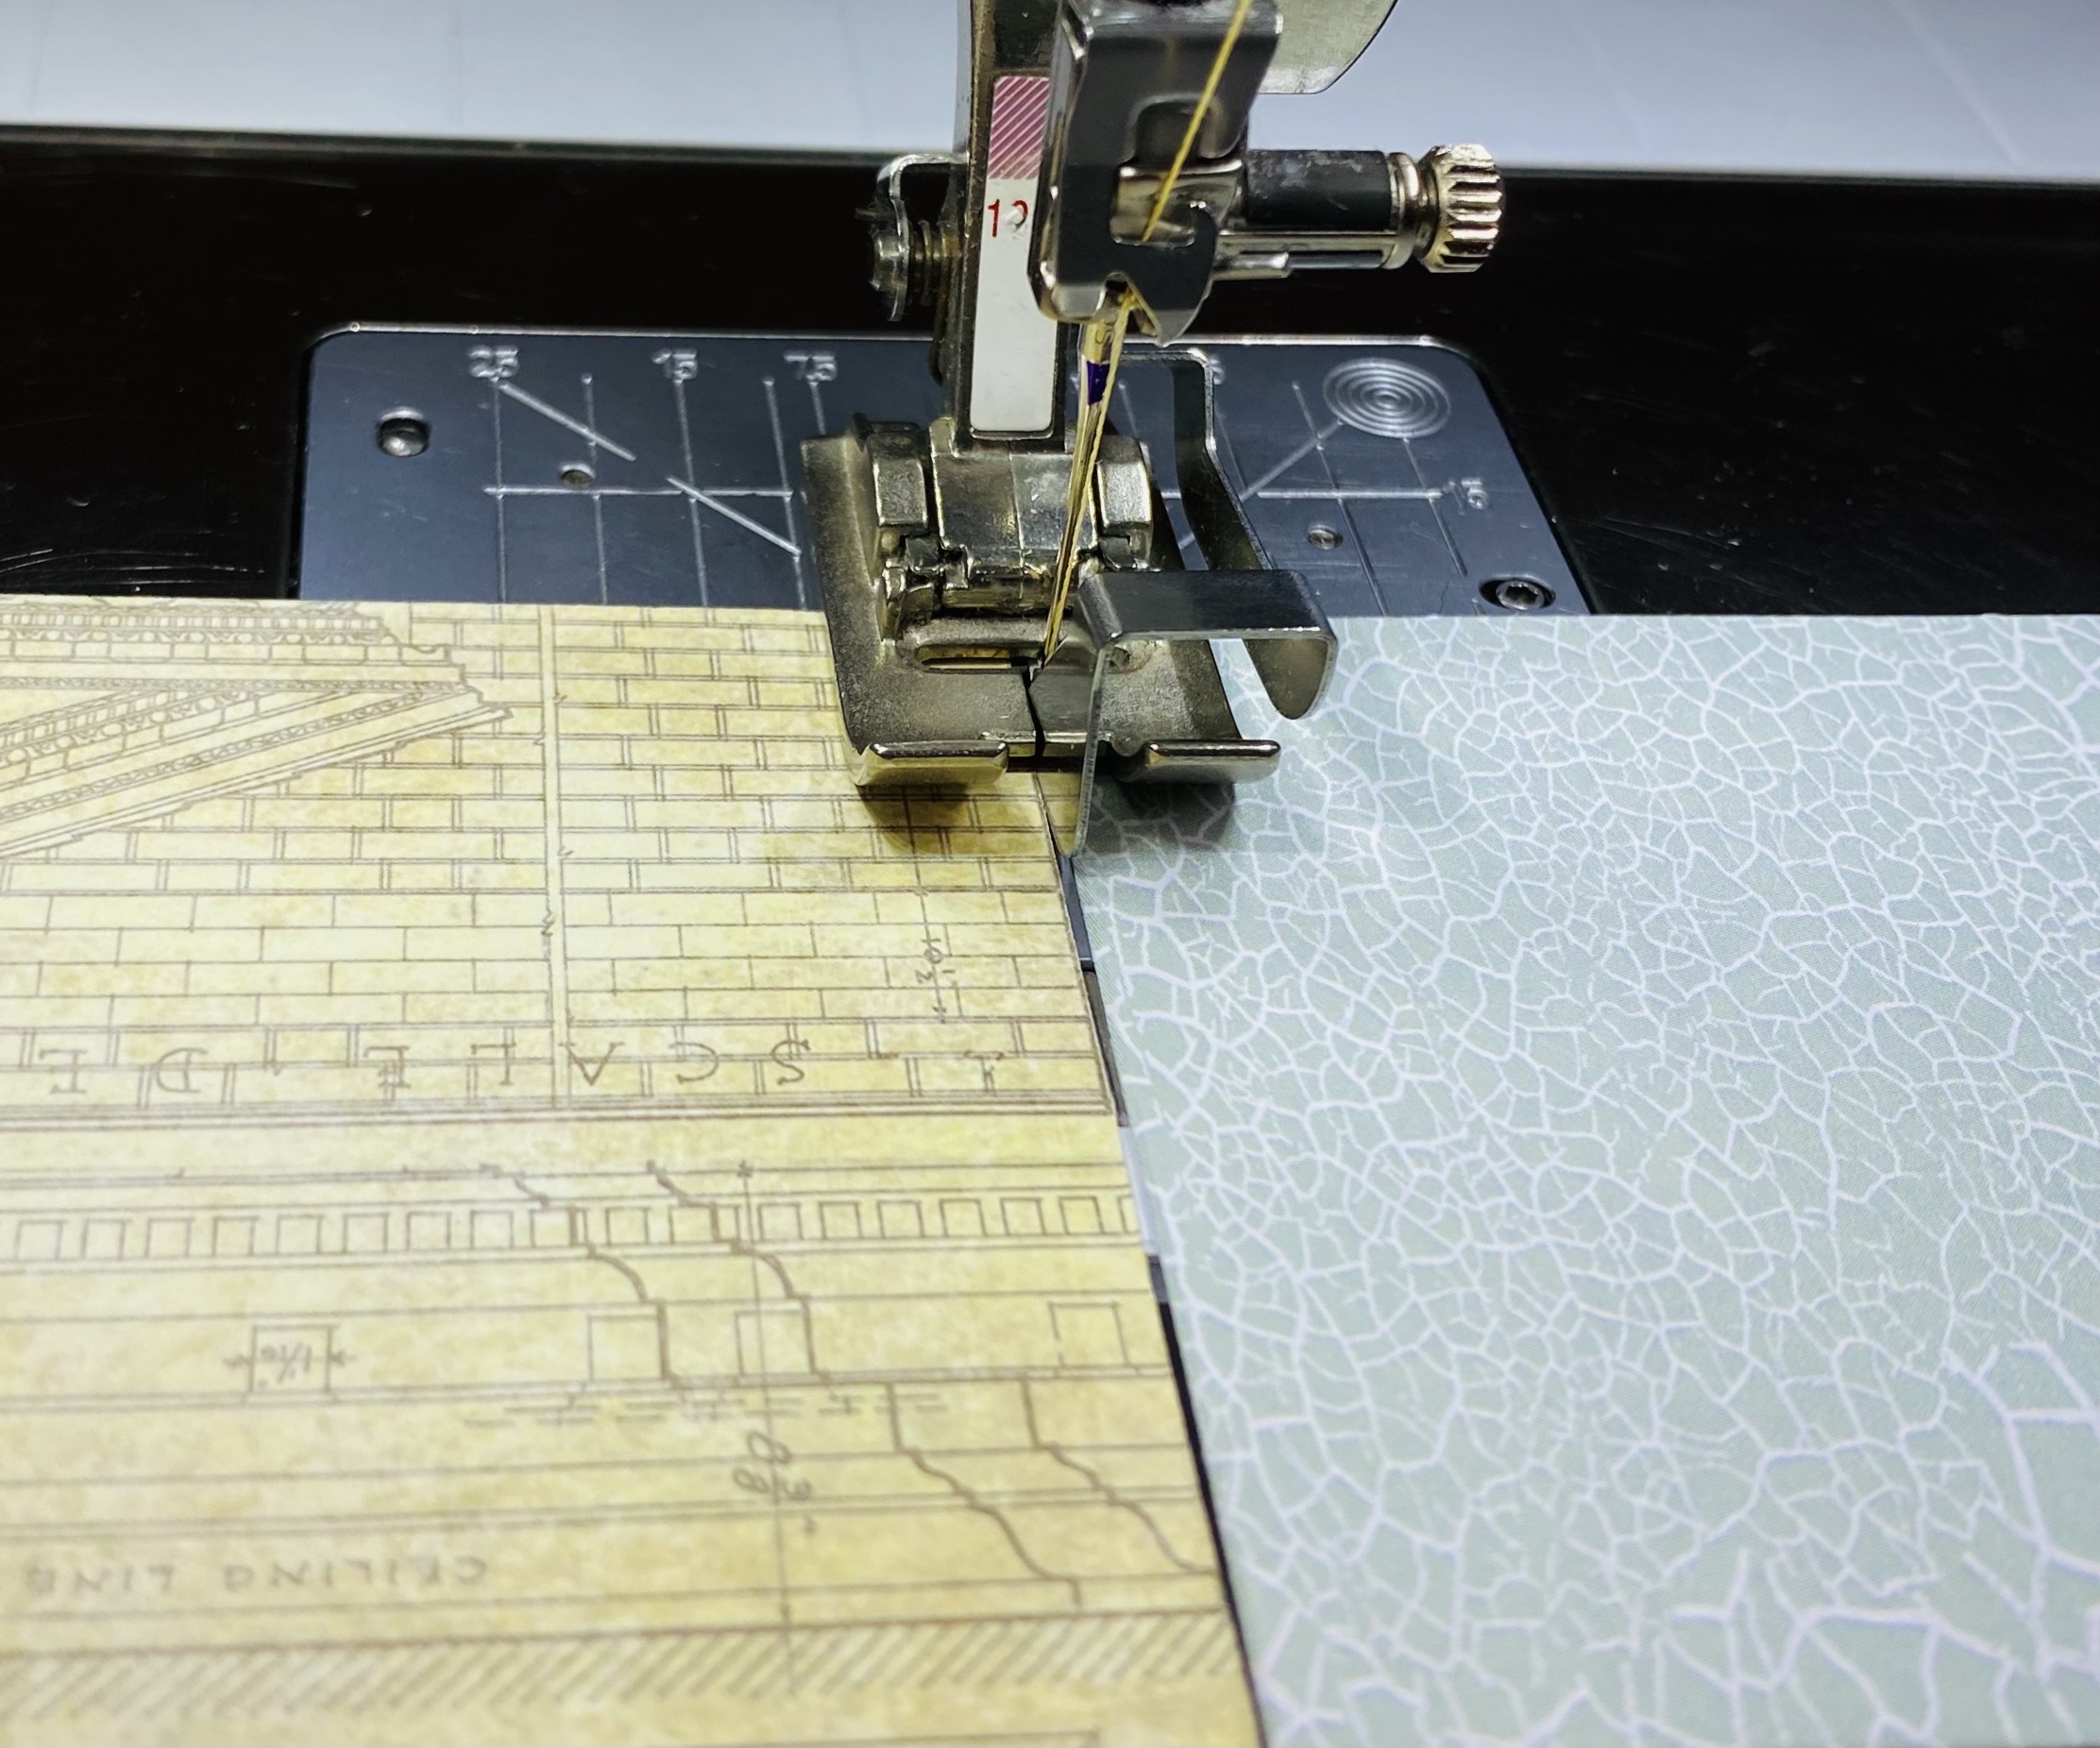
Couching the Seams
When the squares are stitched together, the size of the quilt is 7 1/2″ x 10″ , and the next step is couching yarn over the seams to add texture and give the look of sashing. If you’ve never couched before, this is the easy way to start. Couching comes from a hand embroidery technique where you stitch yarn, decorative cords, and other fibers to the surface of your fabric – well, in this case, your paper – to add color and texture.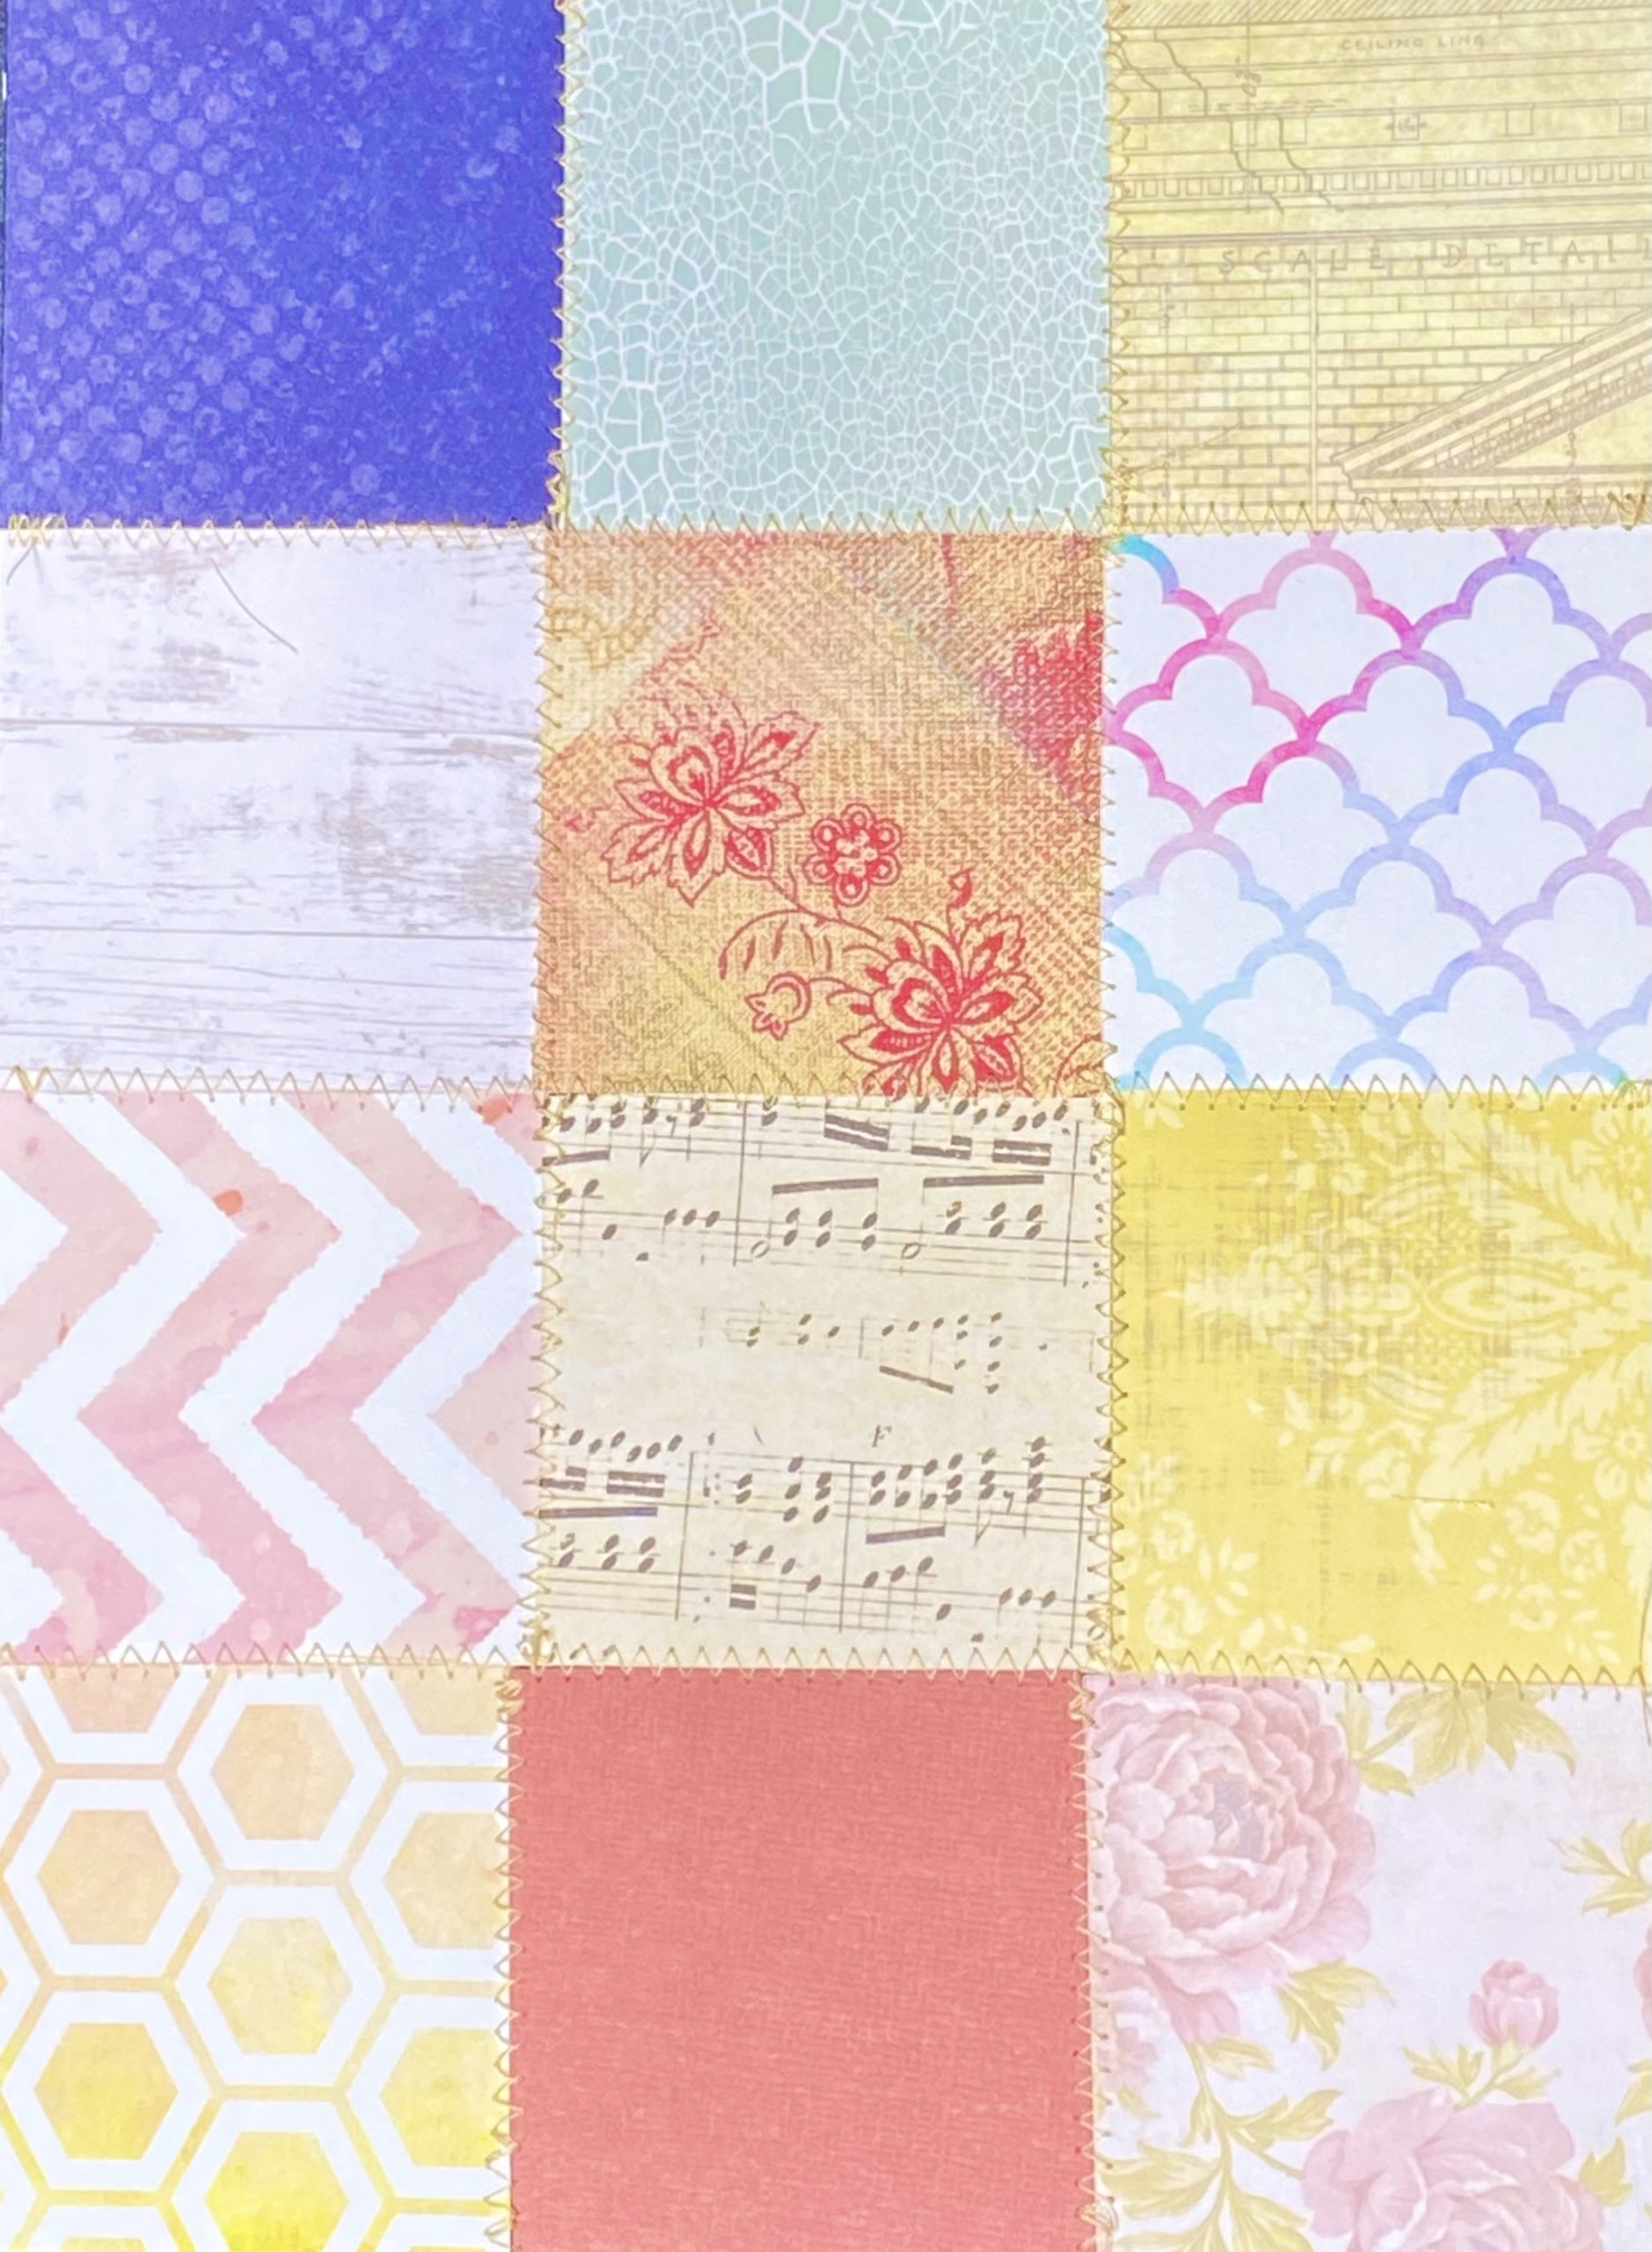
I stitched a soft 1/8″ yarn using two pieces lightly twisted together for each seam, sewing with a zigzag stitch. I used a couching foot, BERNINA Braiding Foot #21. The yarn is fed into the hole on top of the foot and out the back under the foot. This puts the yarn in place to go under the needle so the zigzag stitch can sew over the yarn to hold it in place. 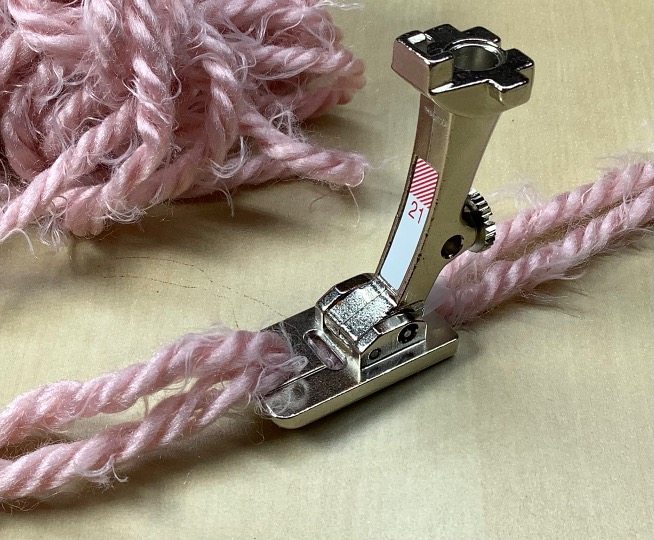
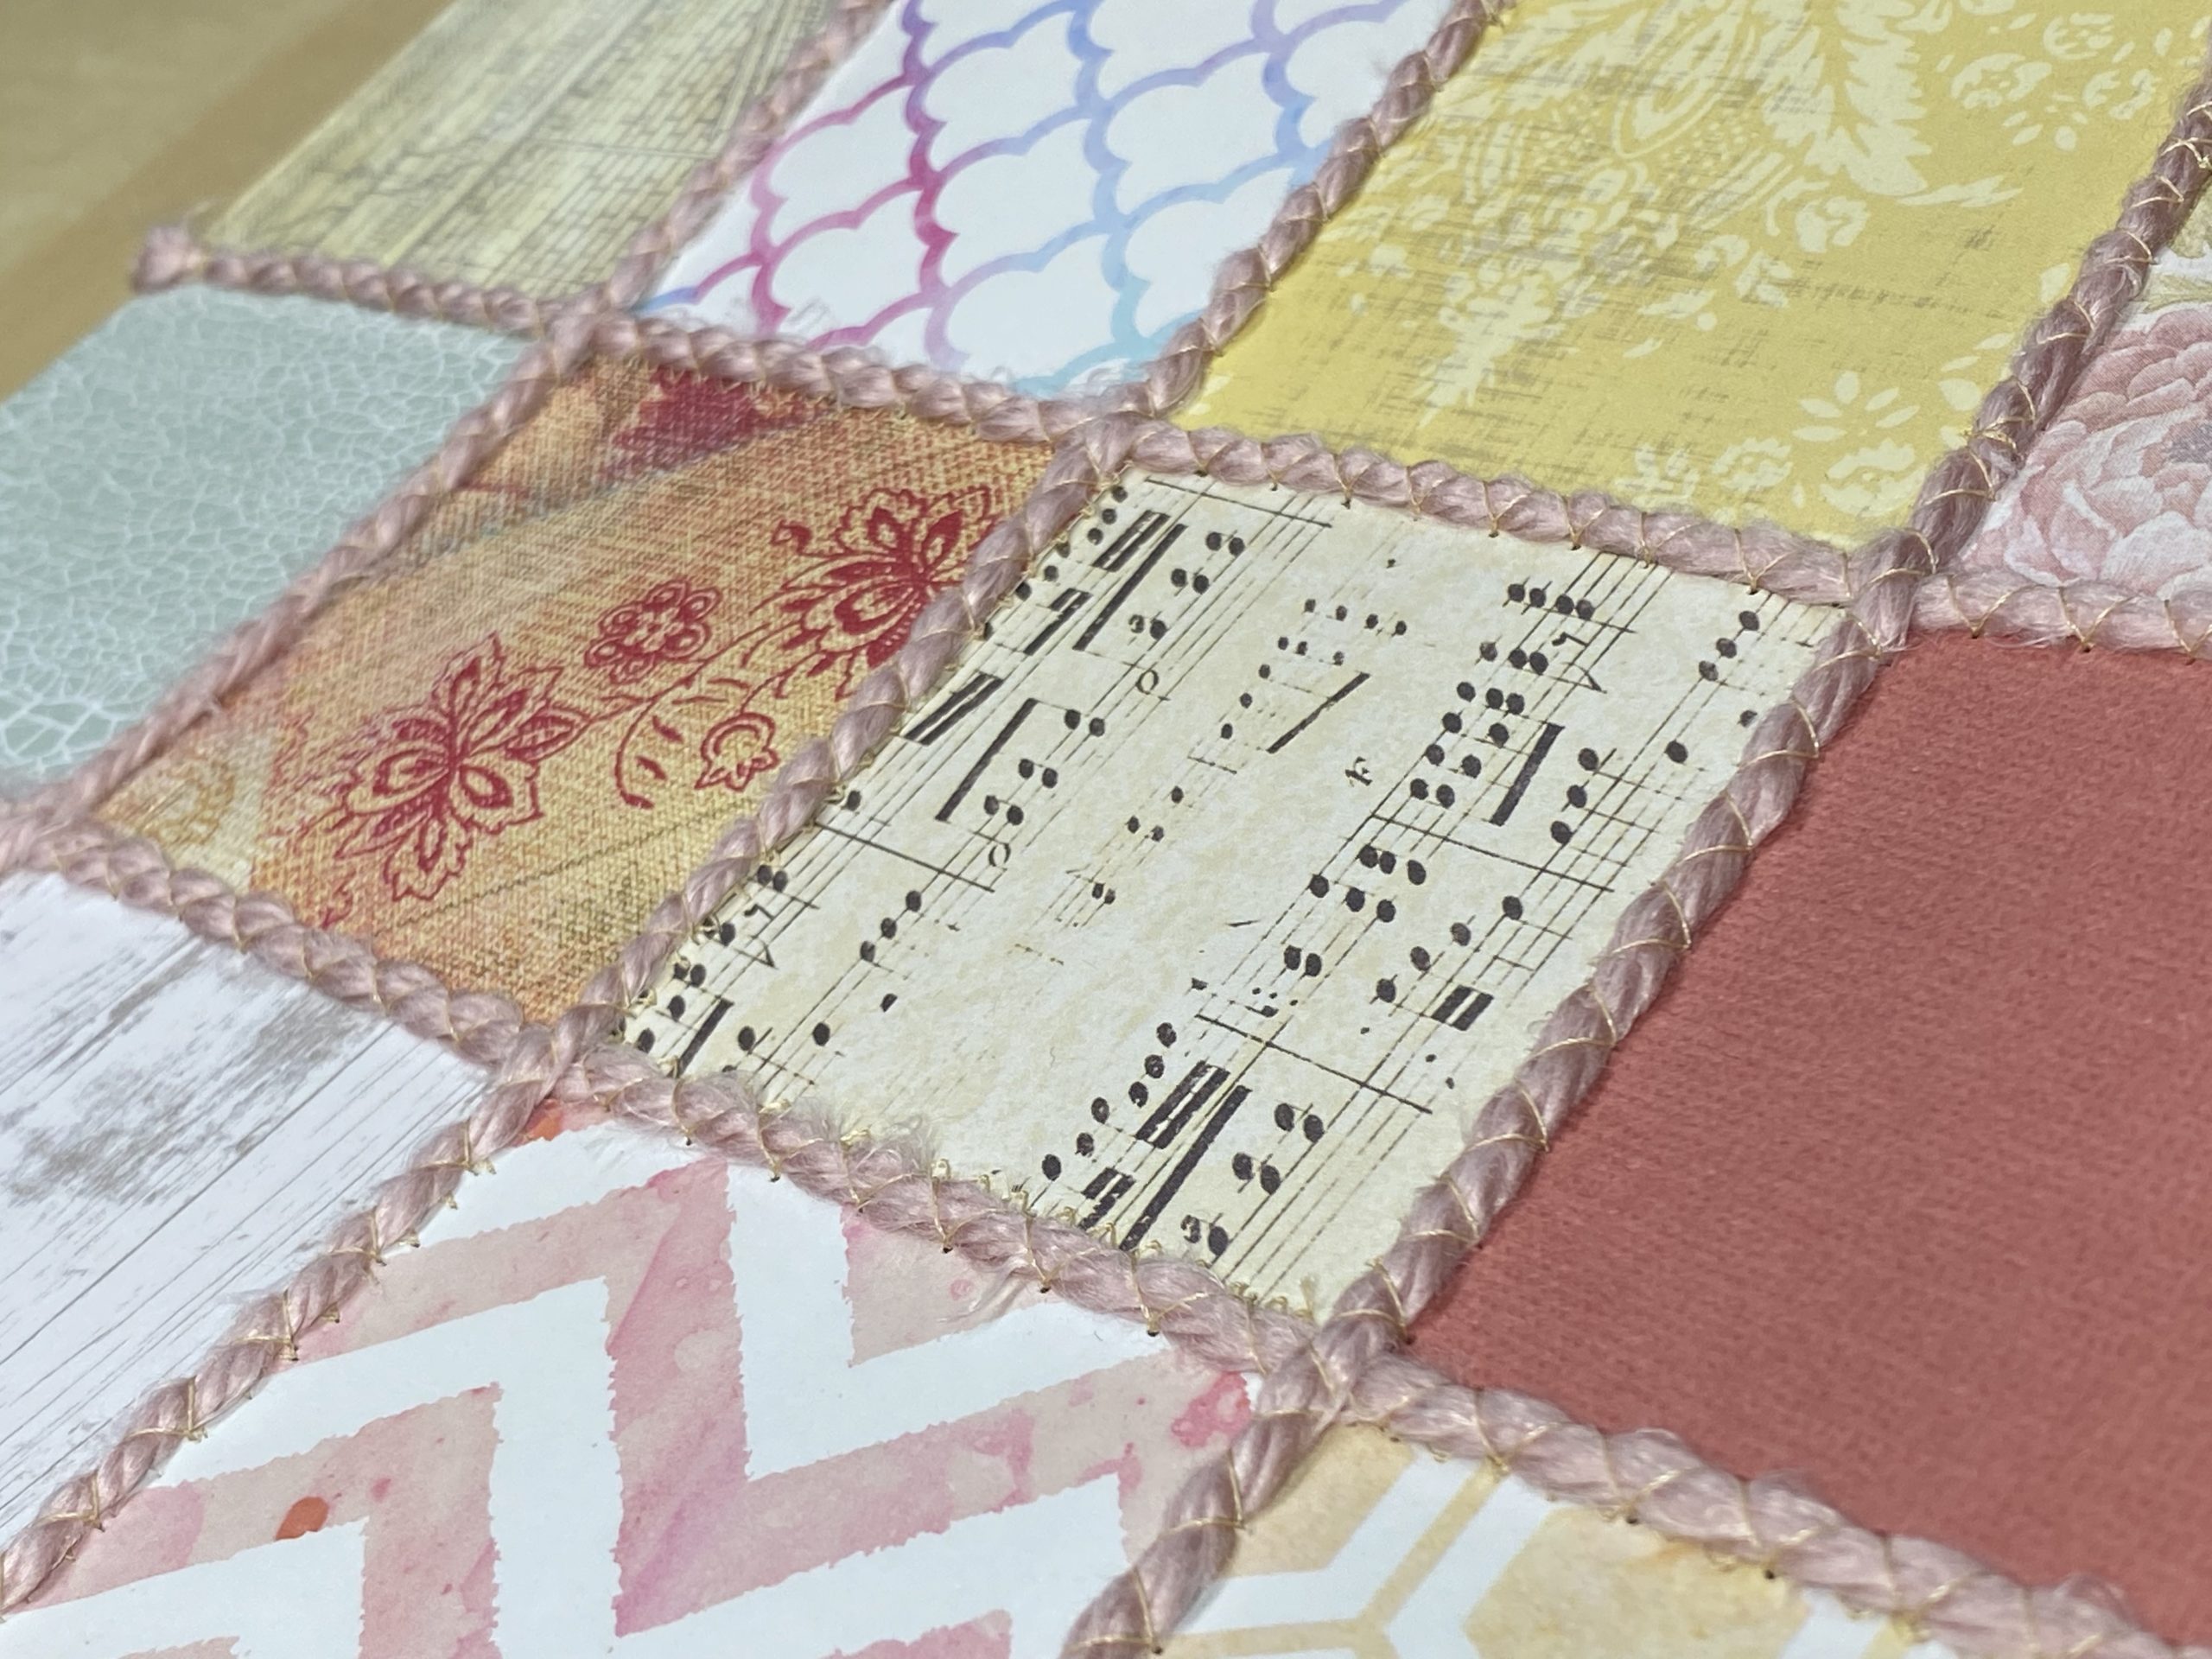
The photo below shows the quilt after couching over the seams.
Added Embellishments
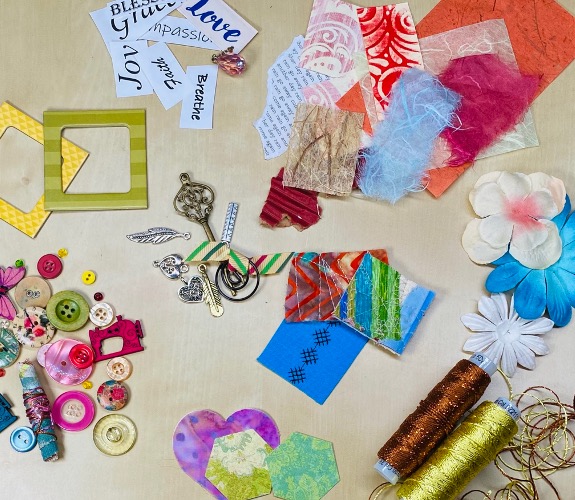
This is where it gets really fun! Gather some items that can be used to embellish the quilt and turn it into a work of art. Look for buttons, decorative papers, charms, fabric pieces, printed words, quotes, or phrases, paper or silk flowers, scrapbook elements, stickers, ribbons, lace, trim, and anything else that looks beautiful to you and/or makes you feel good. The photo below shows a few items that I rounded up so I could start designing the final look of the quilt. Start by placing a few embellishments on the quilt, auditioning and arranging them until you start seeing a plan. You may want to embellish each square or dress up a few selected ones, add decorative items on the seam lines or the intersections where the squares are joined. It’s all up to you to create your own unique paper quilt. As you stack things up and move them around, the quilt starts taking shape and coming to life.
Putting it All Together
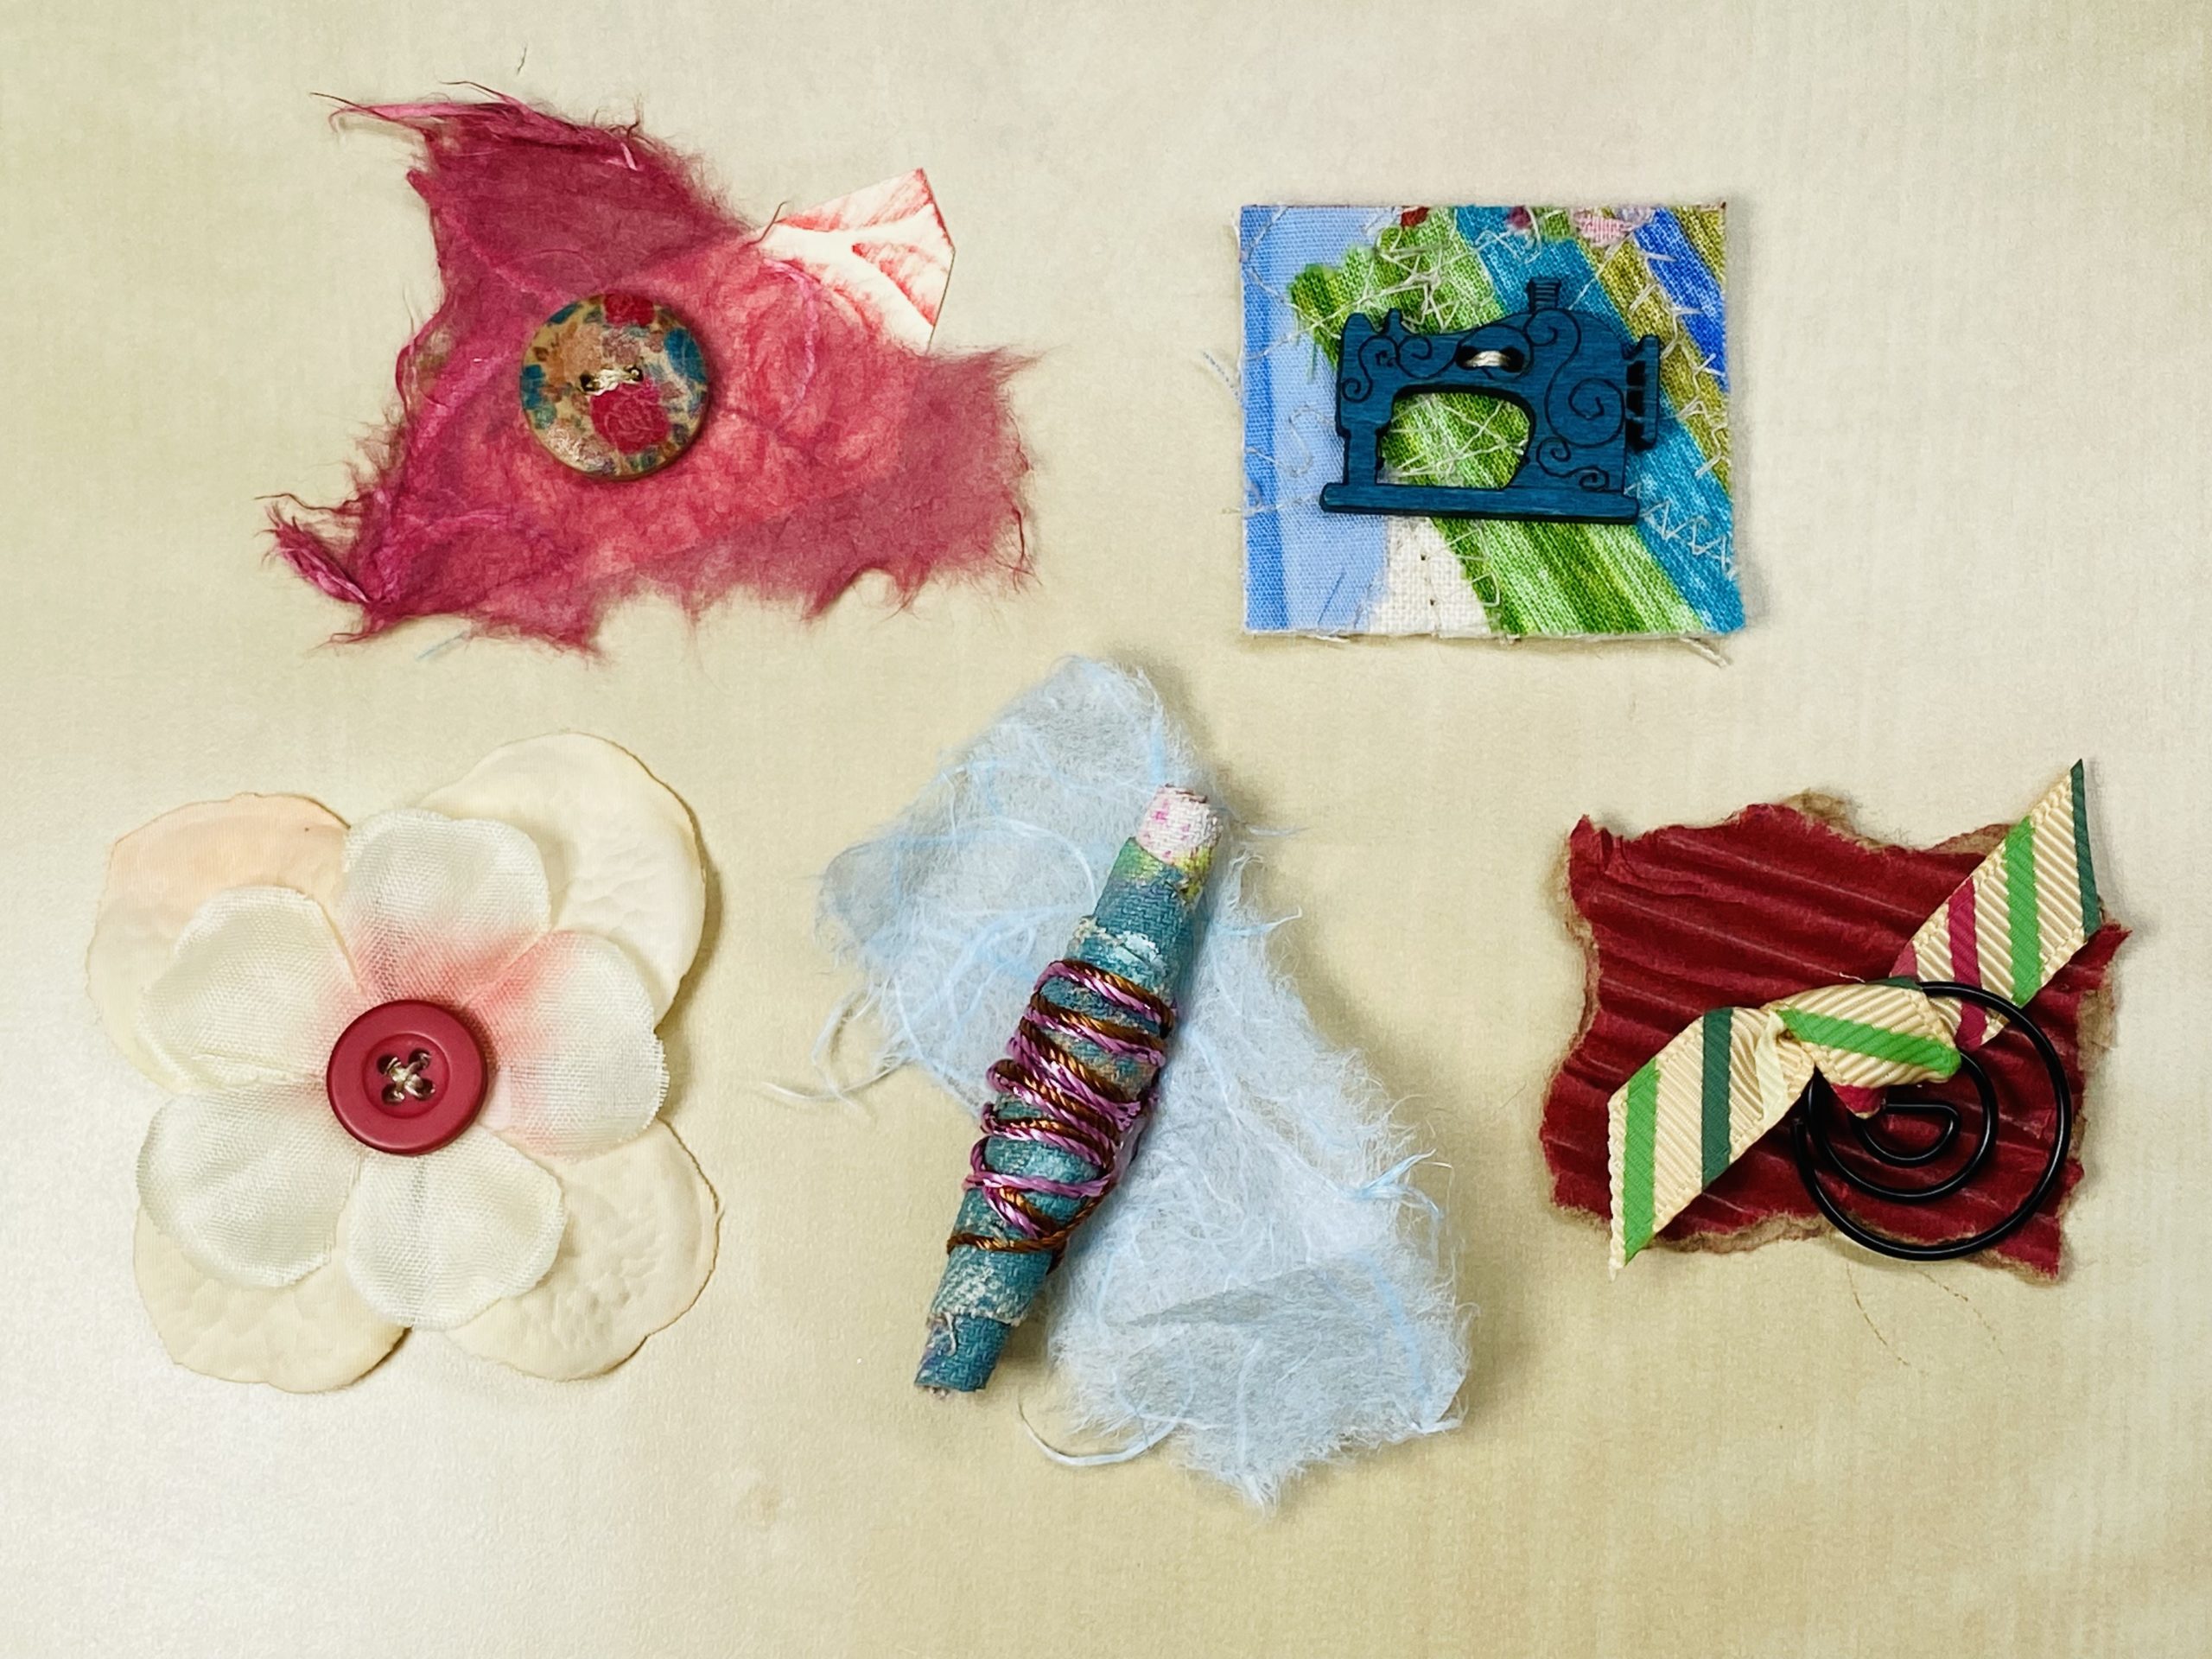
Once you think you have everything arranged, take another photo. You may change and rearrange items before you attach them but knowing where you started makes it easier to finish. Some of the embellishments are stitched to the quilt and others are glued. As much as possible, I like to make fragments before attaching them to the quilt. A fragment is where you stack 2 or 3 items (or more) and then stitch or glue them together. The buttons here are sewn through the layers to hold them together and then I glue the entire fragment to the quilt. If I have a button, trim, or fabric piece that goes directly on the quilt, I sew it to the quilt before putting the backing in place.
Backing/Finishing the Quilt
I stitch as much as I can to the quilt before adding the backing and finishing the edges, keeping the embellishments at least 1/2″ away from the outer edges.Then I place the quilt and the backing cardstock wrong sides together, using glue stick to hold them, again staying away from the outer edges (with the glue). Trim the edges of the backing even with the quilt. The edges are finished with the same yarn or cord that was used for the sashing. For this, I used an open embroidery foot (BERNINA #20) so I can see what the needle is doing. Starting in the middle of the lower edge, lightly twist 2 pieces of yarn together, place them on the edge of the quilt and zigzag over them, overlapping the end of the stitching with the beginning. 
Once you have the edges finished, complete the quilt by attaching the remaining embellishments in place using craft glue. And now you have your own, one-of-a-kind paper quilt!

If you haven’t already, check out my new course about presser feet. Click here, Courses & Classes, or at the top of this page for more information.
