
For many decades sewing machines have been powered by stepping on the foot pedal, also called a foot control. It connects to your machine with a cord and when you depress it with your foot (wearing shoes or not), the motor starts running. If you depress it all the way to the floor (pedal to the metal), your machine runs at full speed. If you want to regulate your speed and go slower, press it lightly. To stop, simply lift your foot and the machine stops instantly. Using a foot control is easy to learn and it doesn’t take long for a new sewer to master it.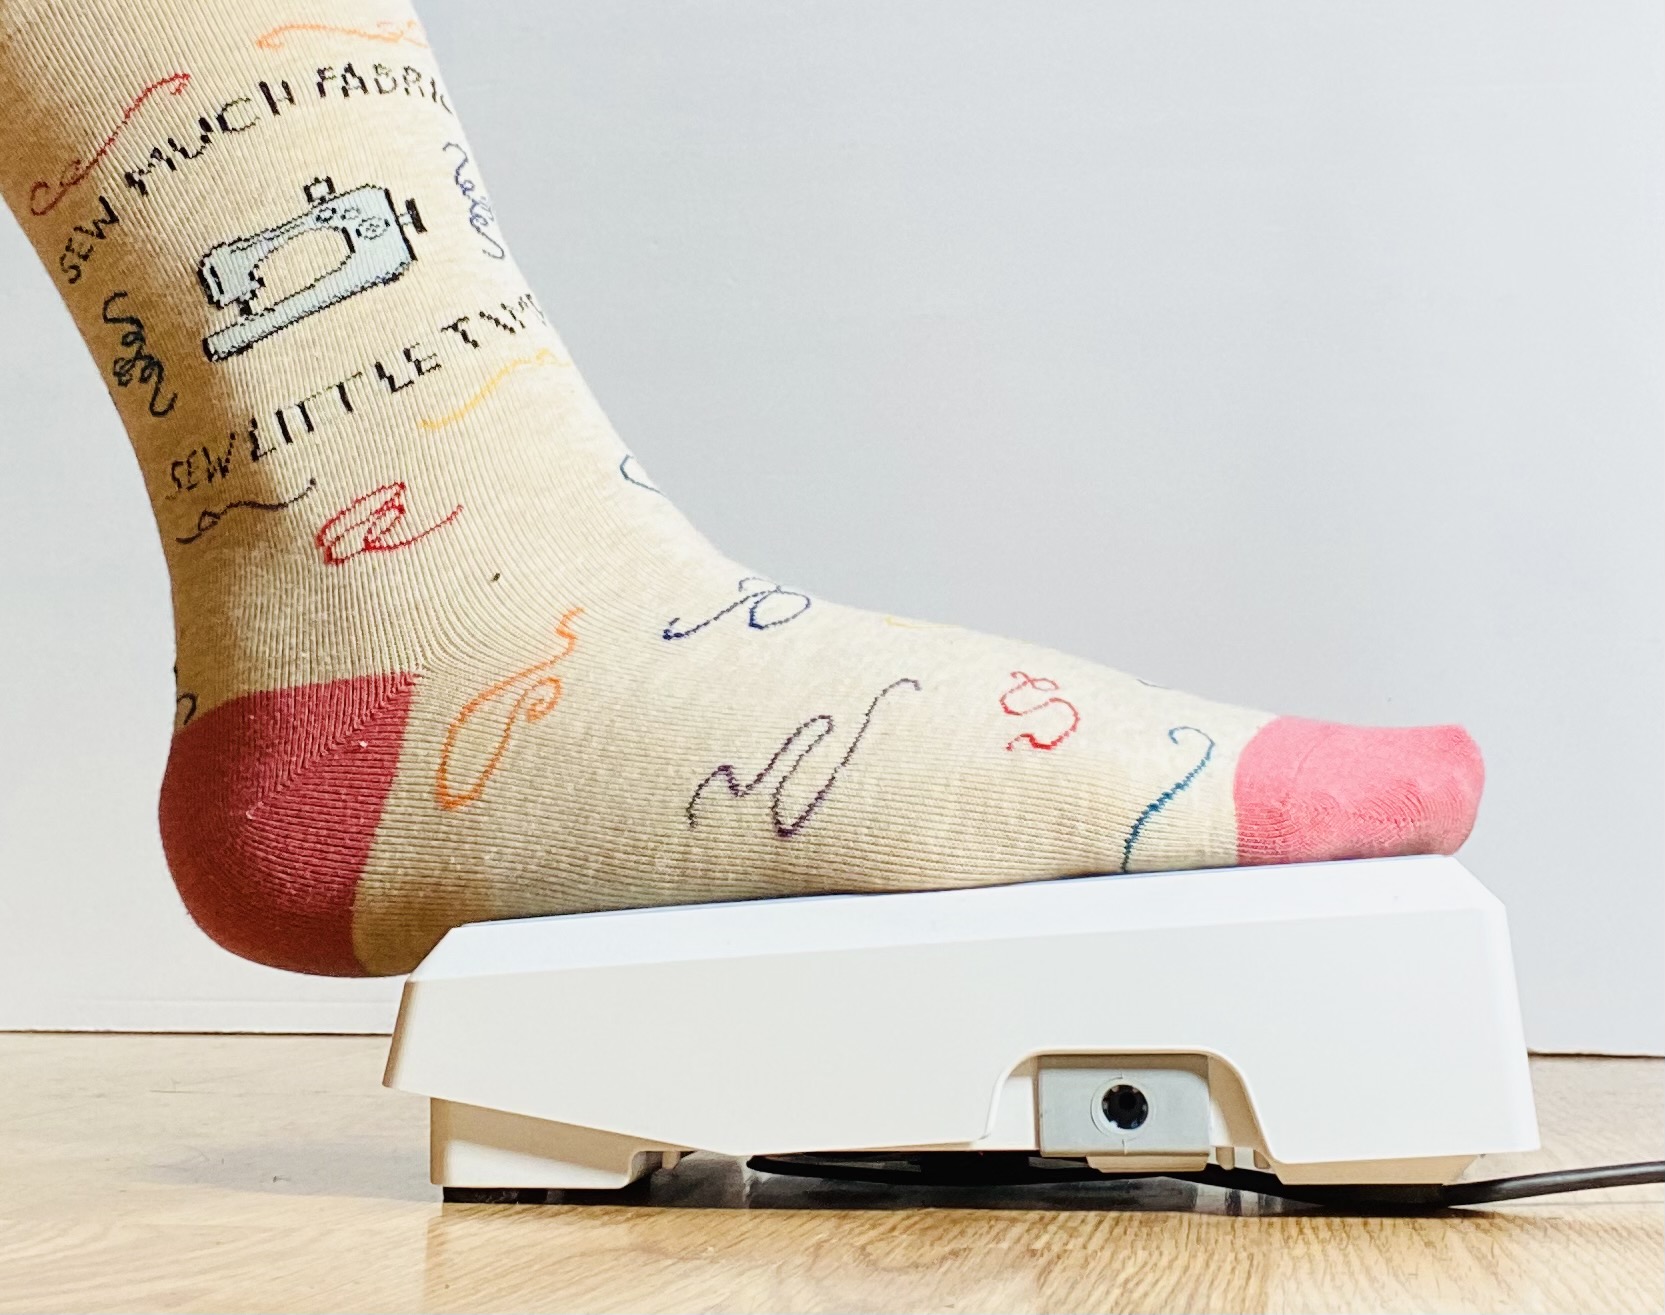
Push Button Control
Some machines now offer a second way to power your machine. They have an On/Off button, usually accompanied by a speed control setting. I sew on a BERNINA 790 PLUS and the Start/Stop button is above the needle area. The Speed Control slide is directly above the button so both are easy to access. Even so, when I first used a machine with this modern function, I had no idea WHY you would want to use it. Starting the machine was easy – I just pushed the button. But the problem came when I reached the end of the seam. With the foot control, I just lifted my foot to stop the machine. It was second nature to do this, and I did it without even having to think about it. With the push button, I had to be alert so I could anticipate when the end of the seam was coming and push the button at just the right time to stop the machine. This was not easy and I panicked every time I needed to stop, so I decided this function was not for me and I thought I would never use it. 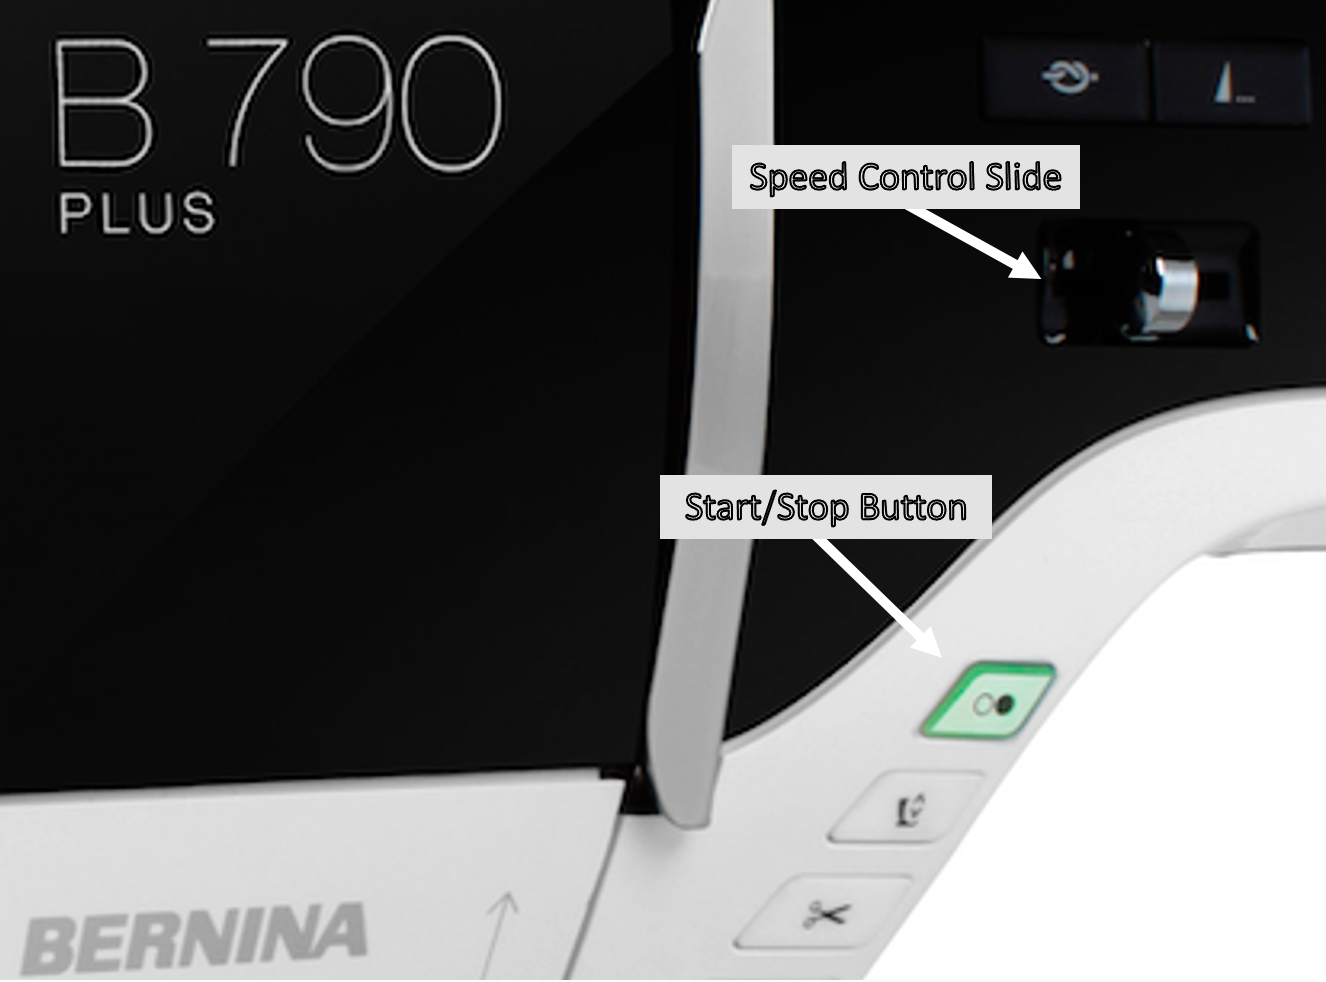
Automatic Stitching
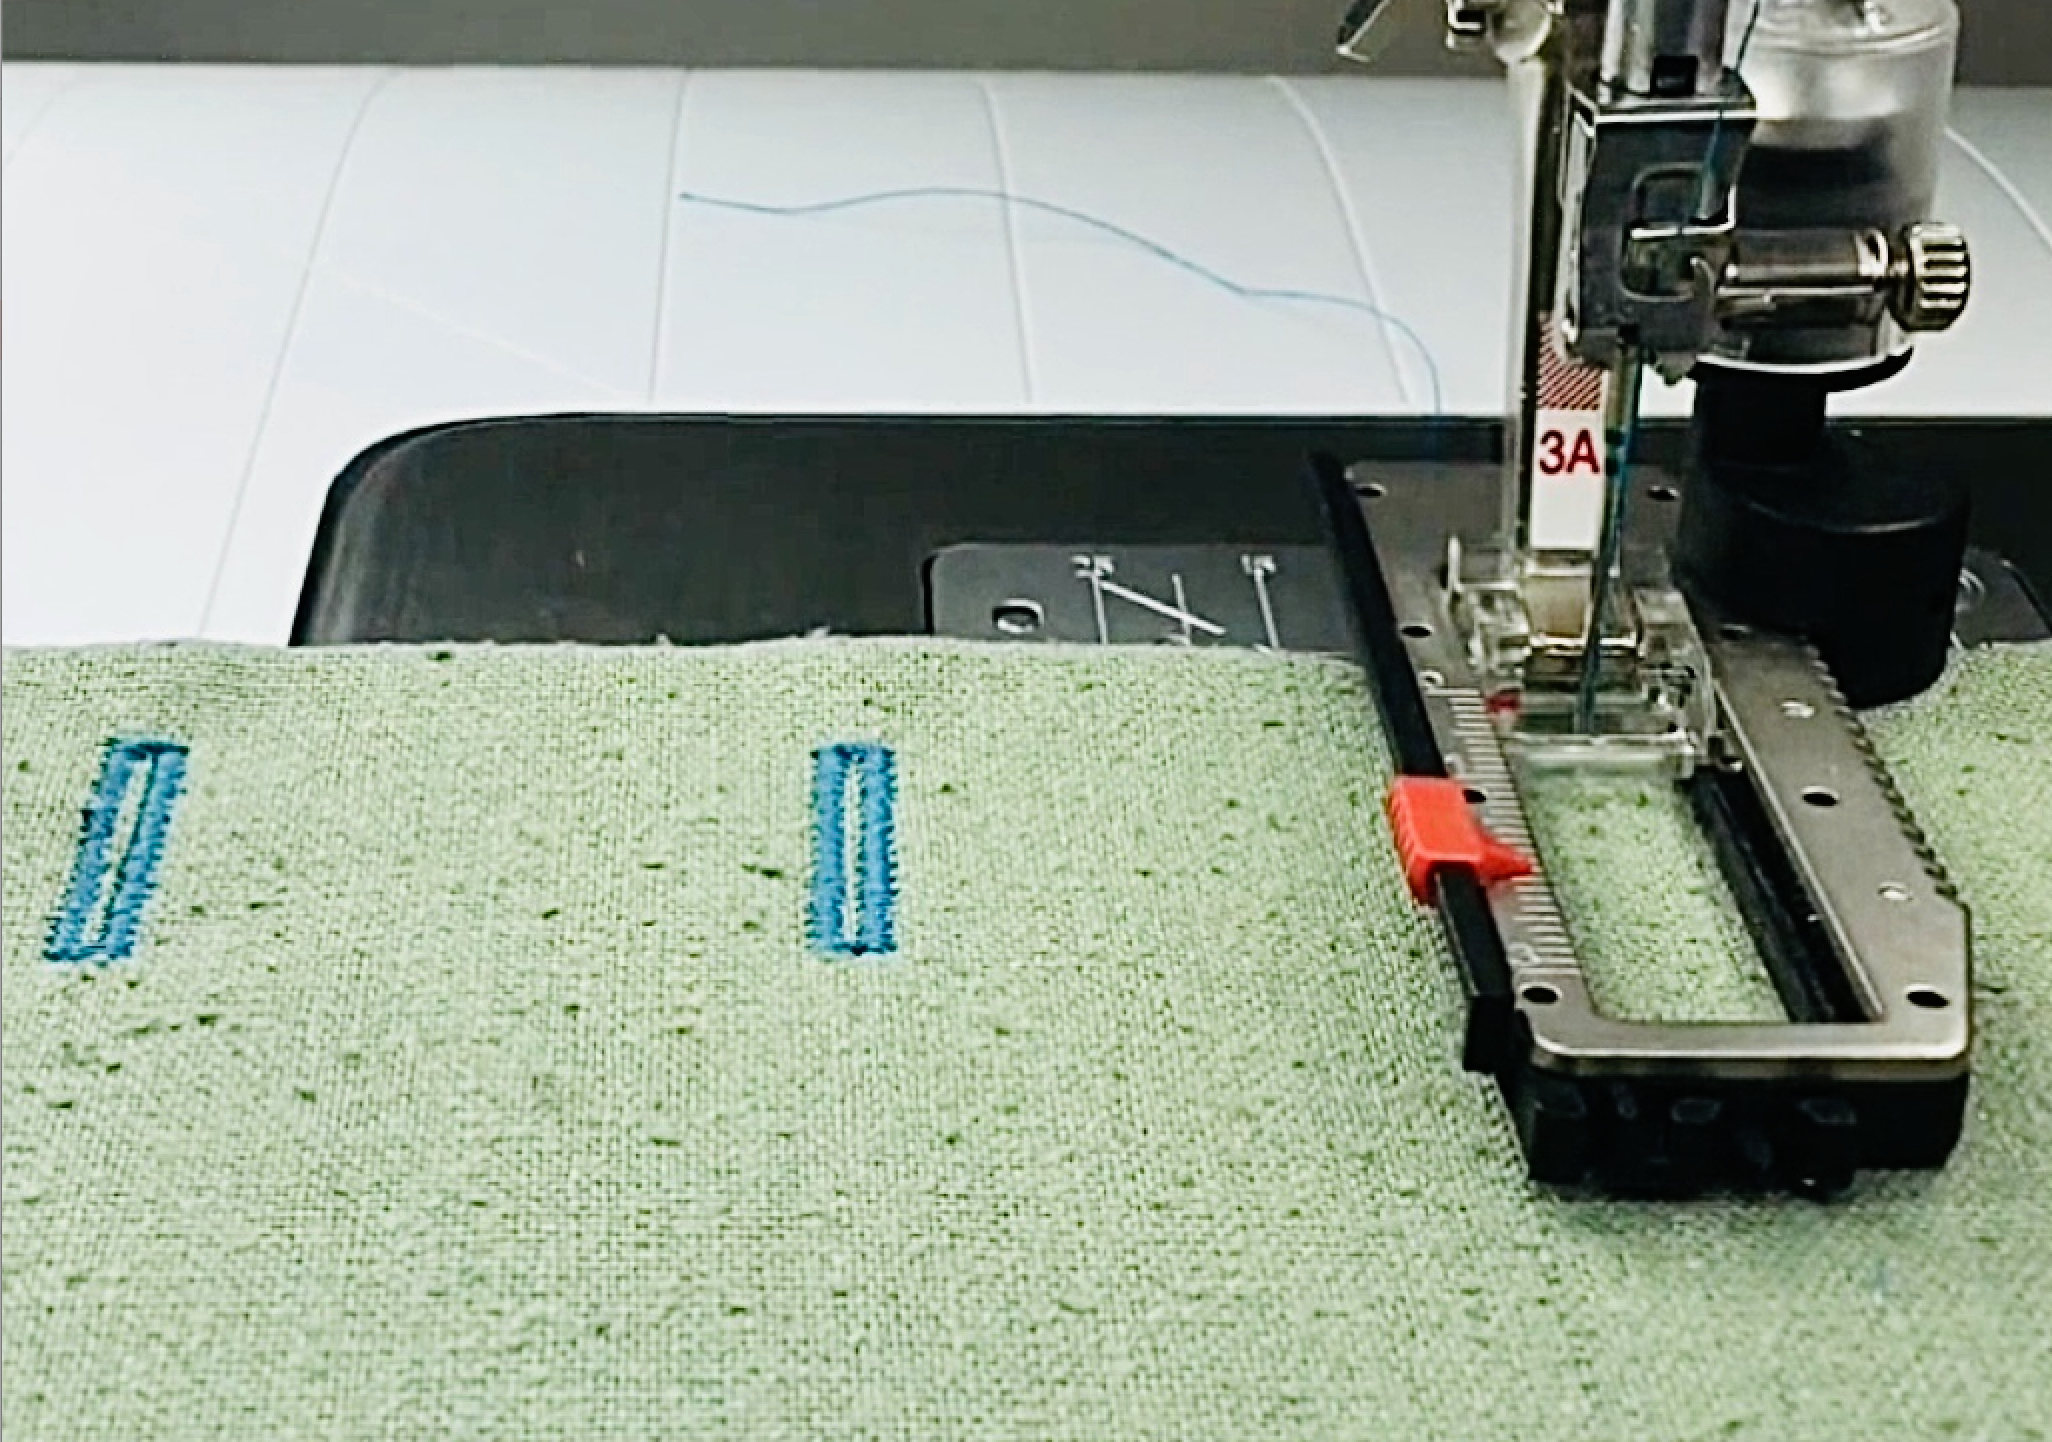
However, I was sewing buttonholes one day, and it occurred to me that when I was making automatic duplicate buttonholes, the Start/Stop button would be the perfect way to power the machine. This is because after making the first buttonhole with Automatic Buttonhole Foot #3A, the machine sews the rest. All you do is position the fabric under the foot, push the button to start the machine, and then let it sew until it automatically stops. When using the foot control for this, you must hold it down without interrupting the cycle, until the machine finishes the buttonhole, and then stops. Using the Start/Stop button means you don’t have to think about that – the machine takes care of it. It’s a small advance in efficiency, but it really is easier.
More Automatic Stitching
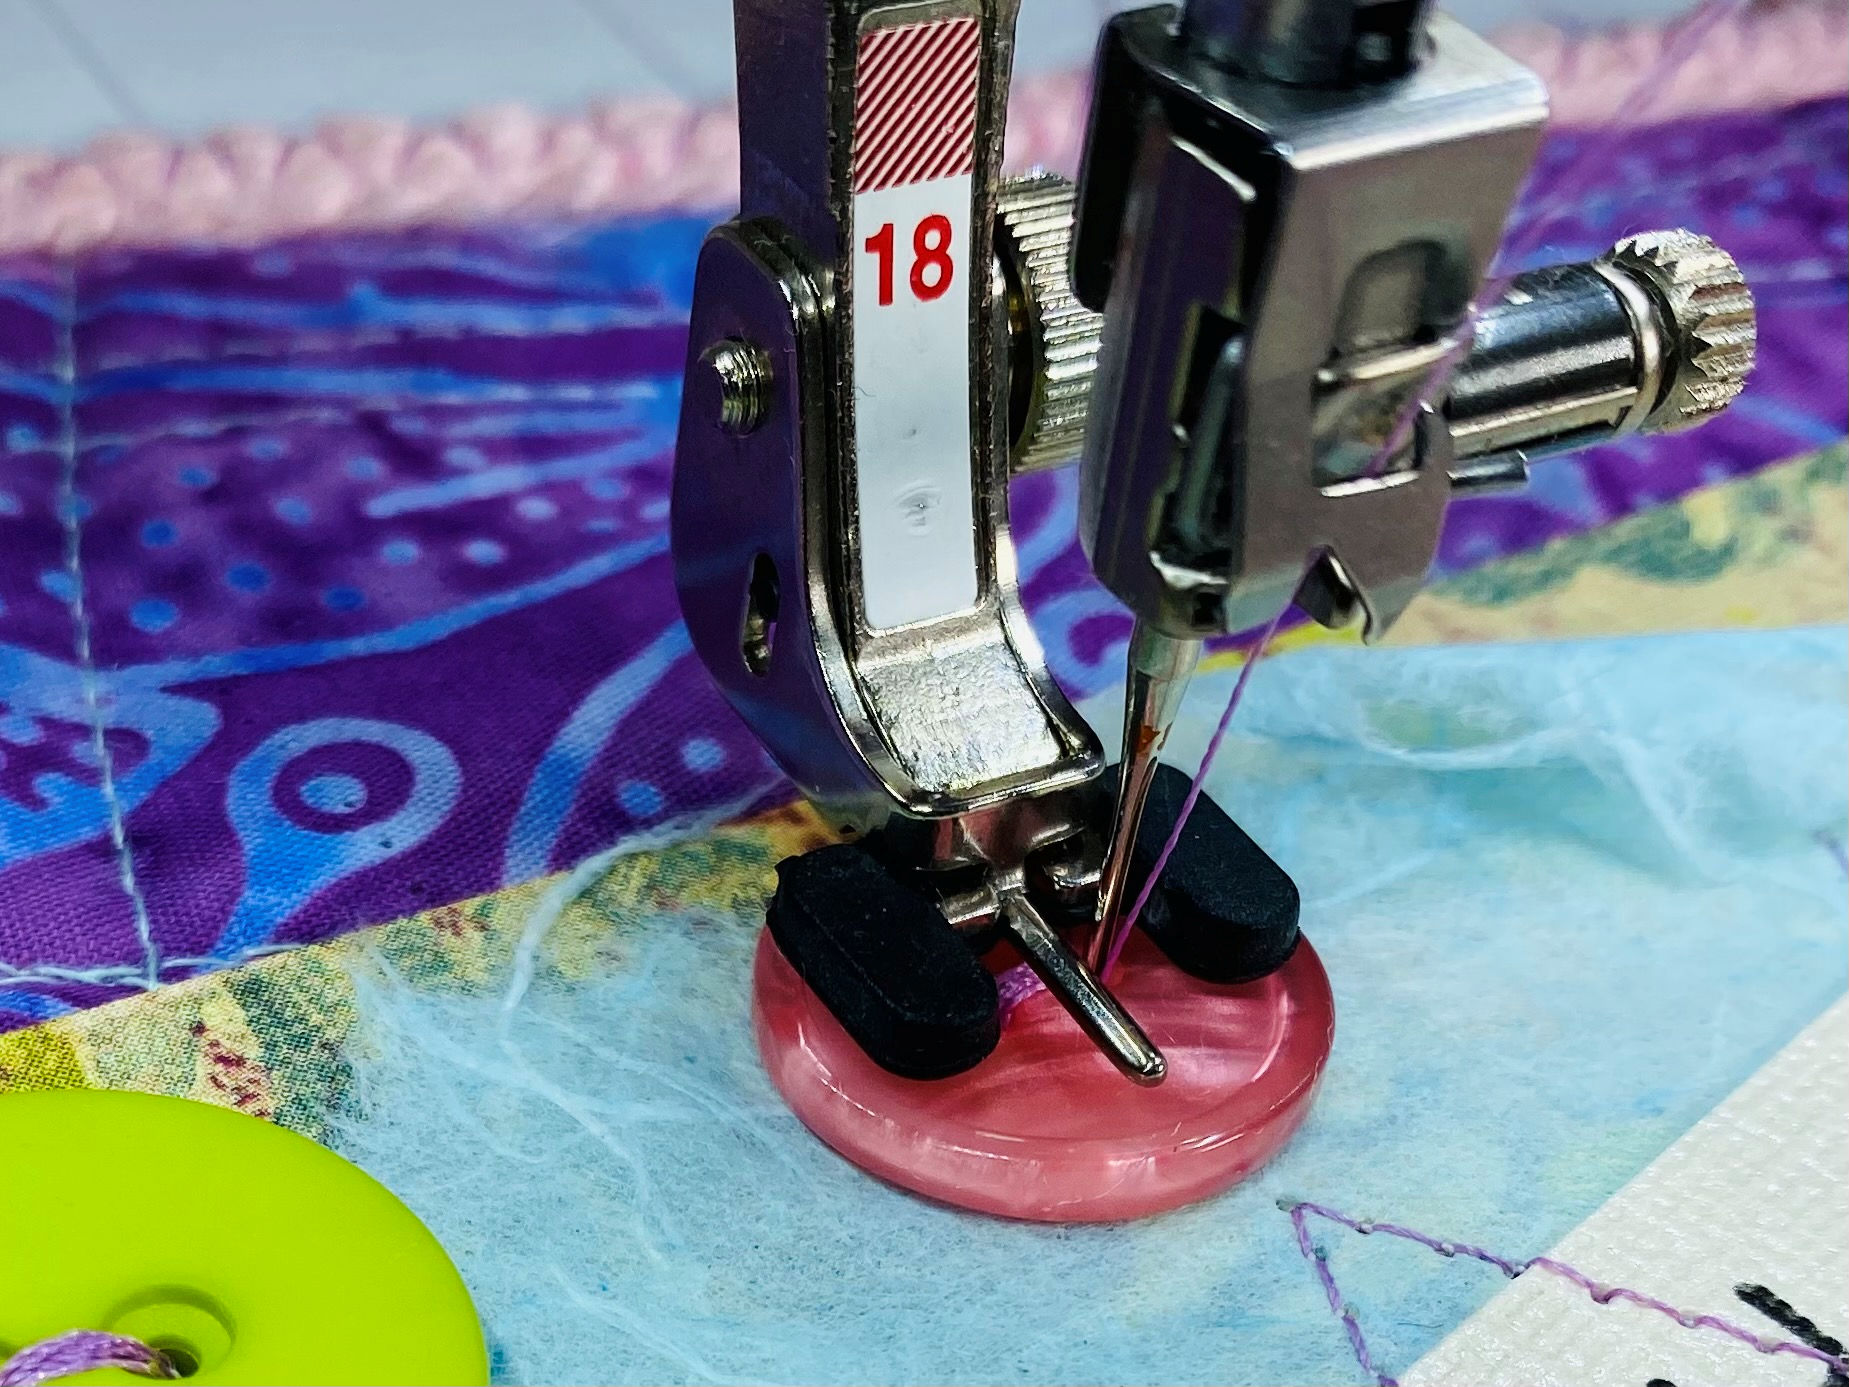
From there, I started using the Start/Stop Button when sewing on buttons. It’s another programmed stitch that stops automatically when the stitching is complete so it’s another place to be a little more efficient.
Freedom Stitching
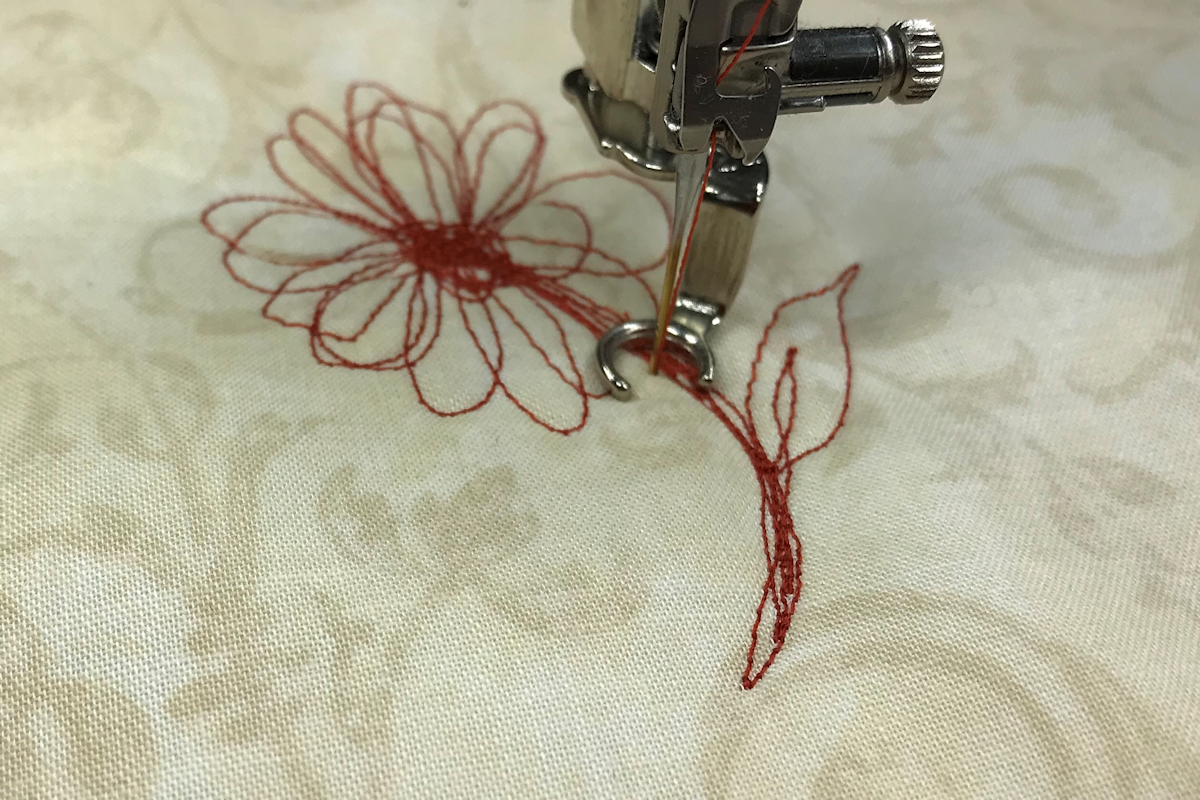
The third place I love to use the Start/Stop button is for free-motion stitching. Running the motor without using the foot pedal gives me one less thing to think about as I move the fabric under the needle.
Try It – You’ll Like It!
The more I used the Start/Stop function, the more I grew to love it. I now use it for almost all of my sewing and rarely use the foot control. I never panic when it’s time to stop because, just like most things, the more you use it, the more familiar it is, making you more comfortable with it. Using the Start/Stop button not only seems more efficient, but it also feels freer to let the machine run without having to control it with my foot. If you have this option, I encourage you to try it a few times and see what you think. When you do, please leave a comment, and let me know how it goes. 
If you haven’t already, check out my new course about presser feet. Click on the tab, Courses & Classes, at the top of this page for more information.
